Your loyalty program is an extension of your brand. When customers see your colors, logos, and domain, it:
Boosts Trust — Familiar branding reassures customers they’re in the right place.
Increases Engagement — A seamless experience keeps focus on your offers, not ours.
Drives Conversions — Consistent visuals reduce friction, helping users complete actions faster.
What you’ll do: Link your own domain; upload logos, favicons, and hero images; pick your color palette; set meta tags; and tweak on‐card text.
Why it matters: Keeps customers in your brand environment, builds trust, and removes distractions.
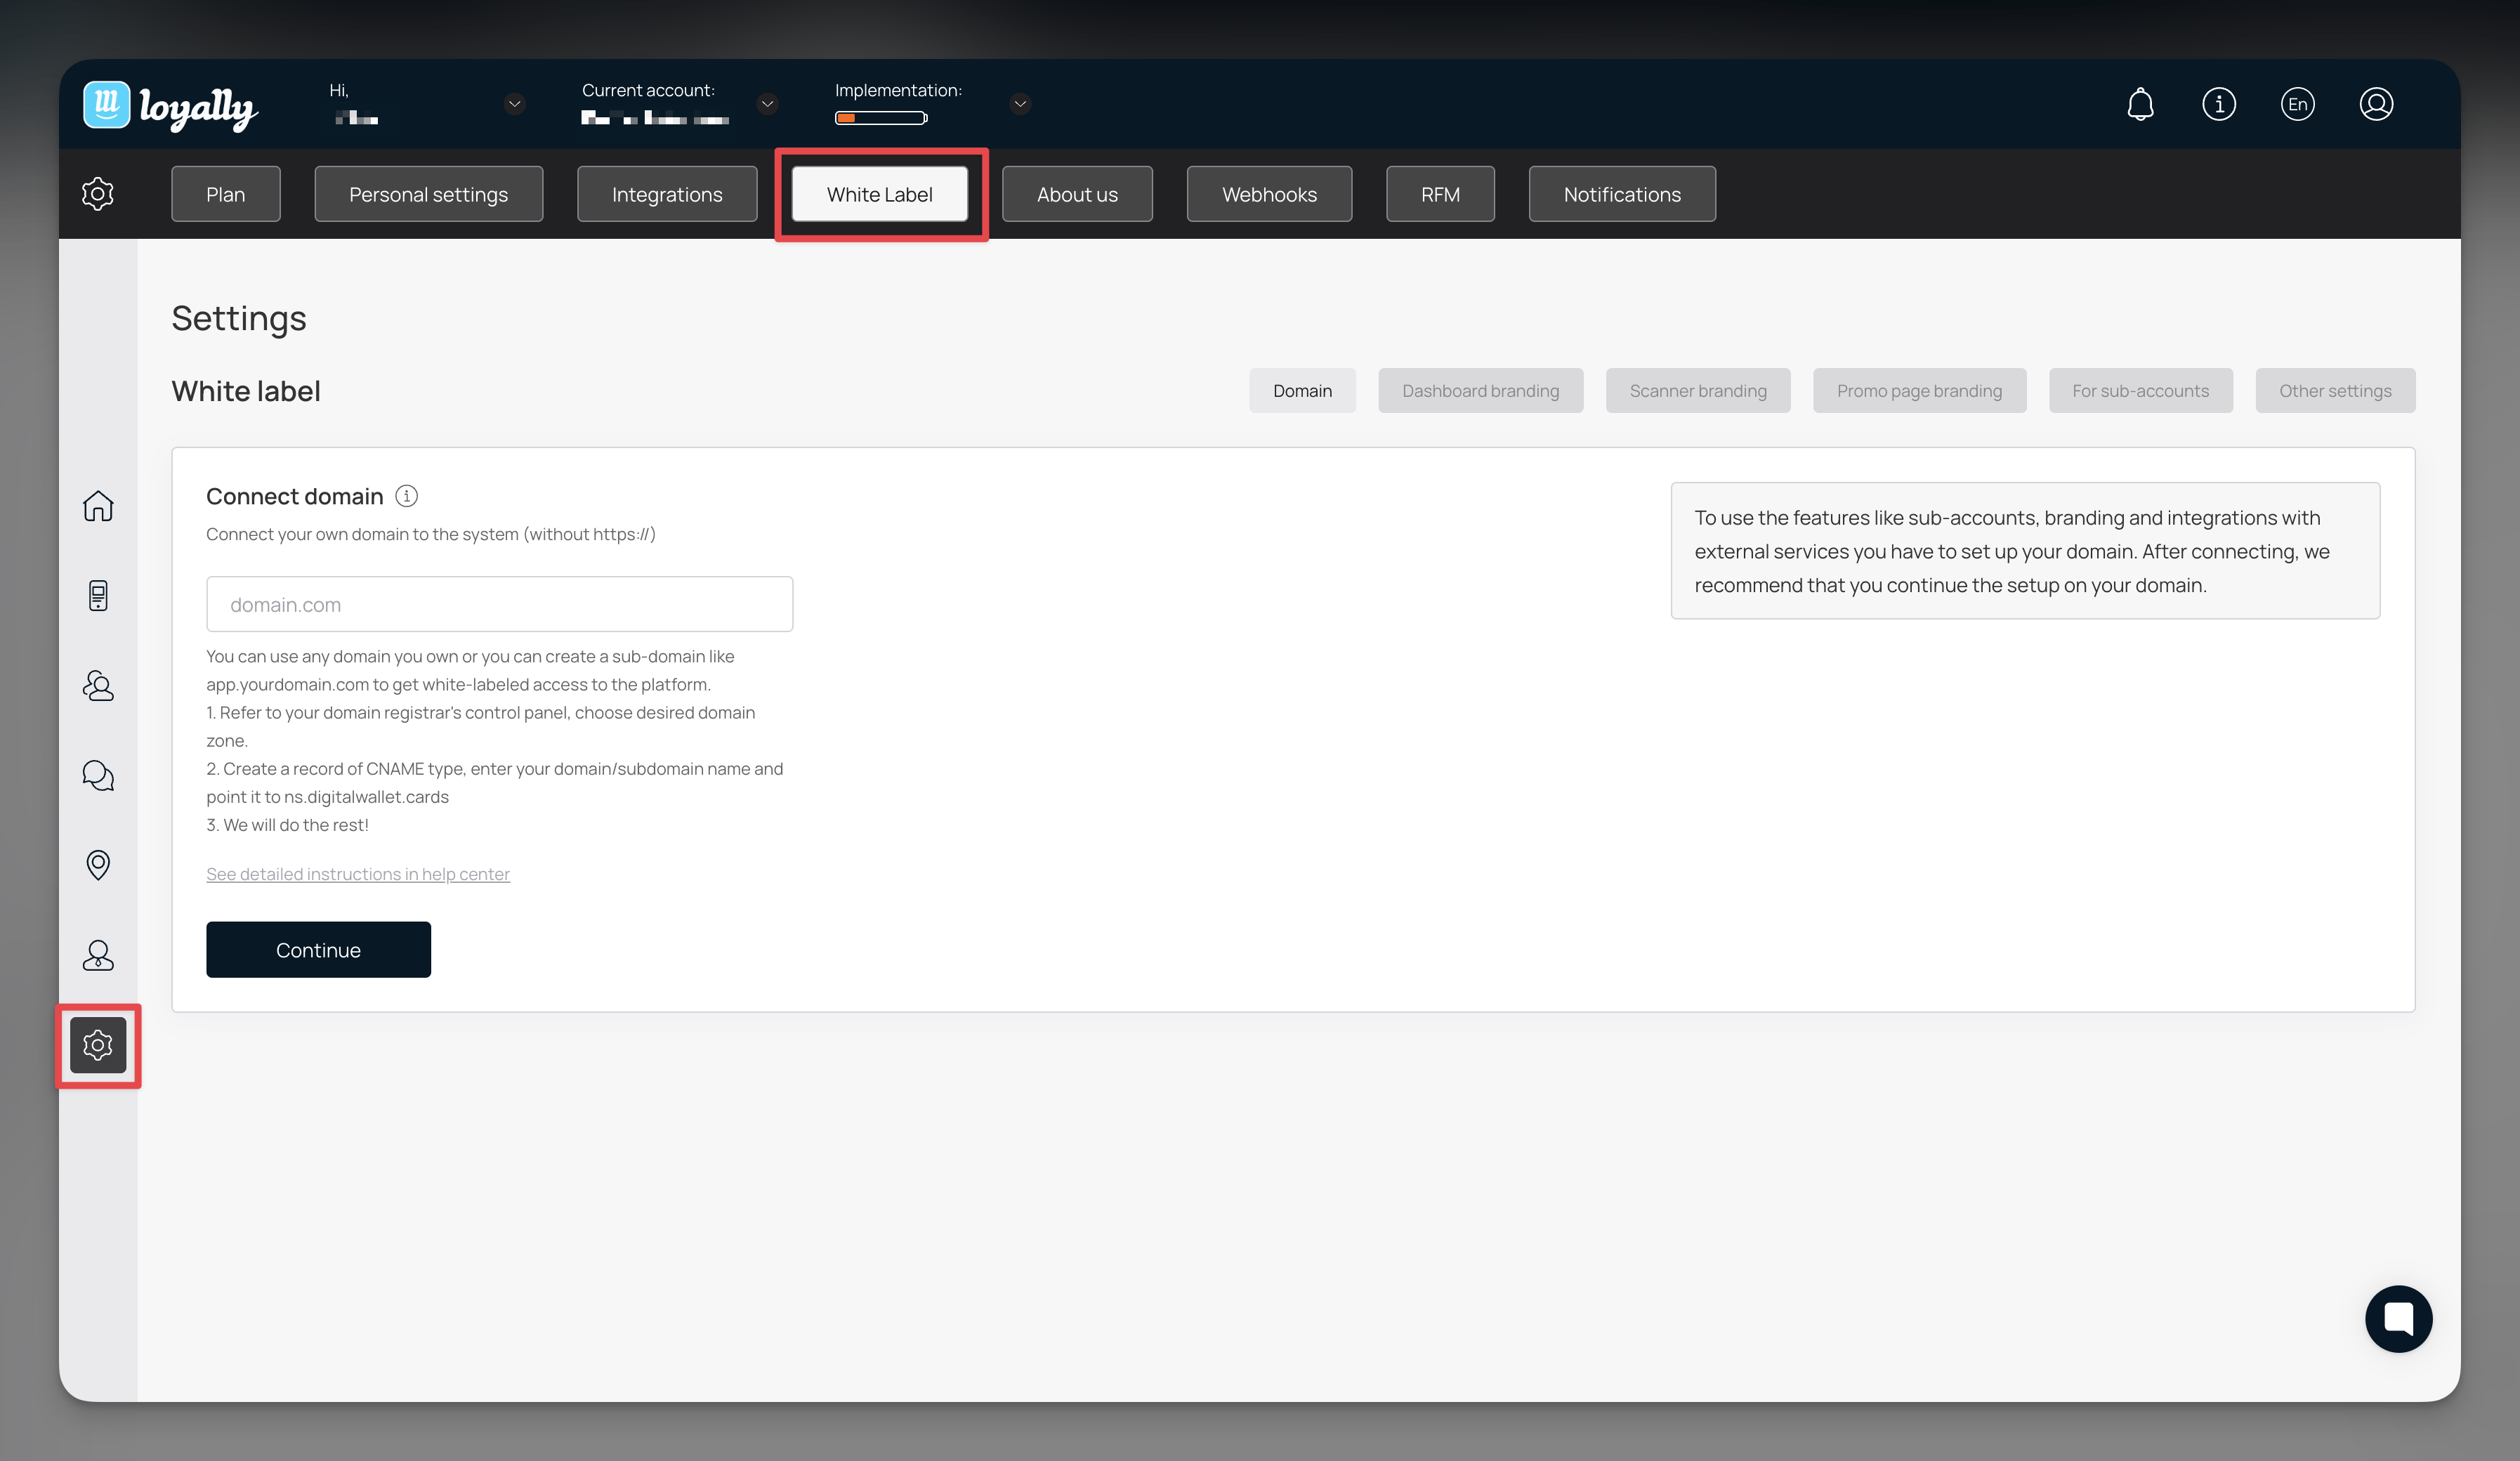
Settings > White Label
Link Domain
Upload Logos & Favicons
Add Login/Signup Images
Pick Colors & Save
Configure Meta Tags
(Optional) Customize Card Text & Scanner App
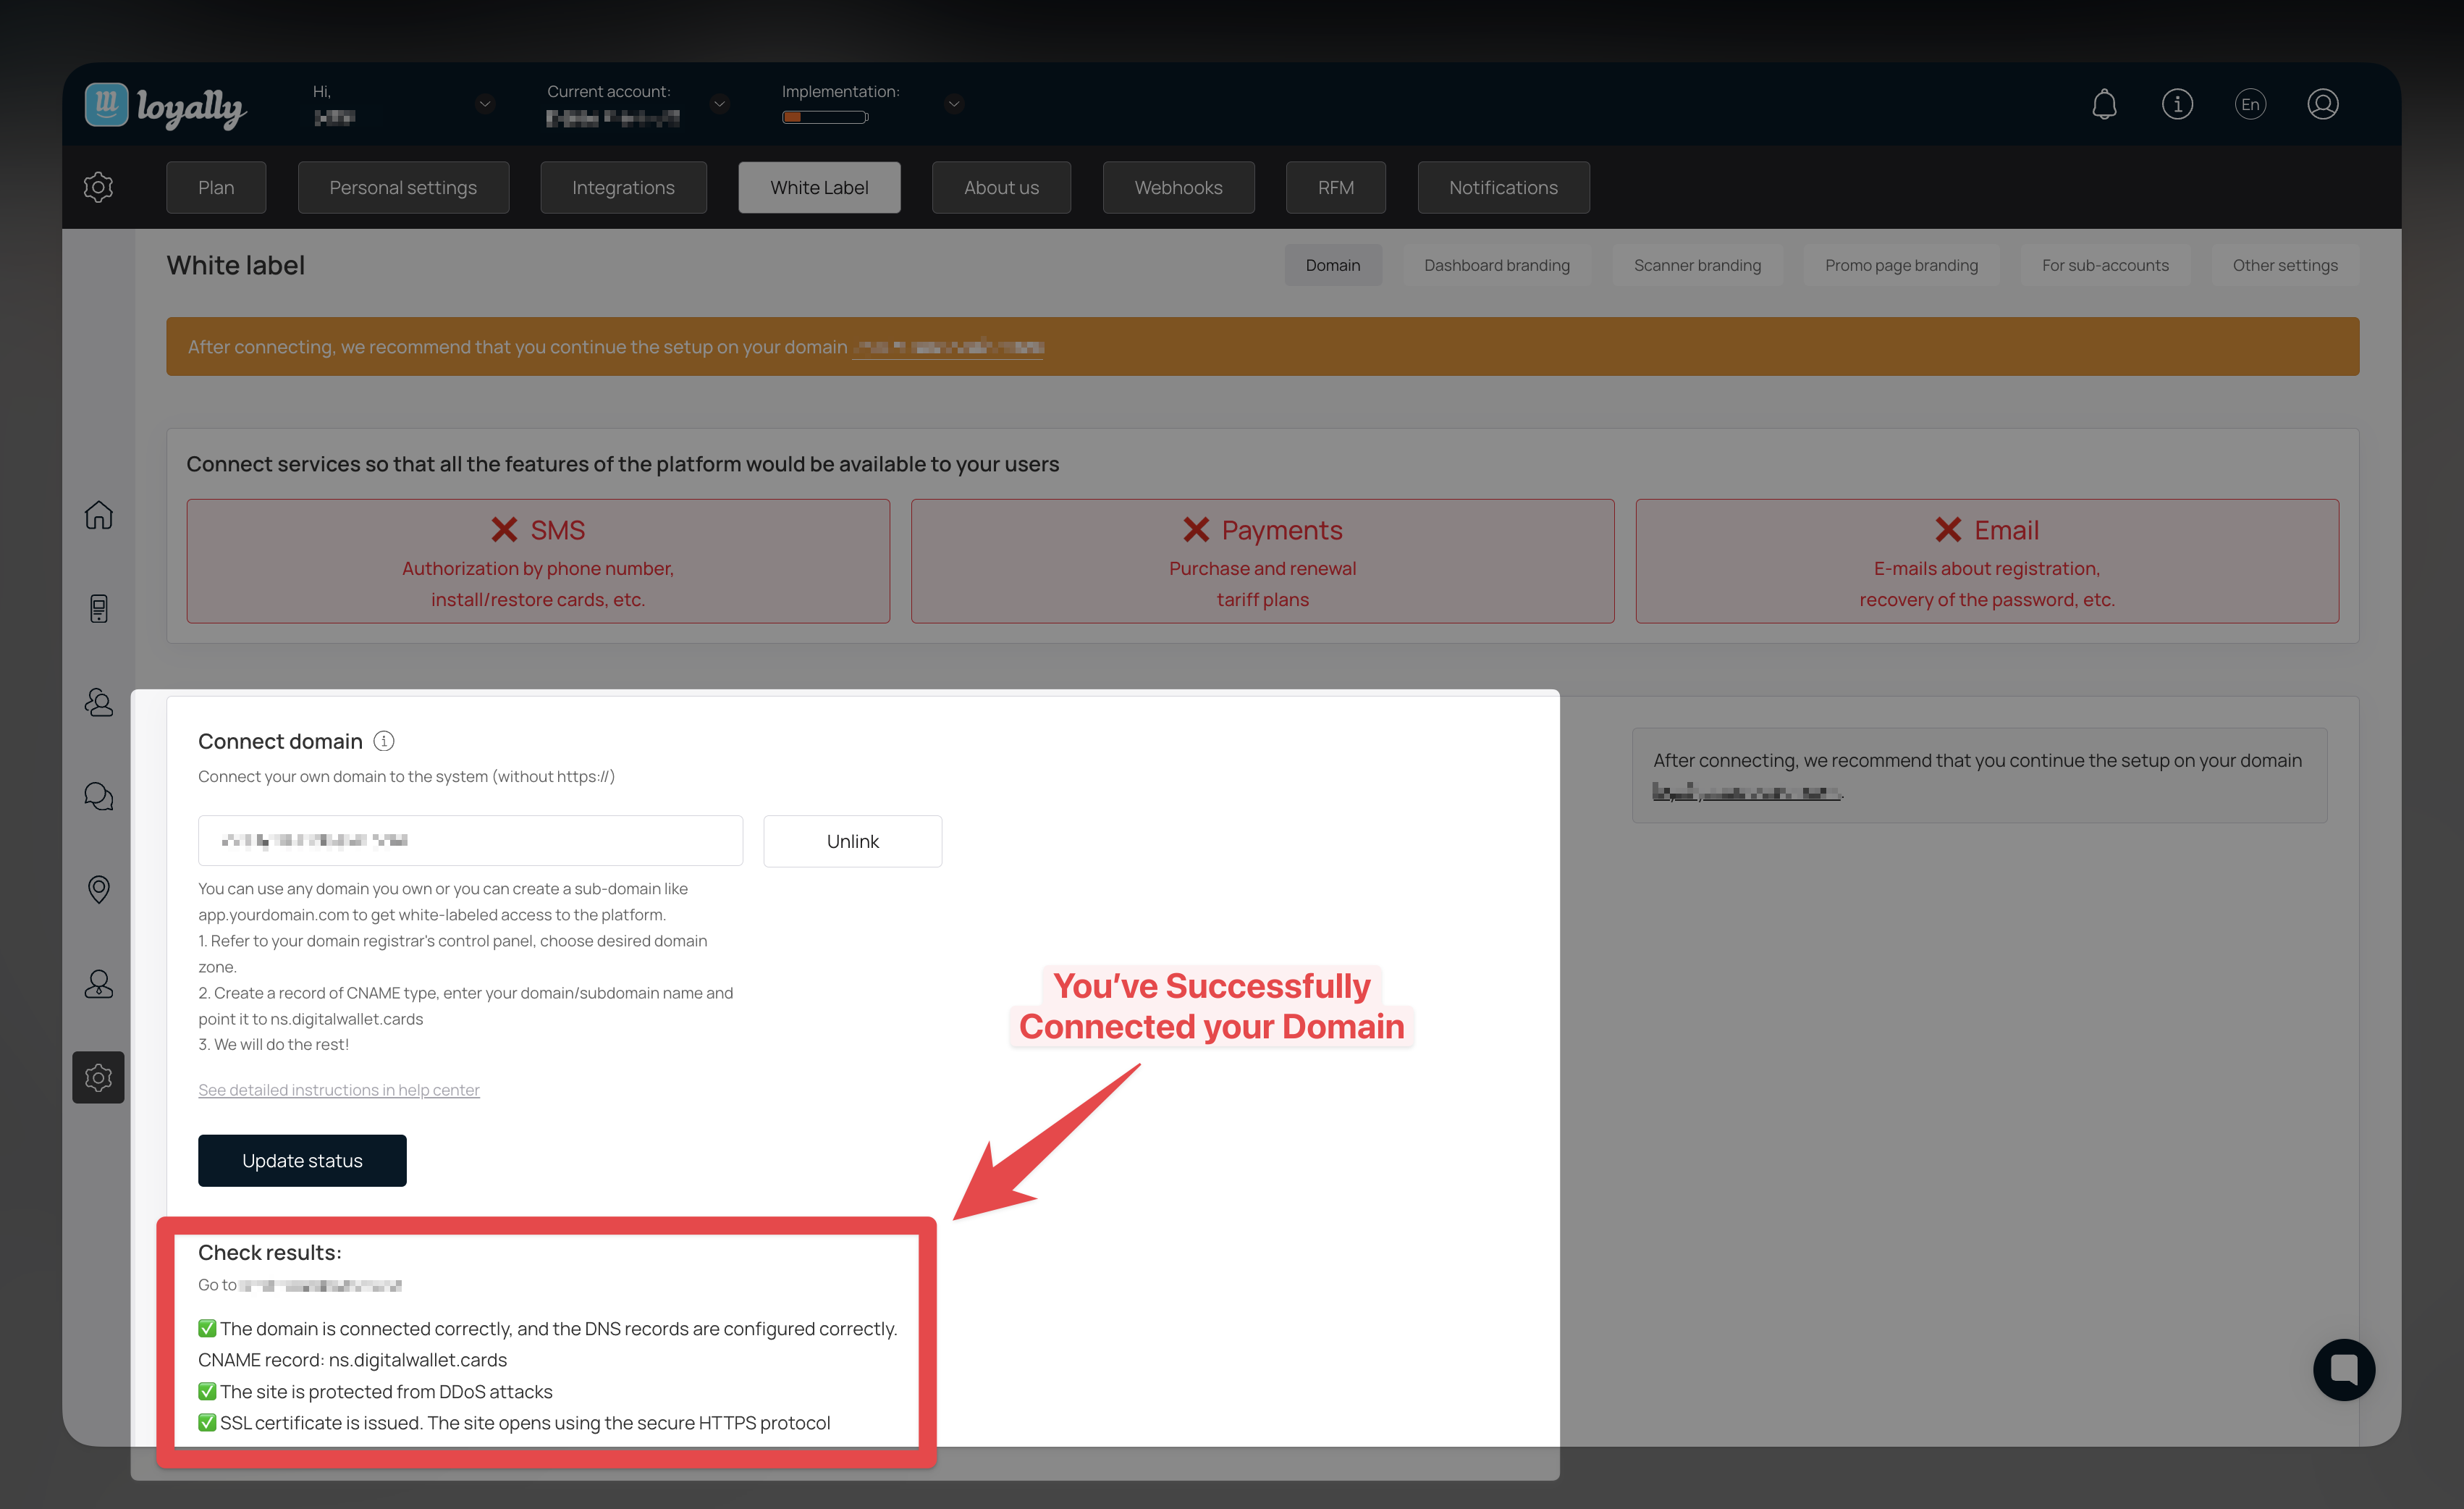
You can use any domain you own—or create a subdomain (e.g. app.yourdomain.com)—to get a fully white-labeled portal.
In your Loyally.ai dashboard, go to Settings > White Label.
Under Connect Domain, enter the domain or subdomain you’d like to use.
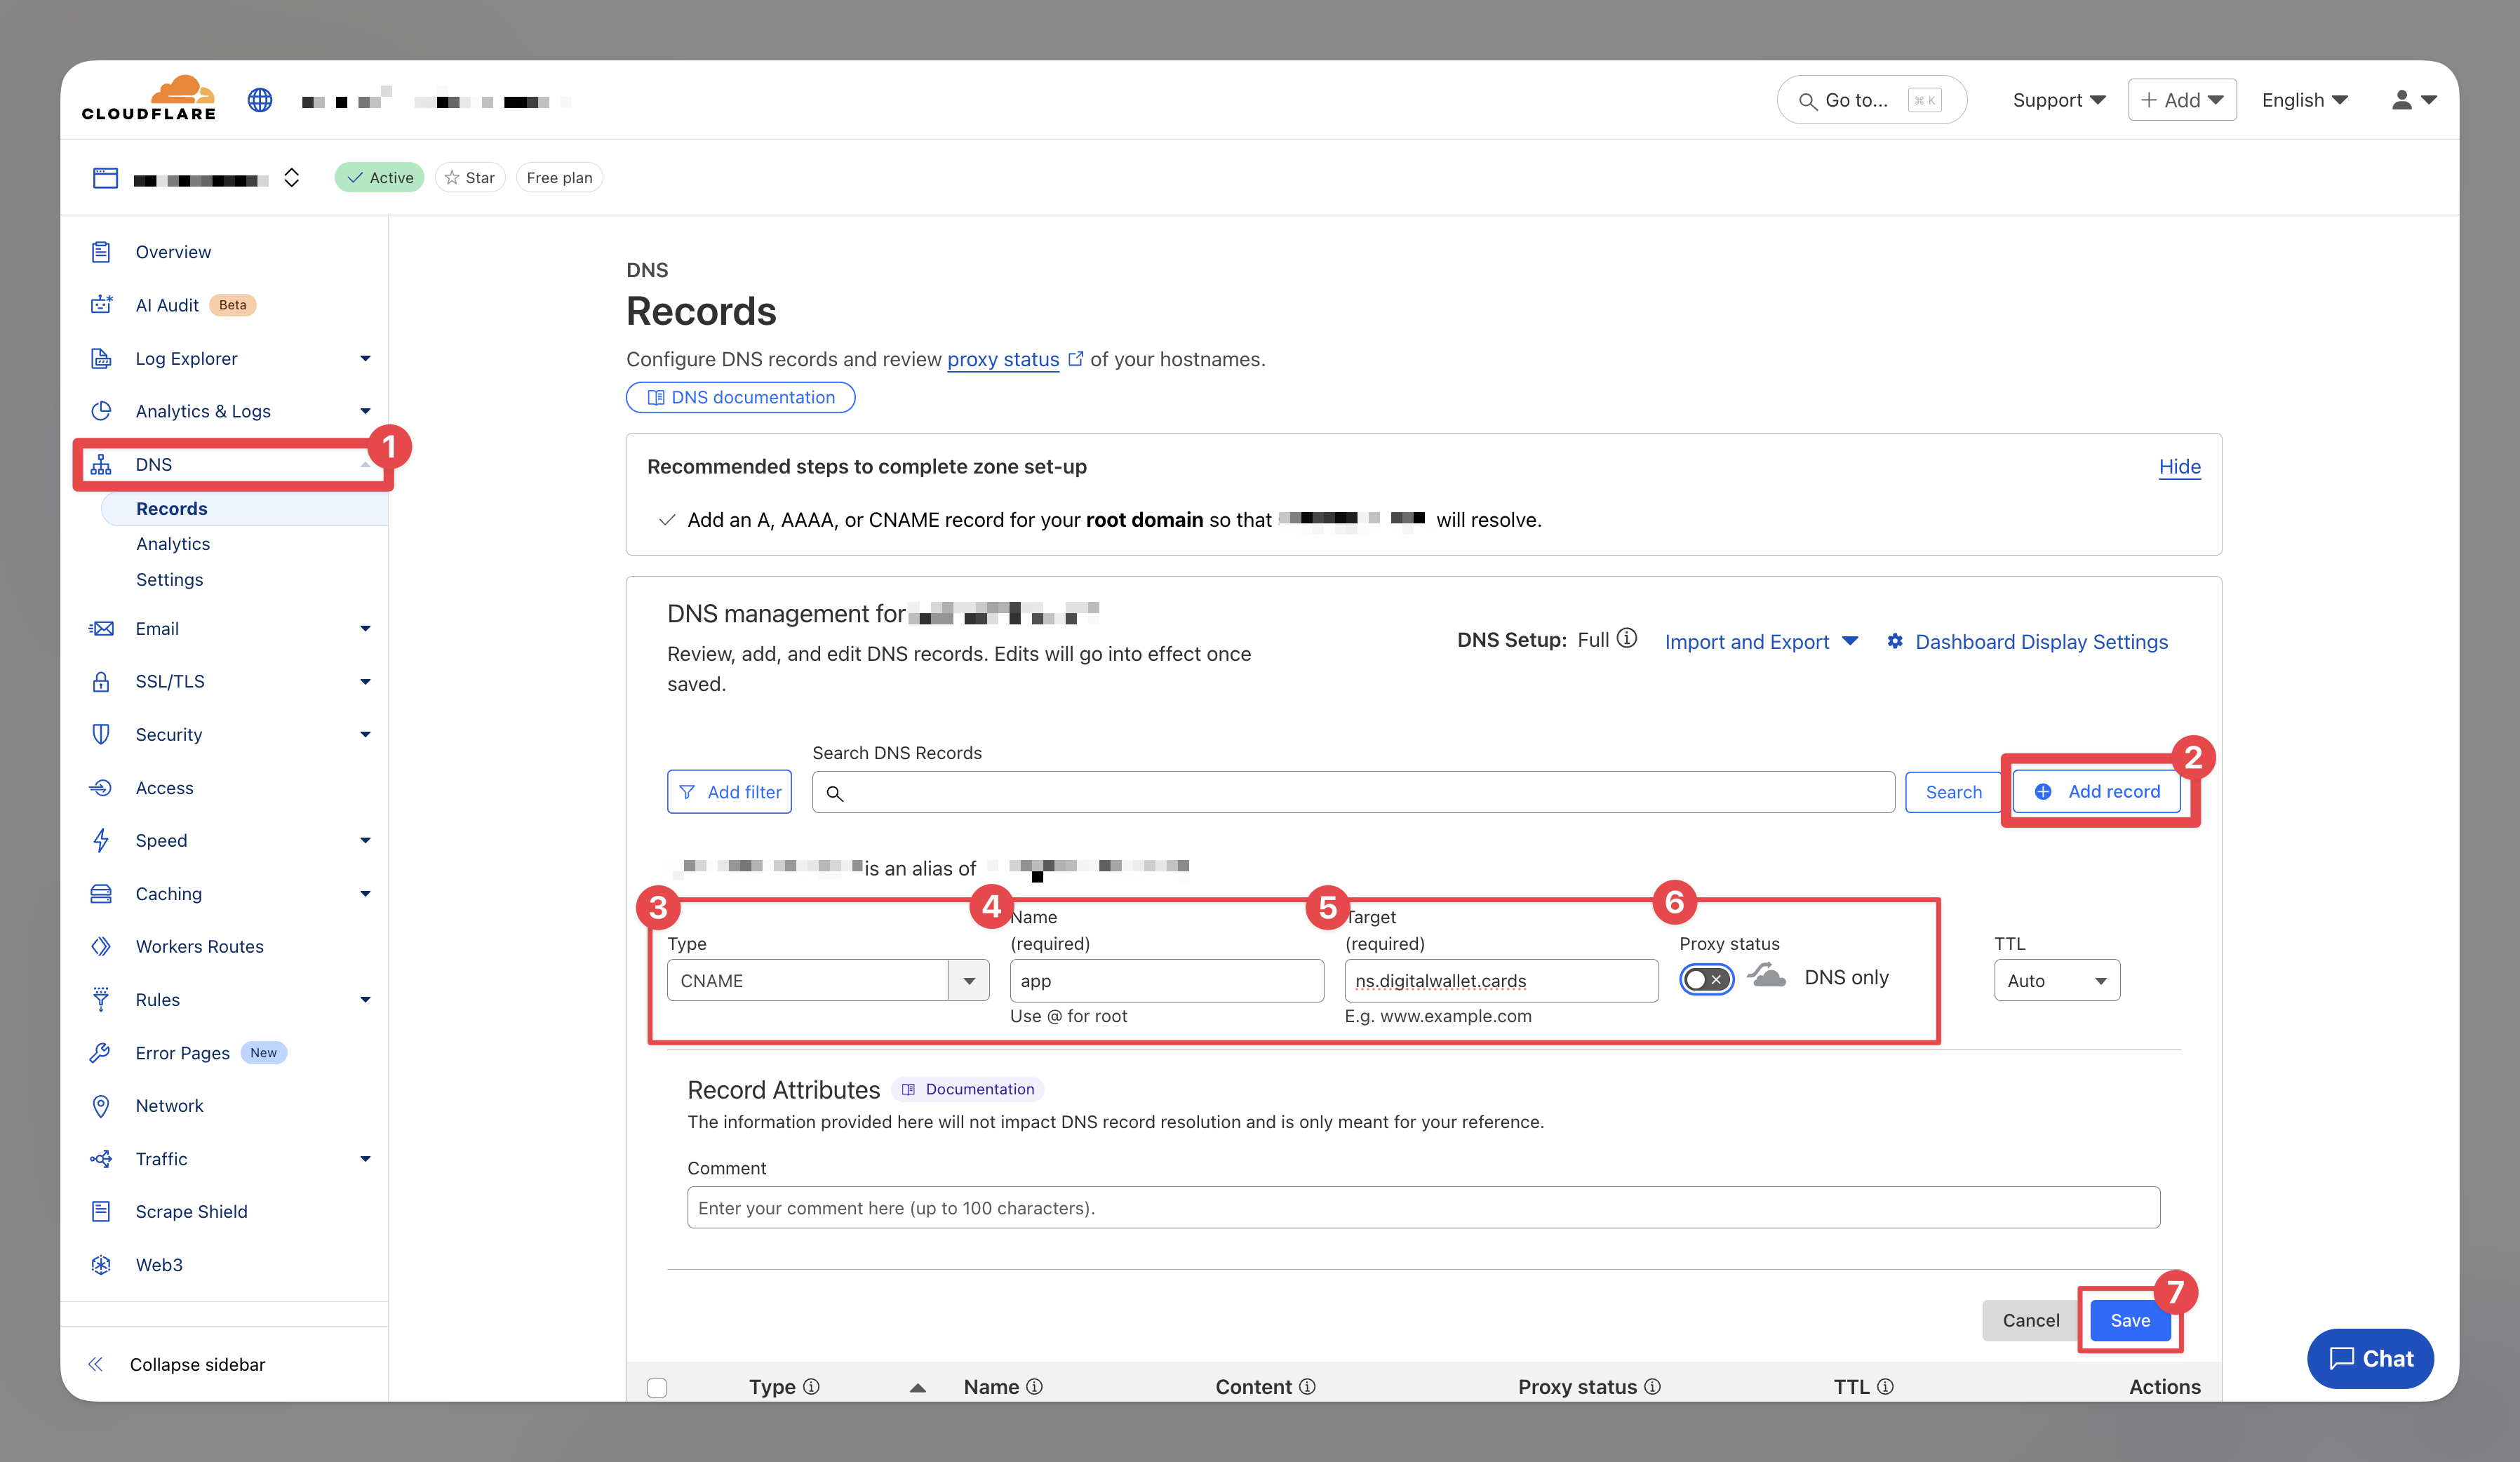
In your domain registrar’s control panel (e.g. Cloudflare, Namecheap, GoDaddy, etc.):
Navigate to the DNS or zone settings for that domain.
Create a CNAME record:
Name/Host: your chosen domain or subdomain (e.g. app if you’re using app.yourdomain.com)
Value/Target: ns.digitalwallet.cards
If you use Cloudflare, set the DNS record to DNS only (disable the proxy orange cloud) to ensure proper SSL provisioning.
Click Continue in Loyally.ai.
Wait up to 24 hours for DNS propagation and SSL provisioning. Then click Update status. The status will update from “Pending” to “Active.”
app. subdomain (e.g., app.yourdomain.com) because it’s intuitive—but you’re free to connect any domain or subdomain you prefer.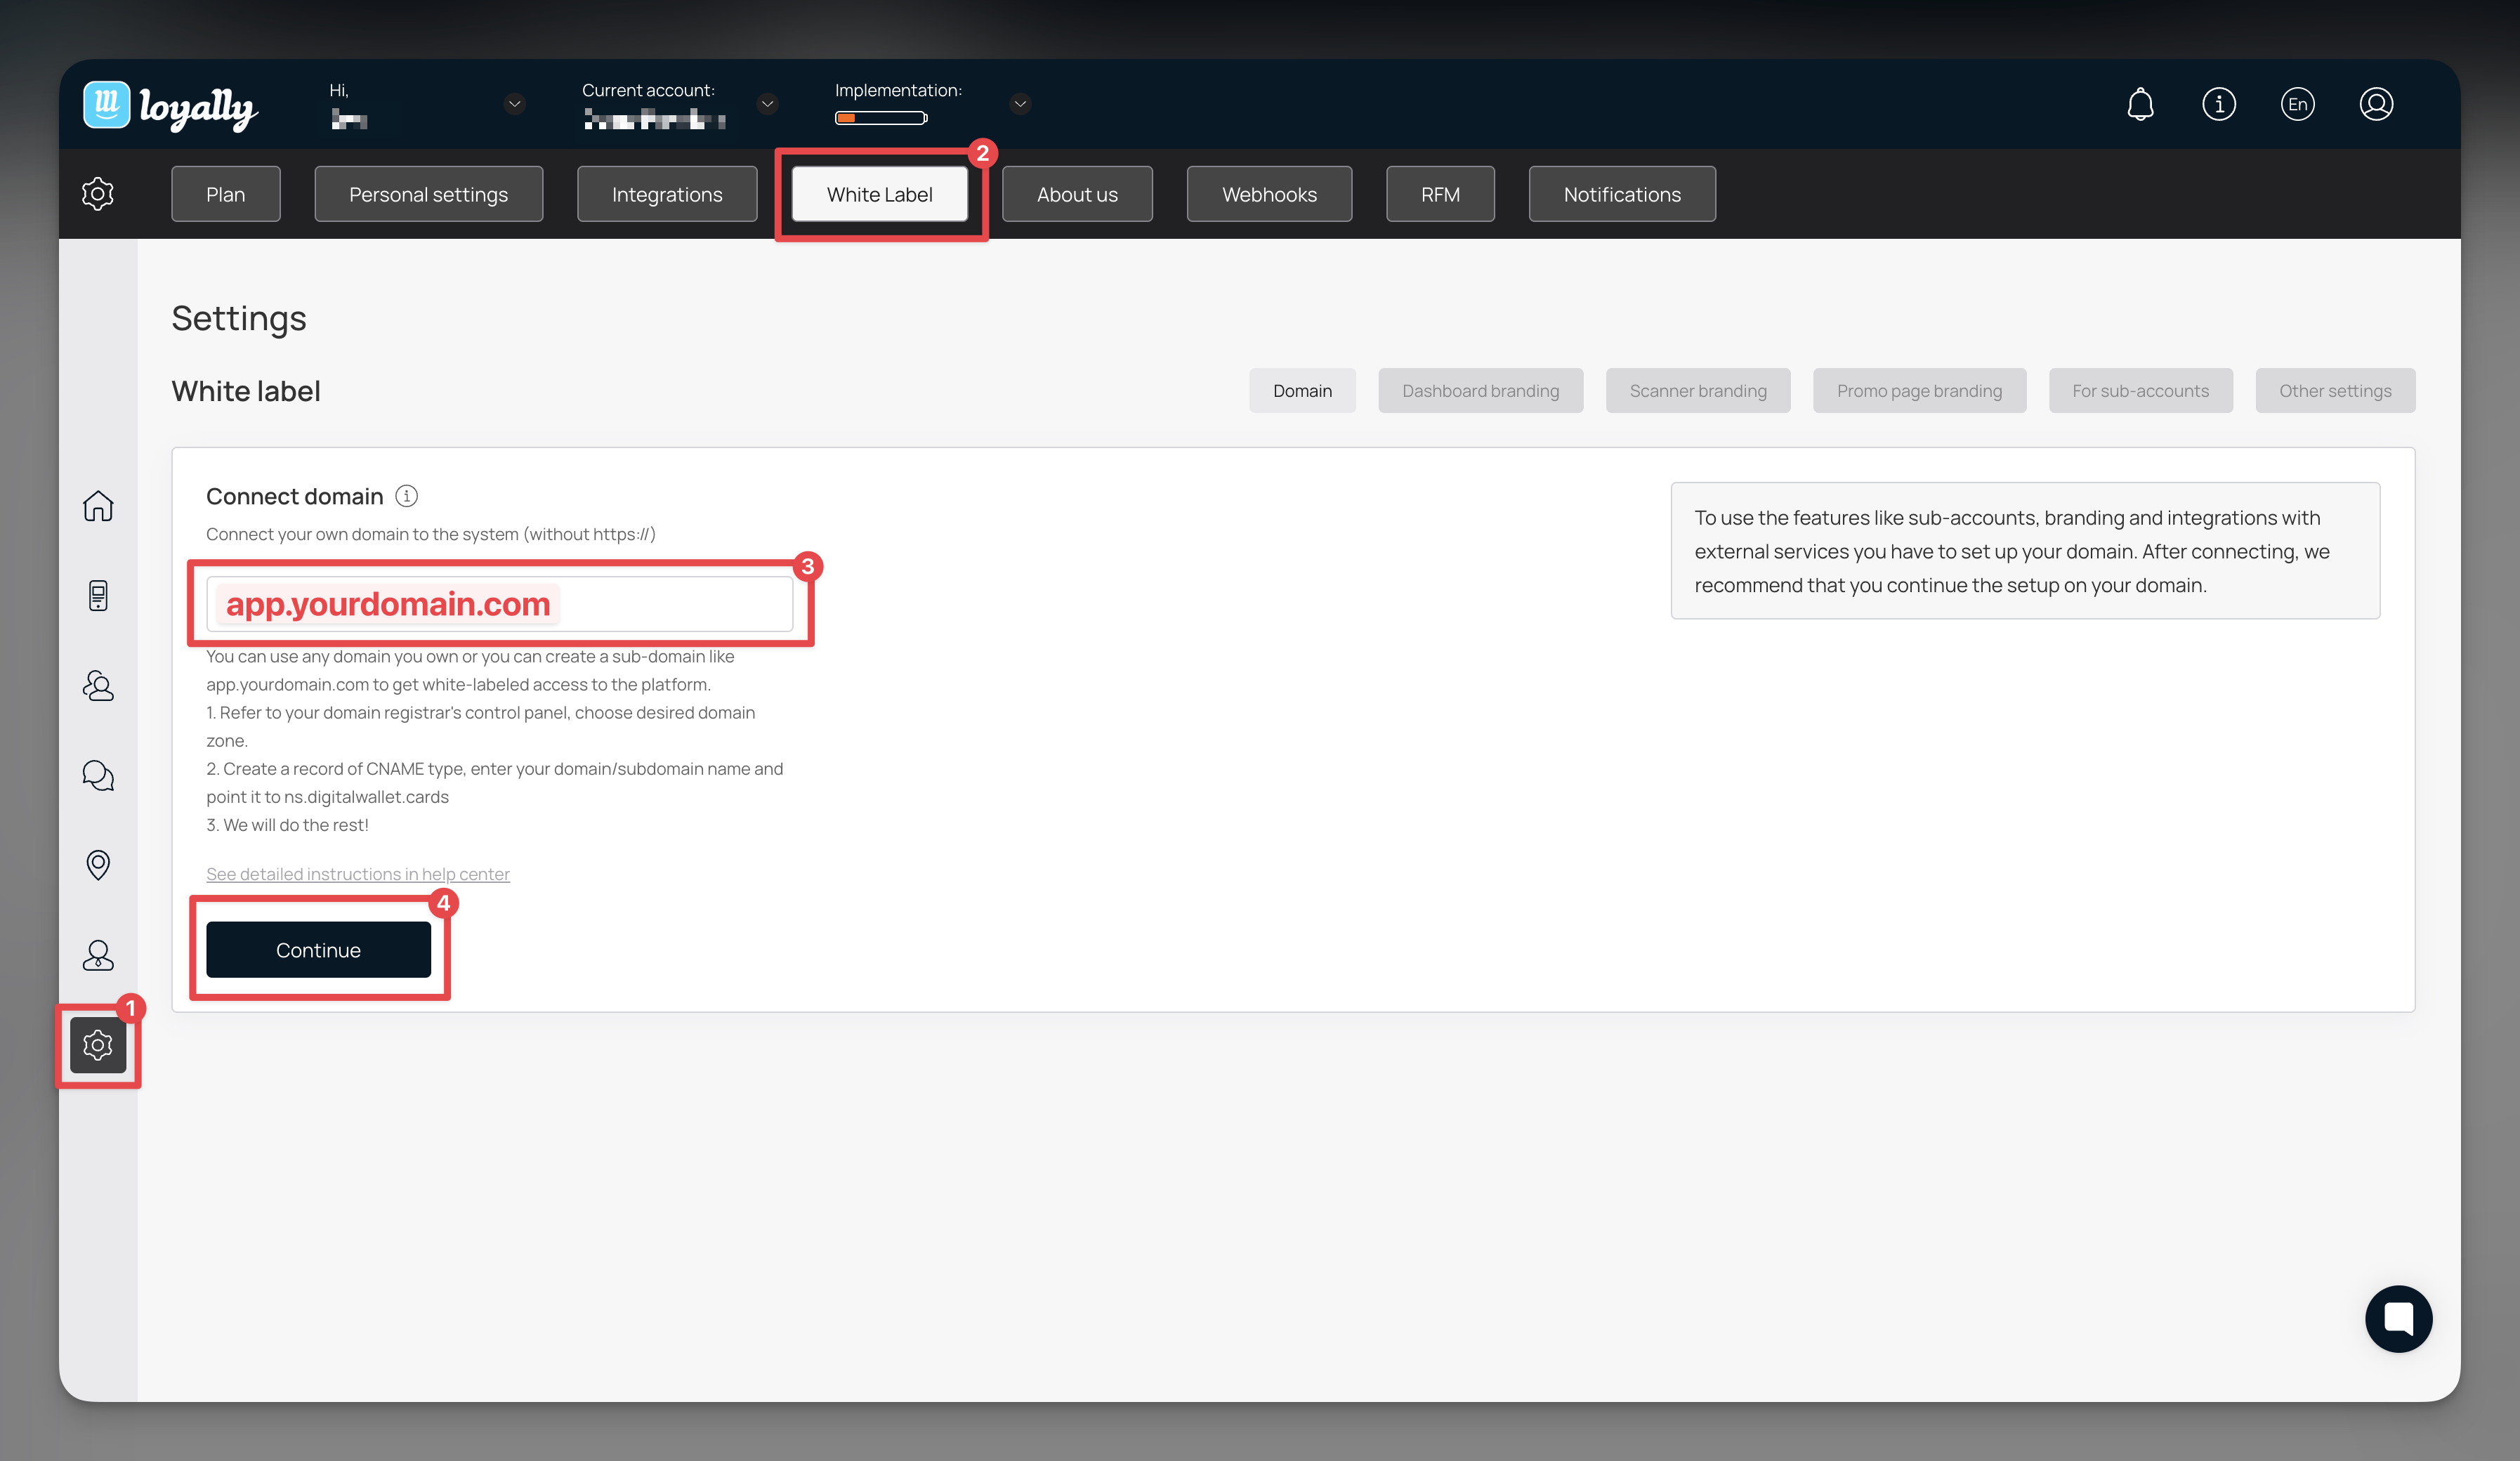
app.yourdomain.com)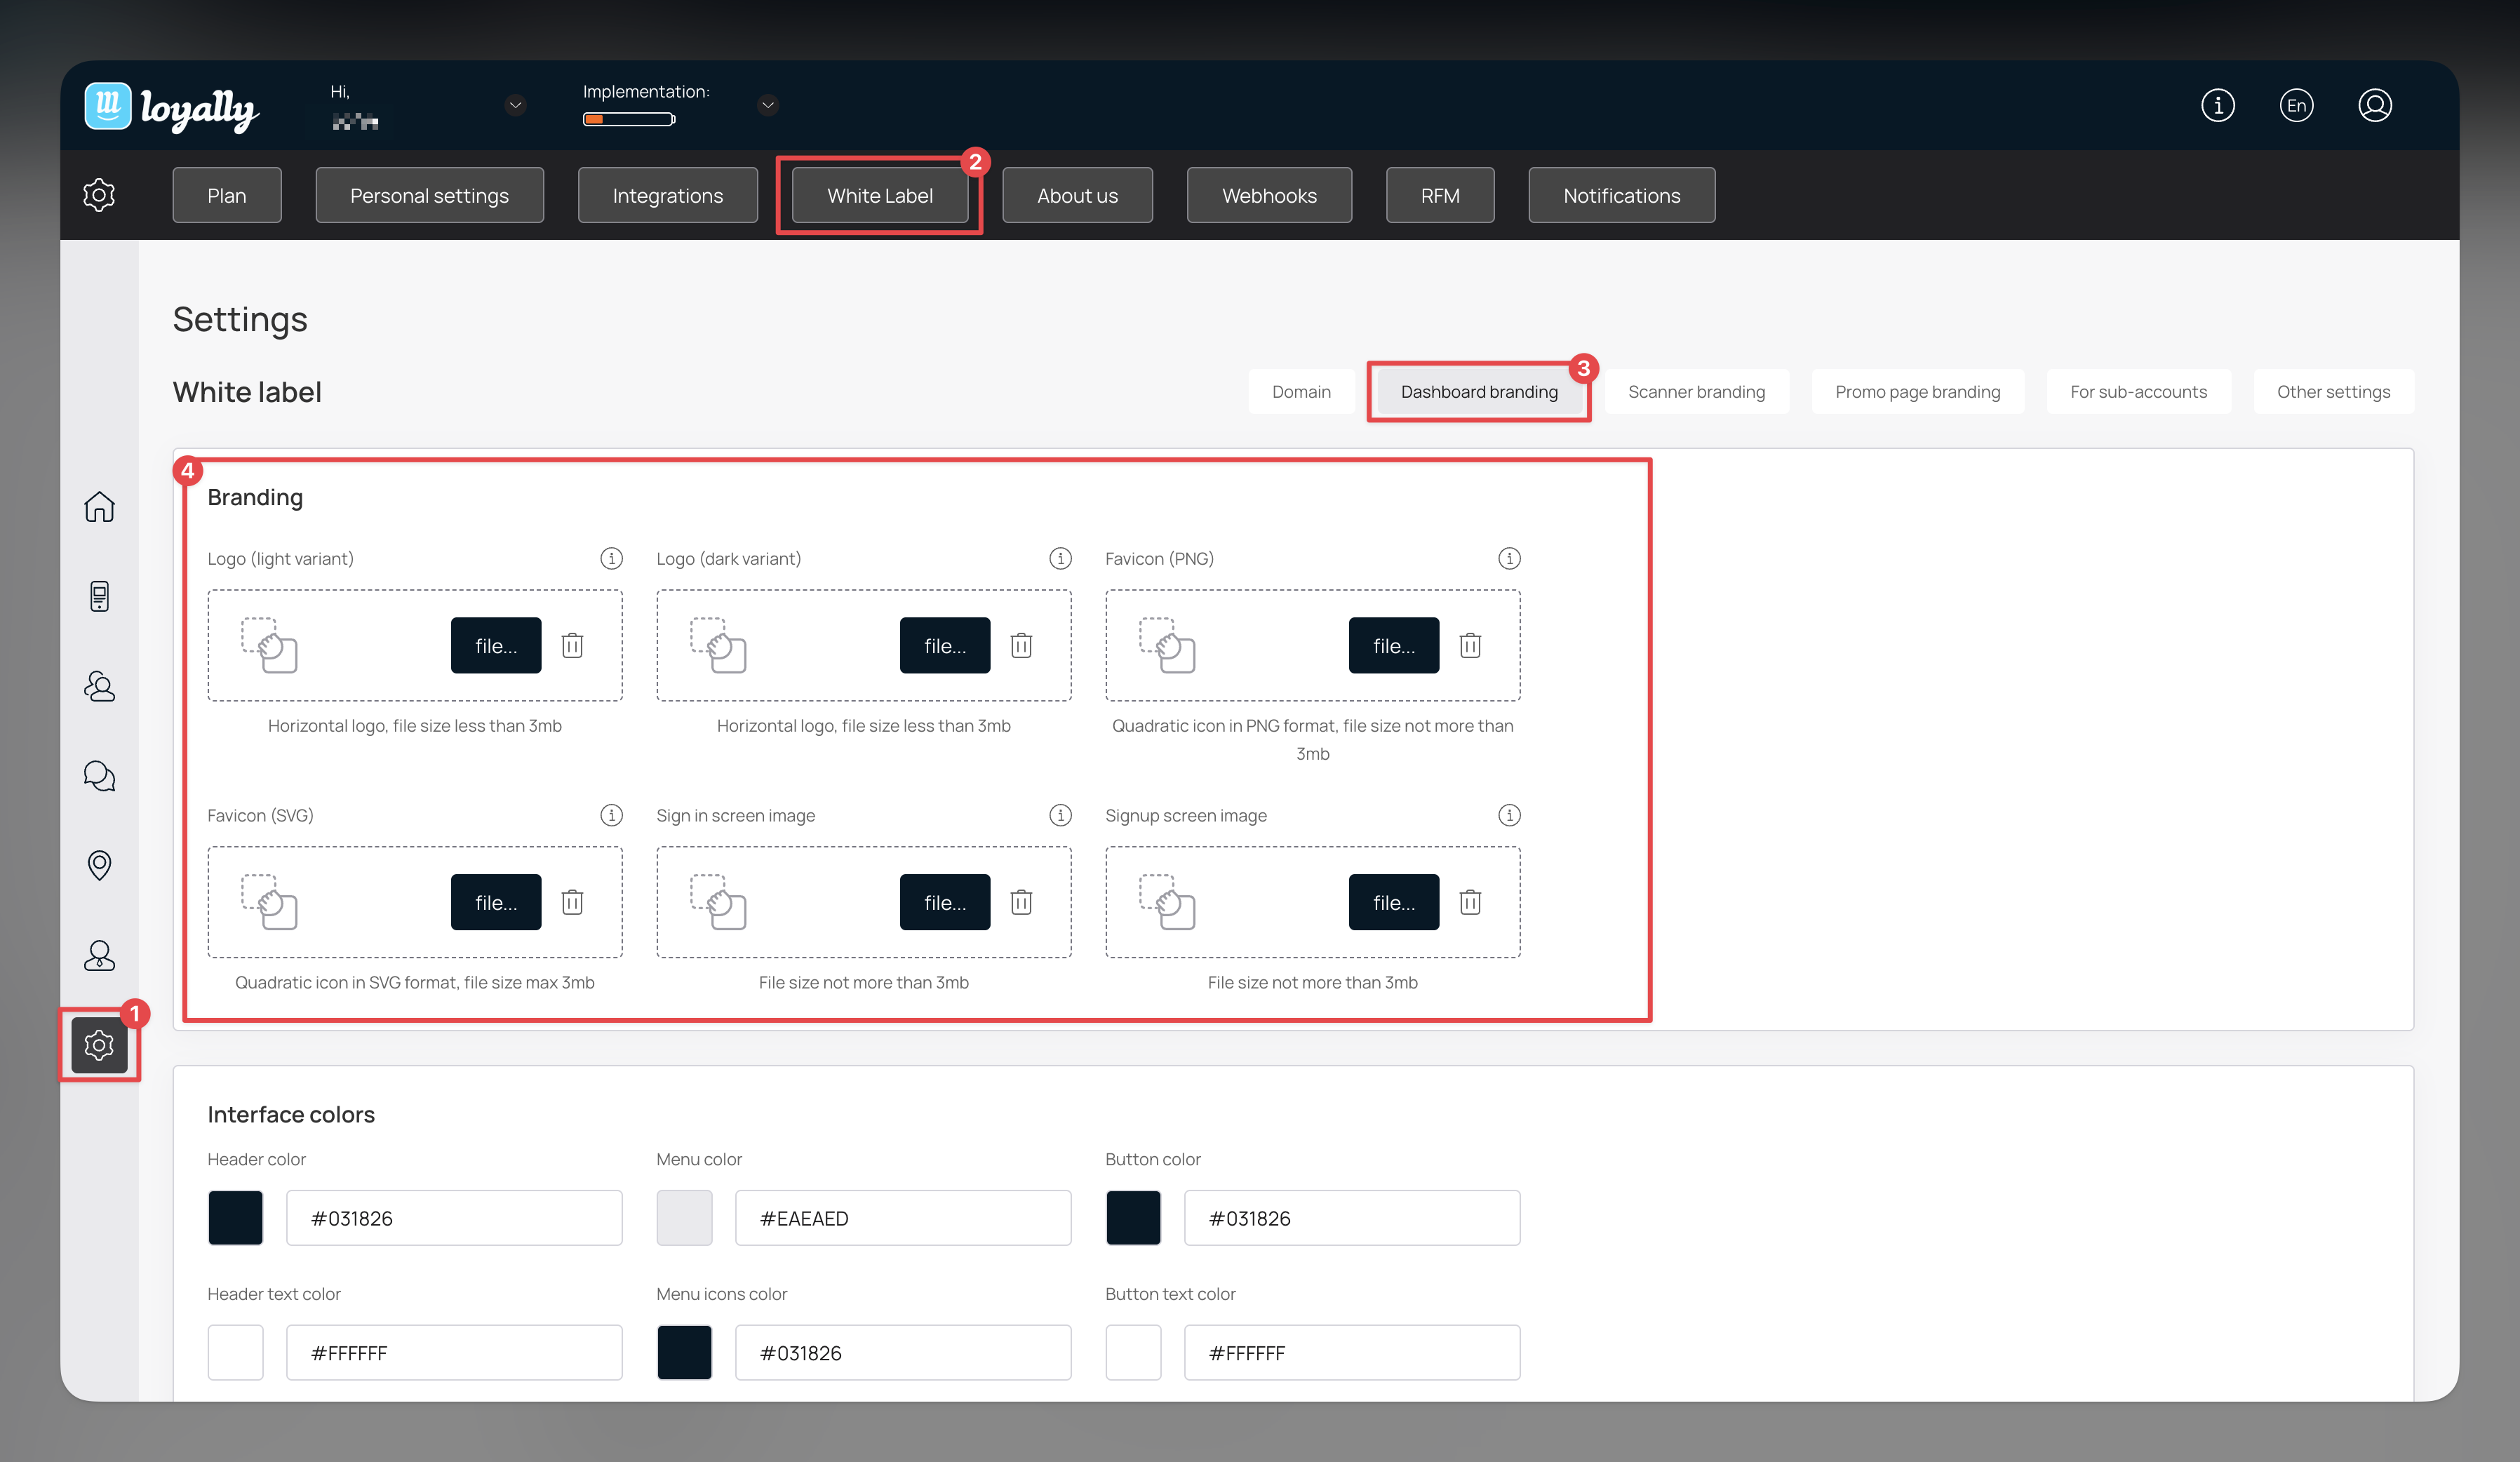
Asset Type | Tip | Recommended Dimensions | Notes |
Logo (light variant) Light-mode Logo (PNG ≤ 3 MB) | Horizontal logo, file size less than 3mb | The recommended proportions are 16/3 at least 210x44px. | Transparent background recommended |
Dark-mode Logo (PNG ≤ 3 MB) | Dashboard Branding > Logo (Dark Variant) | For dark-theme users | |
Favicon (PNG) | Dashboard Branding > Favicon (PNG) | 32 × 32 px or 64 × 64 px | |
Favicon (SVG) | Dashboard Branding > Favicon (SVG) | Scales crisply on all devices | |
Sign-In Screen Image | Dashboard Branding > Sign-In Screen Image | ≥ 1200 × 600 px; appears on login page | |
Sign-Up Screen Image | Dashboard Branding > Sign-Up Screen Image | ≥ 1200 × 600 px; appears on registration page |
Scroll to Interface Colors.
Use the pickers to set header, menu, button, and hover colors.
Click Save Colors.
Tip: Verify contrast ratios (≥ 4.5:1) so text remains legible.
In Meta Tags, fill in:
Page Title (browser tab)
Social Media Title & Description (link previews)
Upload a Social Media Image (1200 × 630 px recommended)
Click Save.
Why it matters: Ensures your brand appears correctly when customers share links or find you via search engines.
Under Text on Cards, enter the message beneath the barcode (e.g., “Powered by [YourBrand]“ or “Earn 1 point per $1 spent”, etc.).
Toggle Front-of-Card Text and Back-of-Card Text on/off.
Click Save.
(Only if you use our mobile Scanner App.)
Click Scanner Branding.
Upload your App Icon (512 × 512 px) and Header Logo.
Choose header background, text, and button colors.
Preview in the dashboard, then click Install or copy the distribution link.