Learn how to view and manage customer details from their profile when using Multipass Cards in Loyally.
The Customer Profile lets you track available and redeemed visits, adjust visit counts, manage bonus balances, update card details, and send personalized notifications — all in one place.
From a customer’s Multipass profile, you can:
View detailed visit and balance statistics
Add or subtract visits and bonus points
Correct entry errors
Manage card status and expiration
Copy installation and referral links
Send push notifications directly to that customer
Review feedback, device information, and segmentation data
Each customer’s profile displays key loyalty data for quick reference:
Field | Description |
LTV (Lifetime Value) | Total purchase amount recorded through loyalty actions. |
Redeemed Visits | Number of visits that have already been used by the customer. |
Available Visits | Number of visits remaining on the customer’s card. |
Visits Sold | Total number of visits originally added to the card. |
Last Visit Redemption | Date of the last redeemed visit. |
Last Visit Added | Date of the last visit added to the card. |
Bonus Balance | Number of bonus points earned by the customer. |
Visits by Referral Program | Number of visits earned through referrals. |
Segments | Customer segment (e.g., RFM or loyalty group). |
Feedback Rating | The customer’s average feedback rating. |
Card Status | Shows if the card is Installed, Not Installed, or Deleted. |
Card Serial Number | Unique card identifier (click Copy to copy). |
Installed on Device | Indicates whether the card was installed via Apple Wallet, Google Wallet, or PWA. |
Card Expiration Date | Expiration date of the customer’s card (editable). |
Total Visits | Total number of visits recorded for the customer. (Note: includes visits removed manually from the backend.) |
UTM Tag | Displays the source channel from which the card was installed. |
Card Issue Date | The date the card was issued to the customer. |
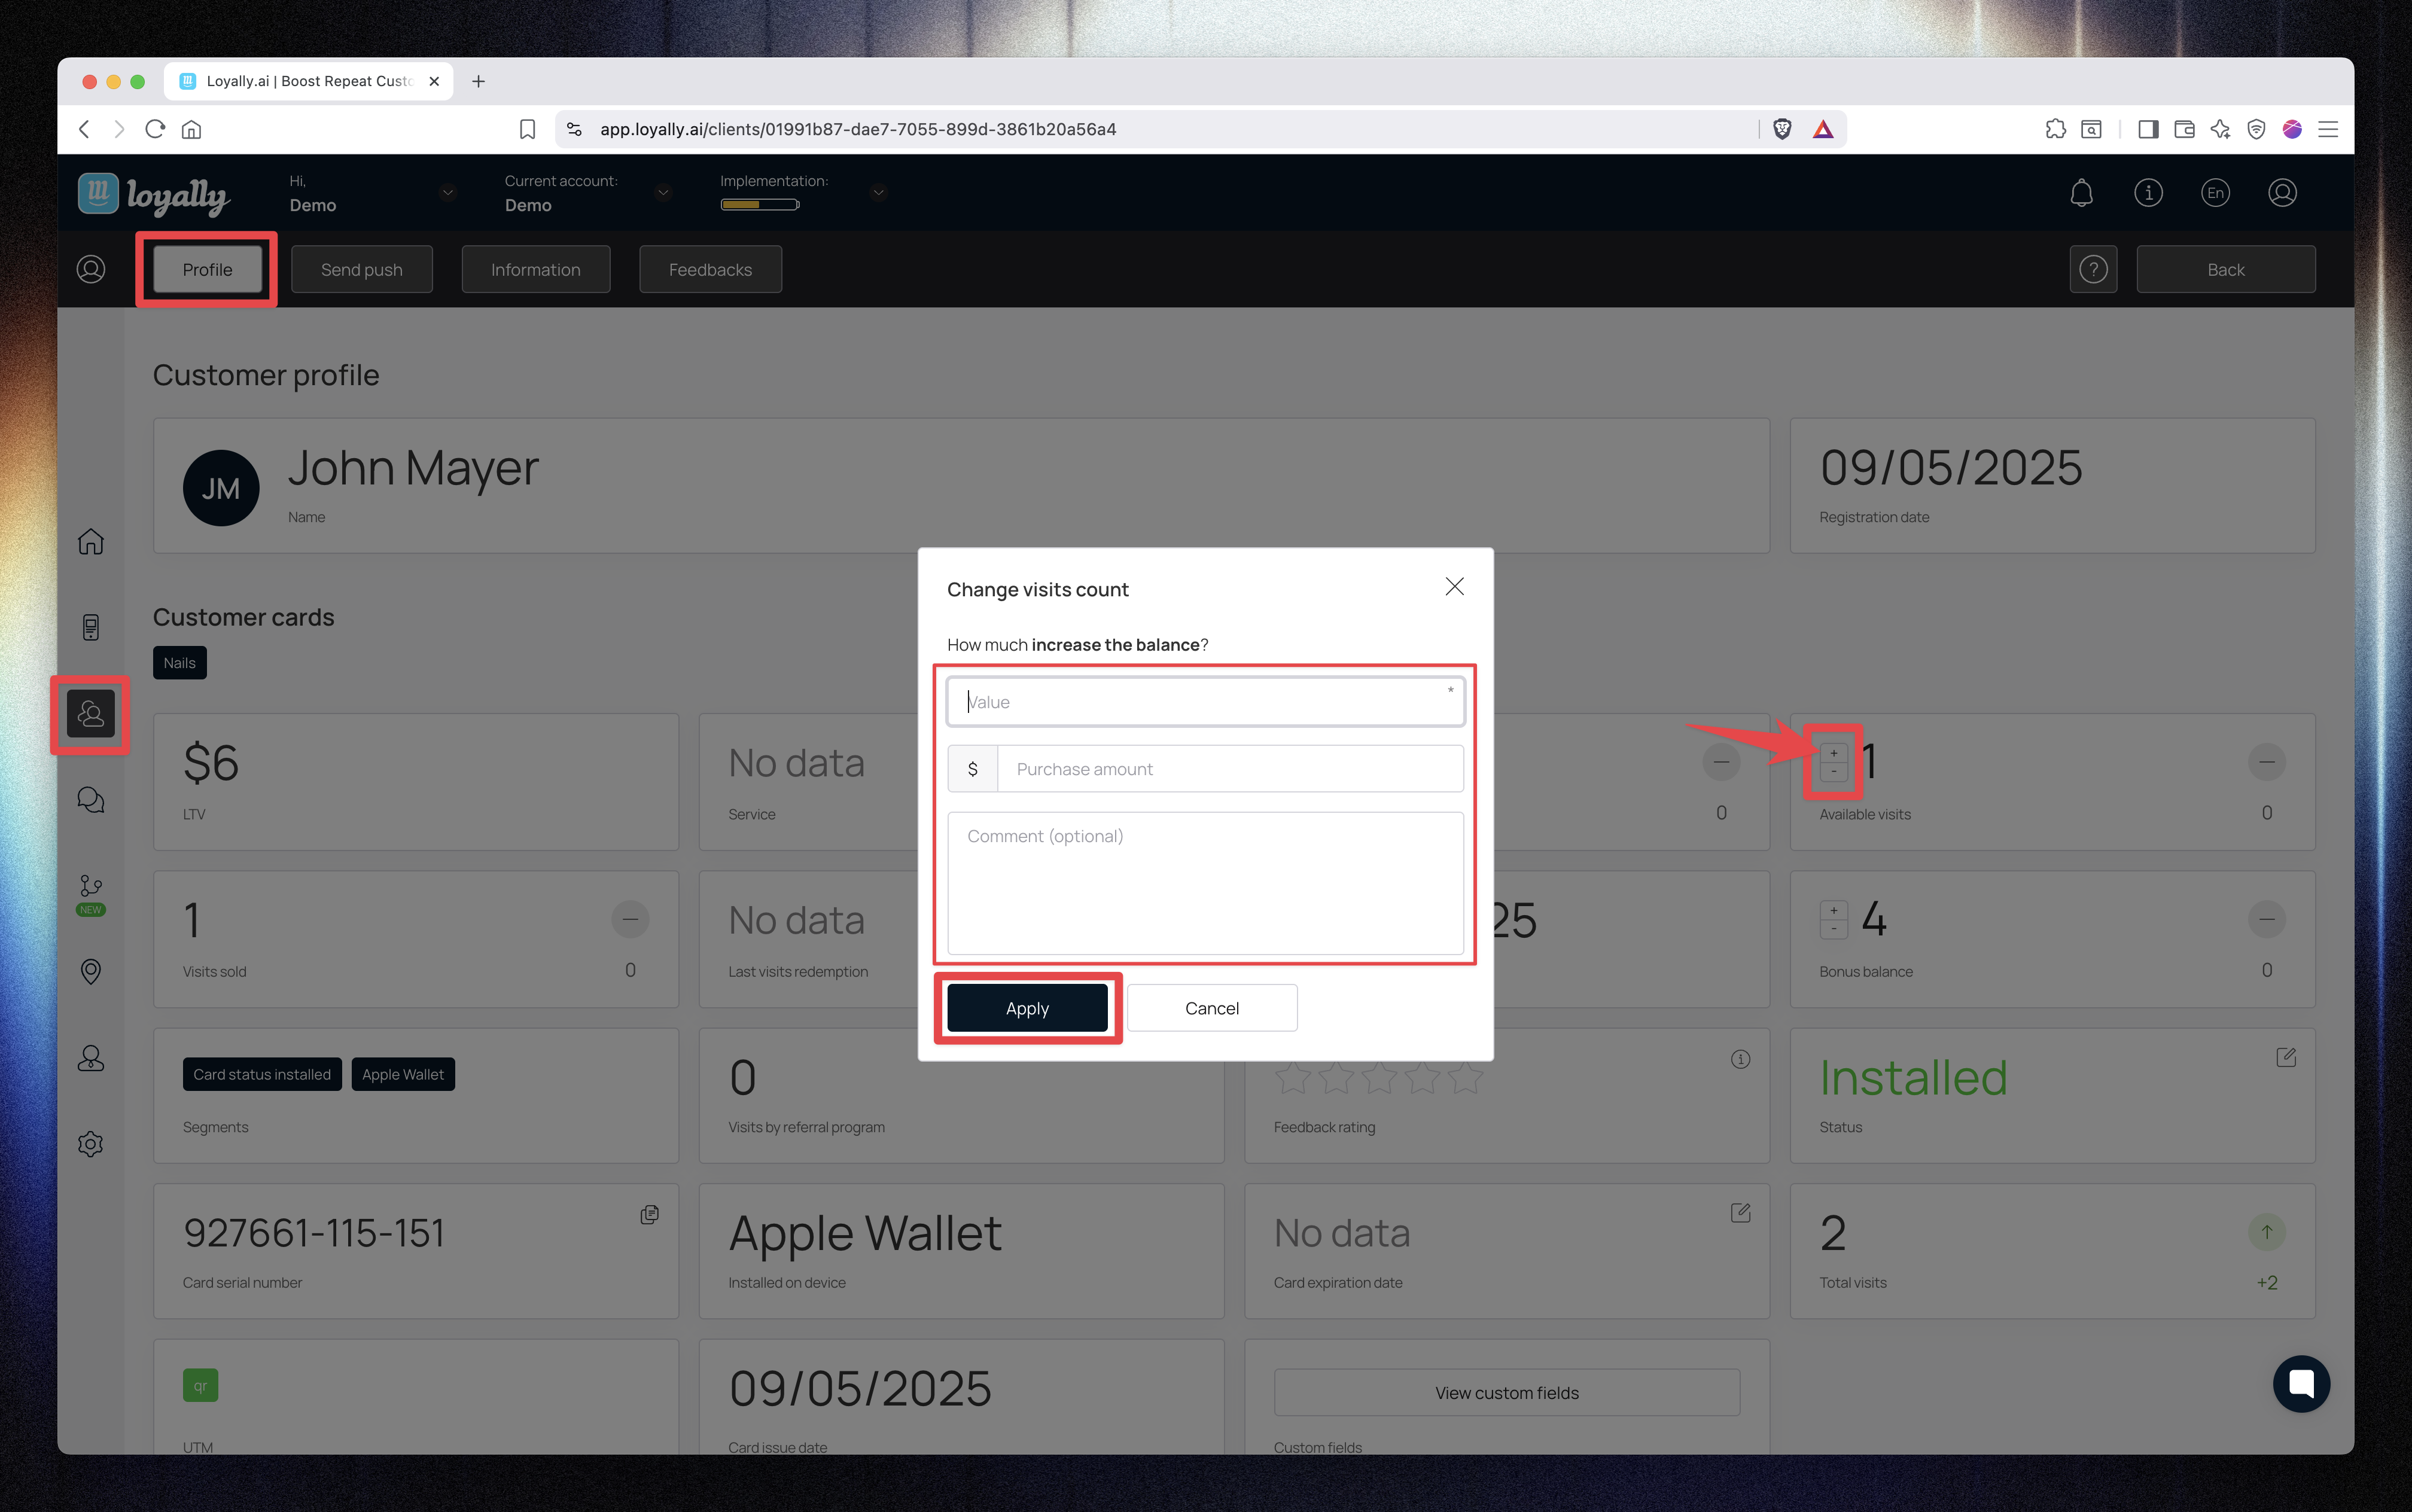
You can manually increase a customer’s available visits directly from their profile.
Open the customer’s profile.
Click the “+” icon beside Available Visits.
In the popup window, enter:
Value → Number of visits to add.
Purchase amount (Transaction amount) → The total purchase value associated with these visits.
Comment (optional) → Add context for the change.
Click Apply.
✅ When you apply the change:
Available visits increase.
Visits sold increases.
LTV also increases (if a purchase amount is entered).
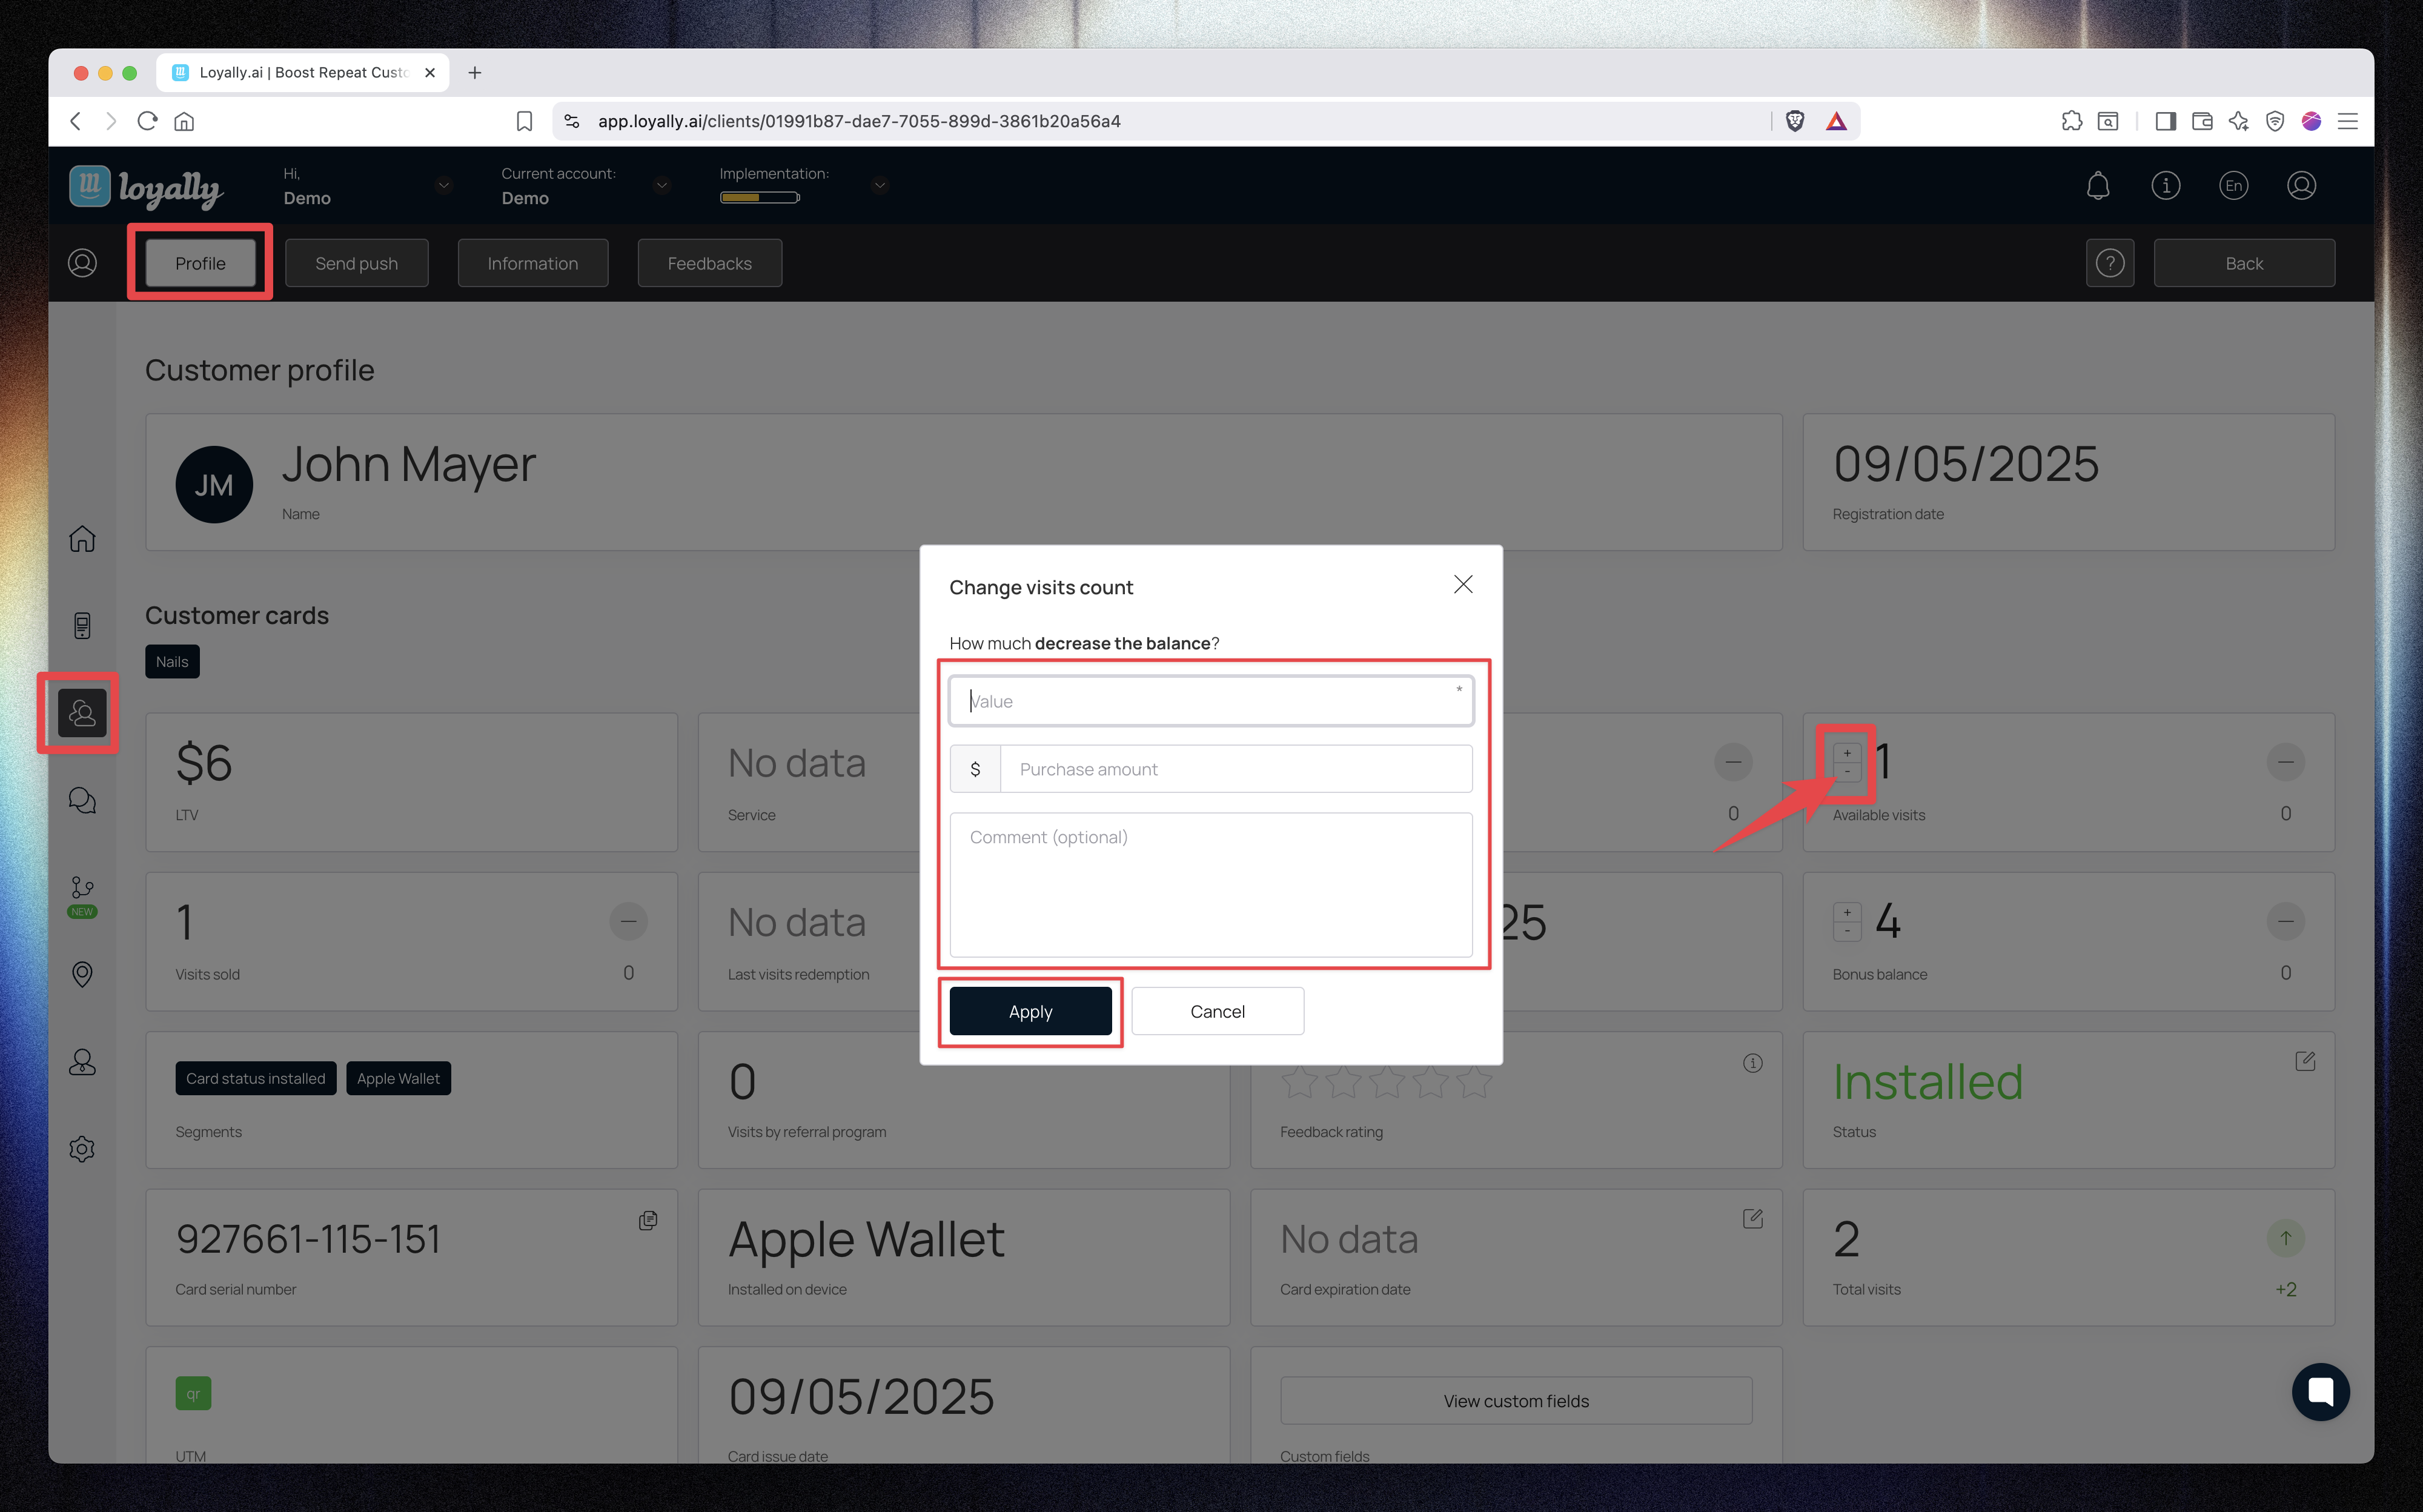
If extra visits were added by mistake, you can easily remove them.
Click the “−” icon beside Available Visits.
Enter the Value (number of visits to remove).
(Optional) Enter a Purchase amount if the correction should affect LTV.
(Optional) Add a Comment for reference.
Click Apply.
📉 Once applied:
The number of Available Visits decreases.
The number of Redeemed Visits also adjusts automatically.
LTV only changes if a purchase amount was entered.
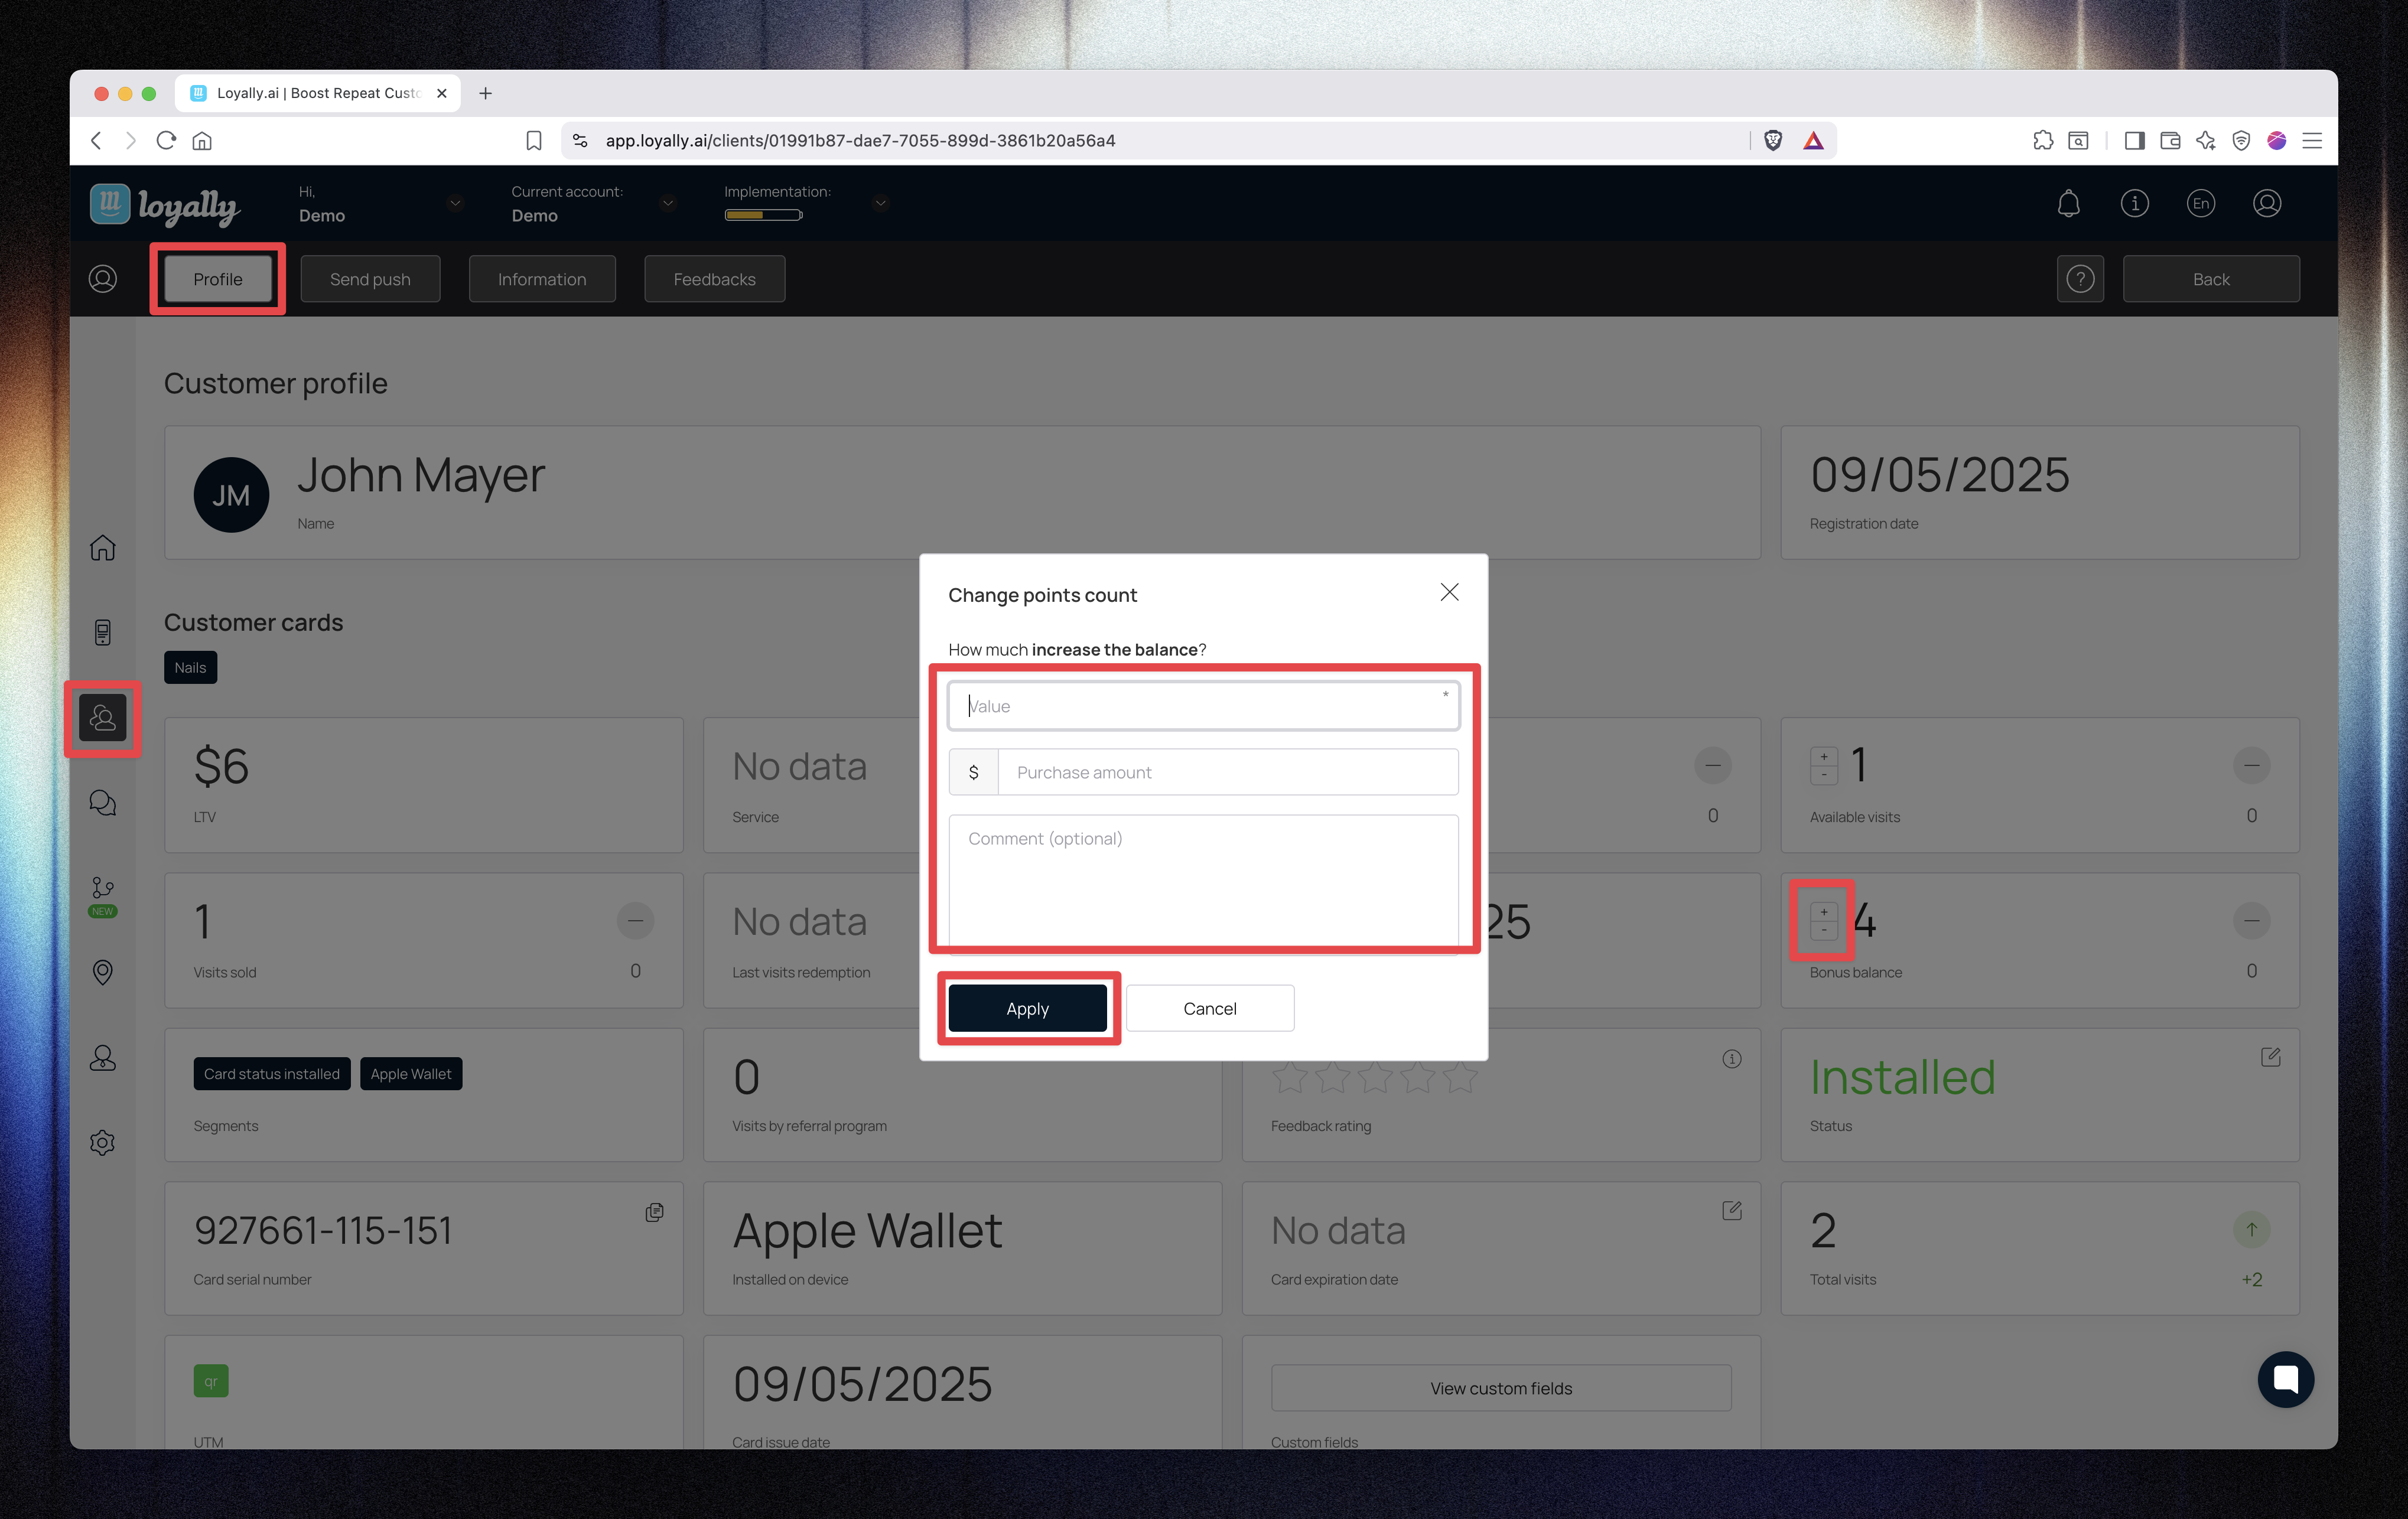
You can manually add or remove bonus points for the customer.
Click the “+” icon beside Bonus Balance.
In the popup:
Value → Number of bonus points to add.
Purchase amount (Transaction amount) → Optional; affects LTV if entered.
Comment (optional) → Add notes if needed.
Click Apply.
✅ The Bonus Balance will increase immediately.
If a purchase amount is entered, LTV will also increase.
Click the “−” icon beside Bonus Balance.
Enter the number of points to remove.
(Optional) Enter a Purchase amount (Transaction amount) if you want to adjust LTV.
(Optional) Add a Comment.
Click Apply.
📉 The points will be deducted from the customer’s balance.
If a purchase amount is entered, LTV will adjust accordingly.
💡 Tip:
Use bonus adjustments carefully — these changes affect customer totals and are logged in transaction history.
This section shows detailed information about the customer’s Multipass card.
Field | Description |
Status | Displays whether the card is Installed, Not Installed, or Deleted. |
Card Serial Number | The unique ID of the card (click Copy). |
Card Expiration Date | Shows and allows editing of the expiration date. |
Installed on Device | Displays if the card is installed via PWA, Apple Wallet, or Google Wallet. |
Card Installation Link | Unique installation link for the customer’s card. |
Referral Link | Personalized referral link for inviting others. |
Click the pencil icon beside Status.
Click Delete when the button appears.
Confirm the deletion.
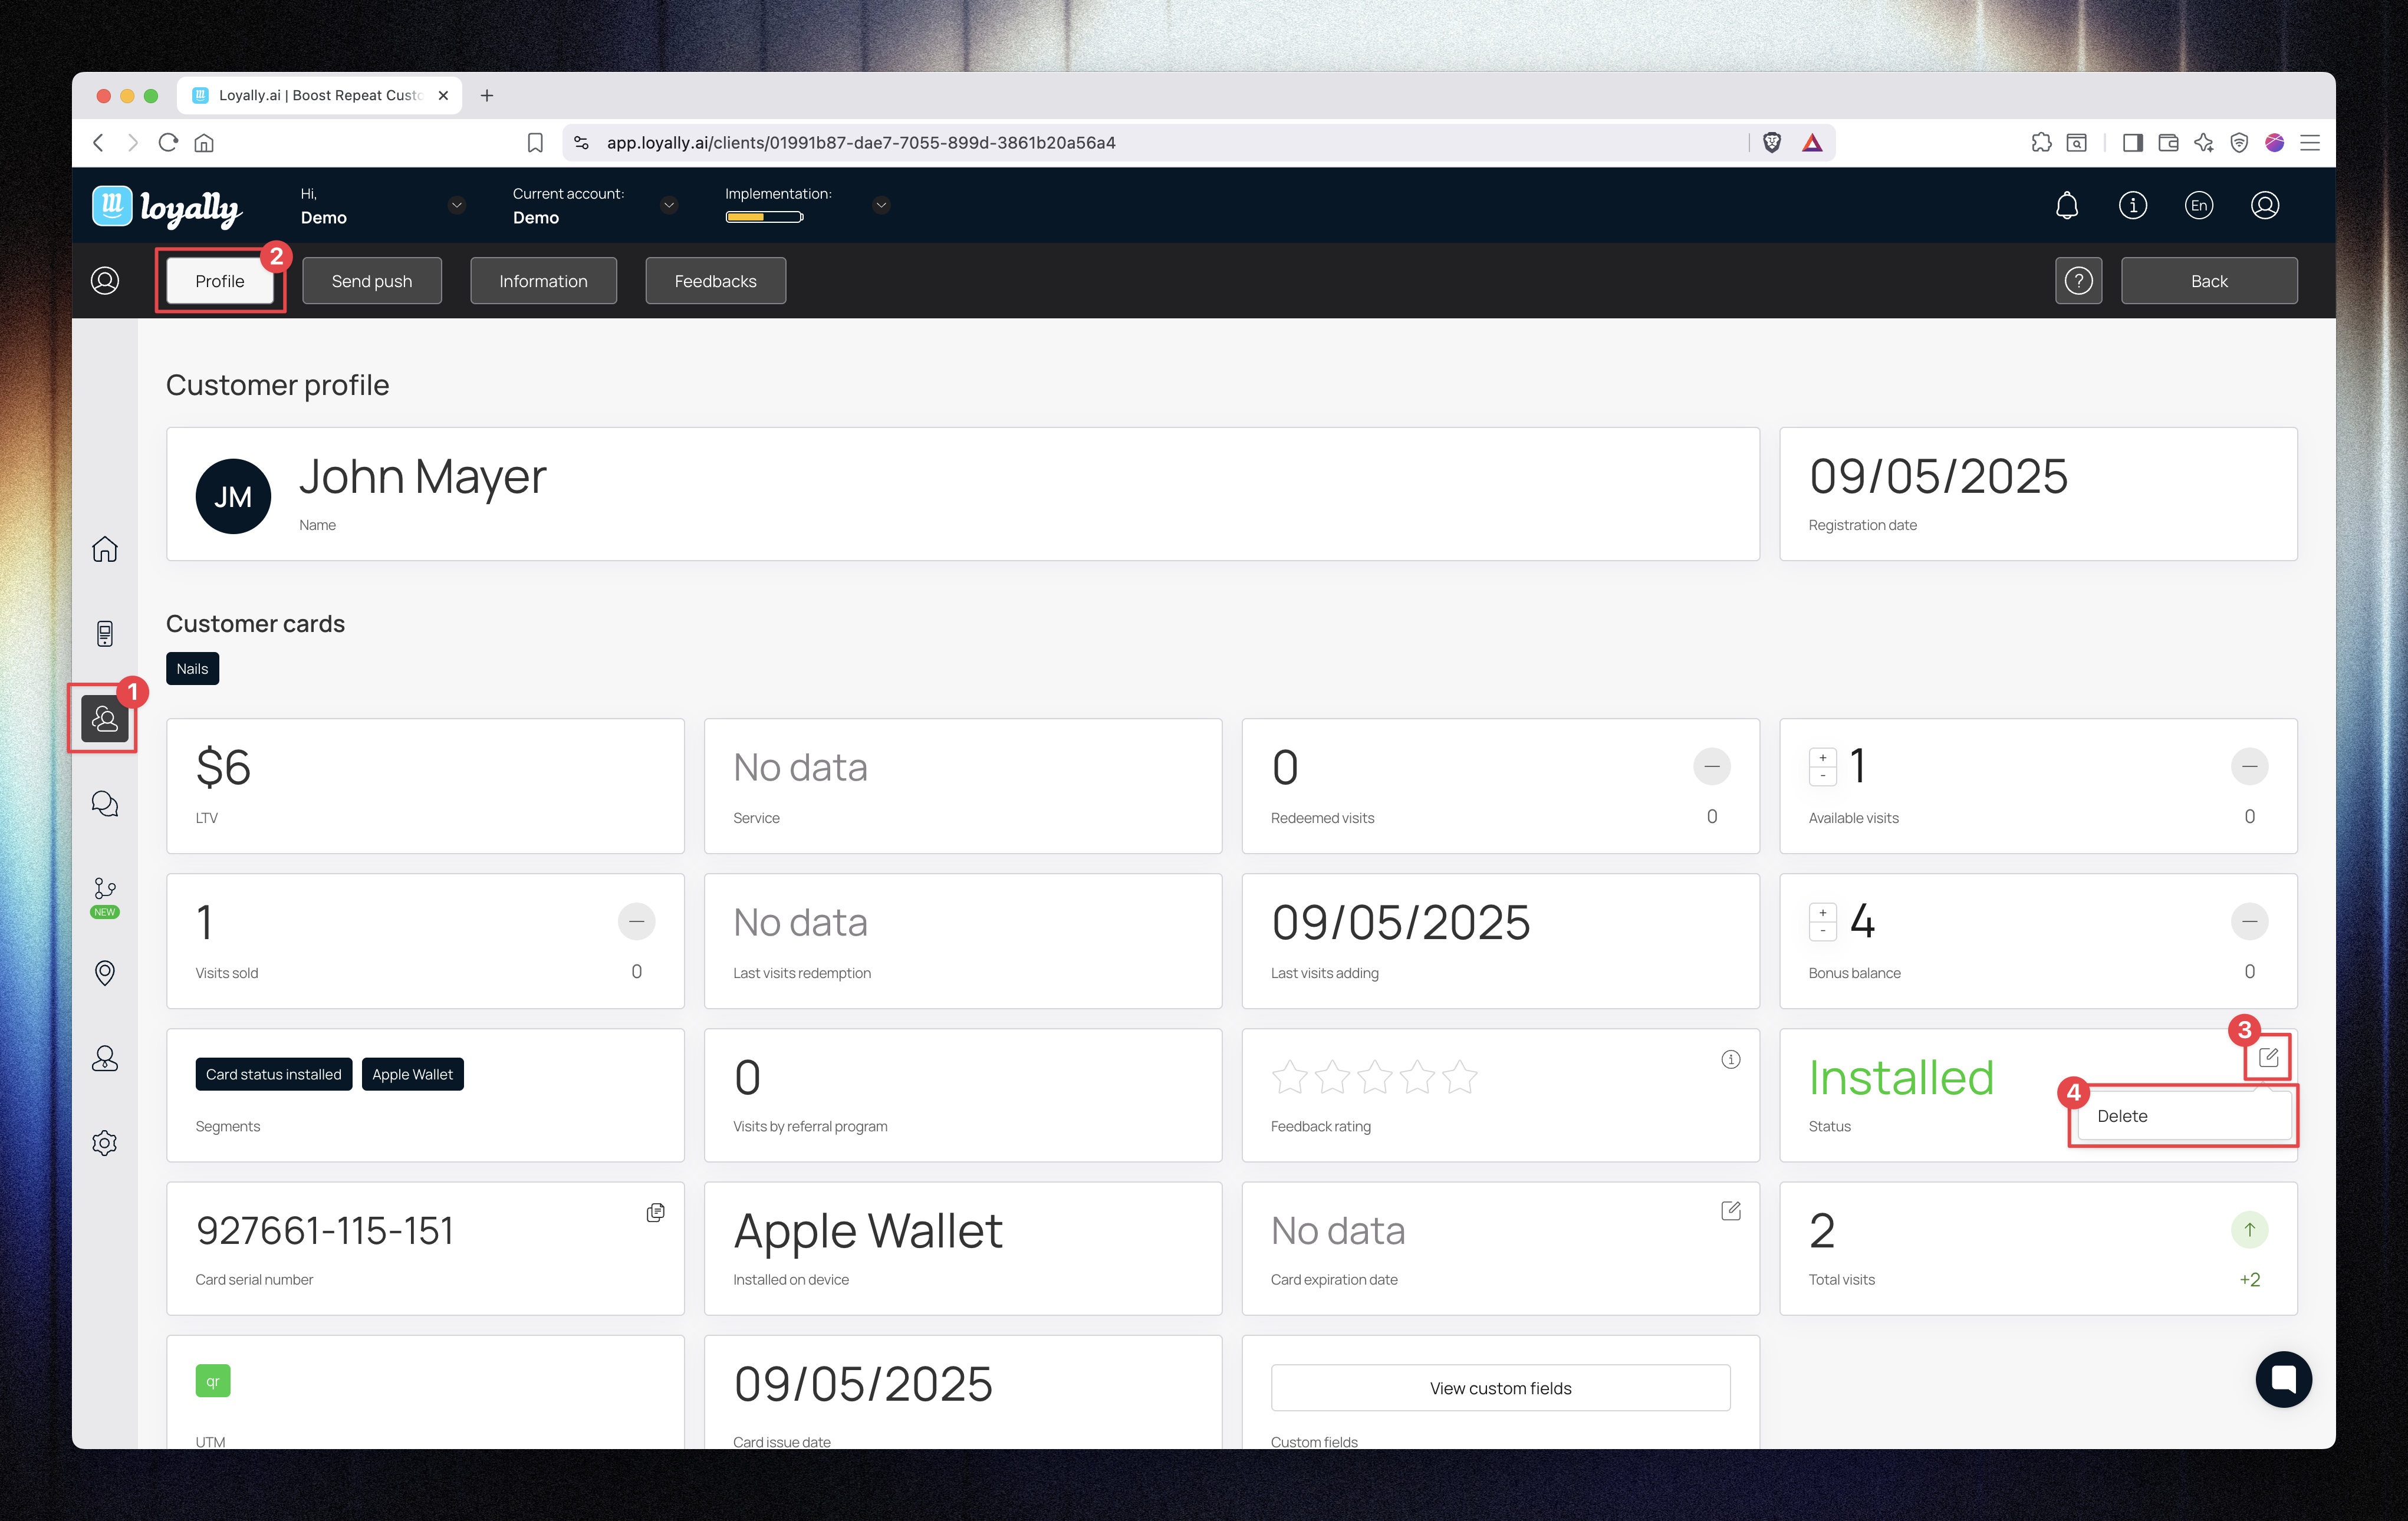
⚠ You can only delete a customer from your list once their card status is changed to Deleted.
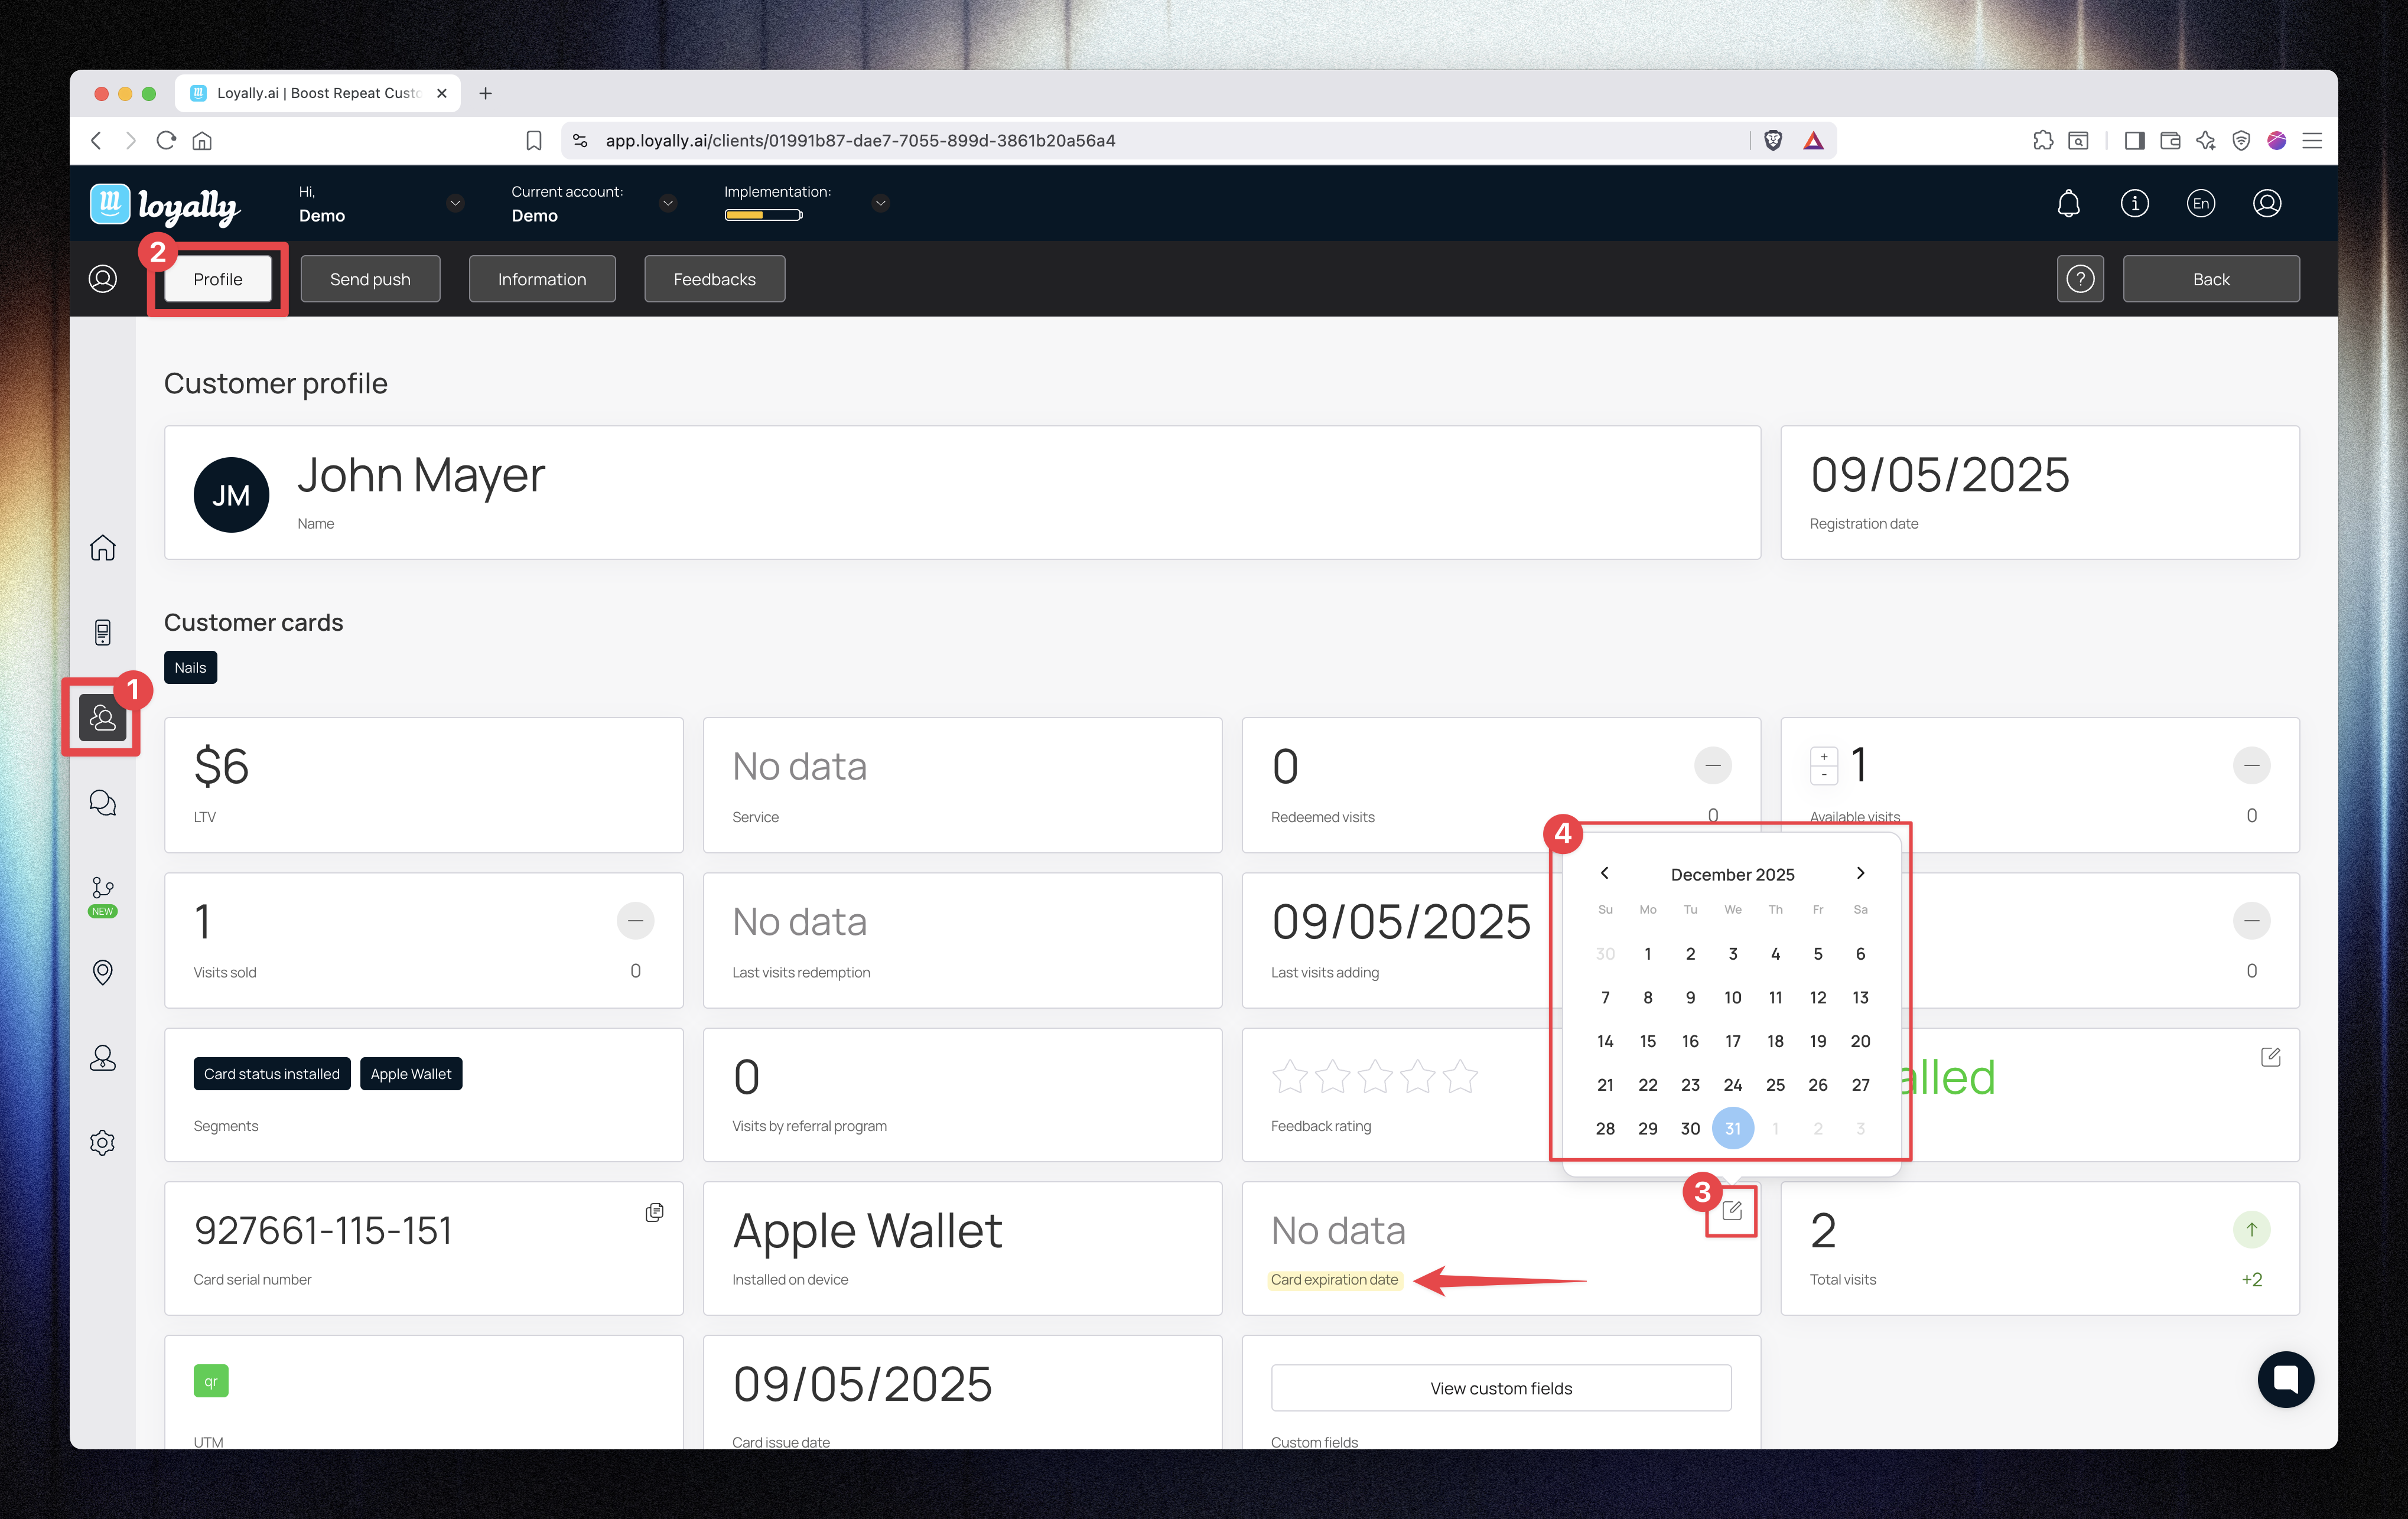
Click the calendar icon beside Card Expiration Date.
Choose a new date from the calendar.
Confirm the change.
The new expiration will appear instantly in the profile.
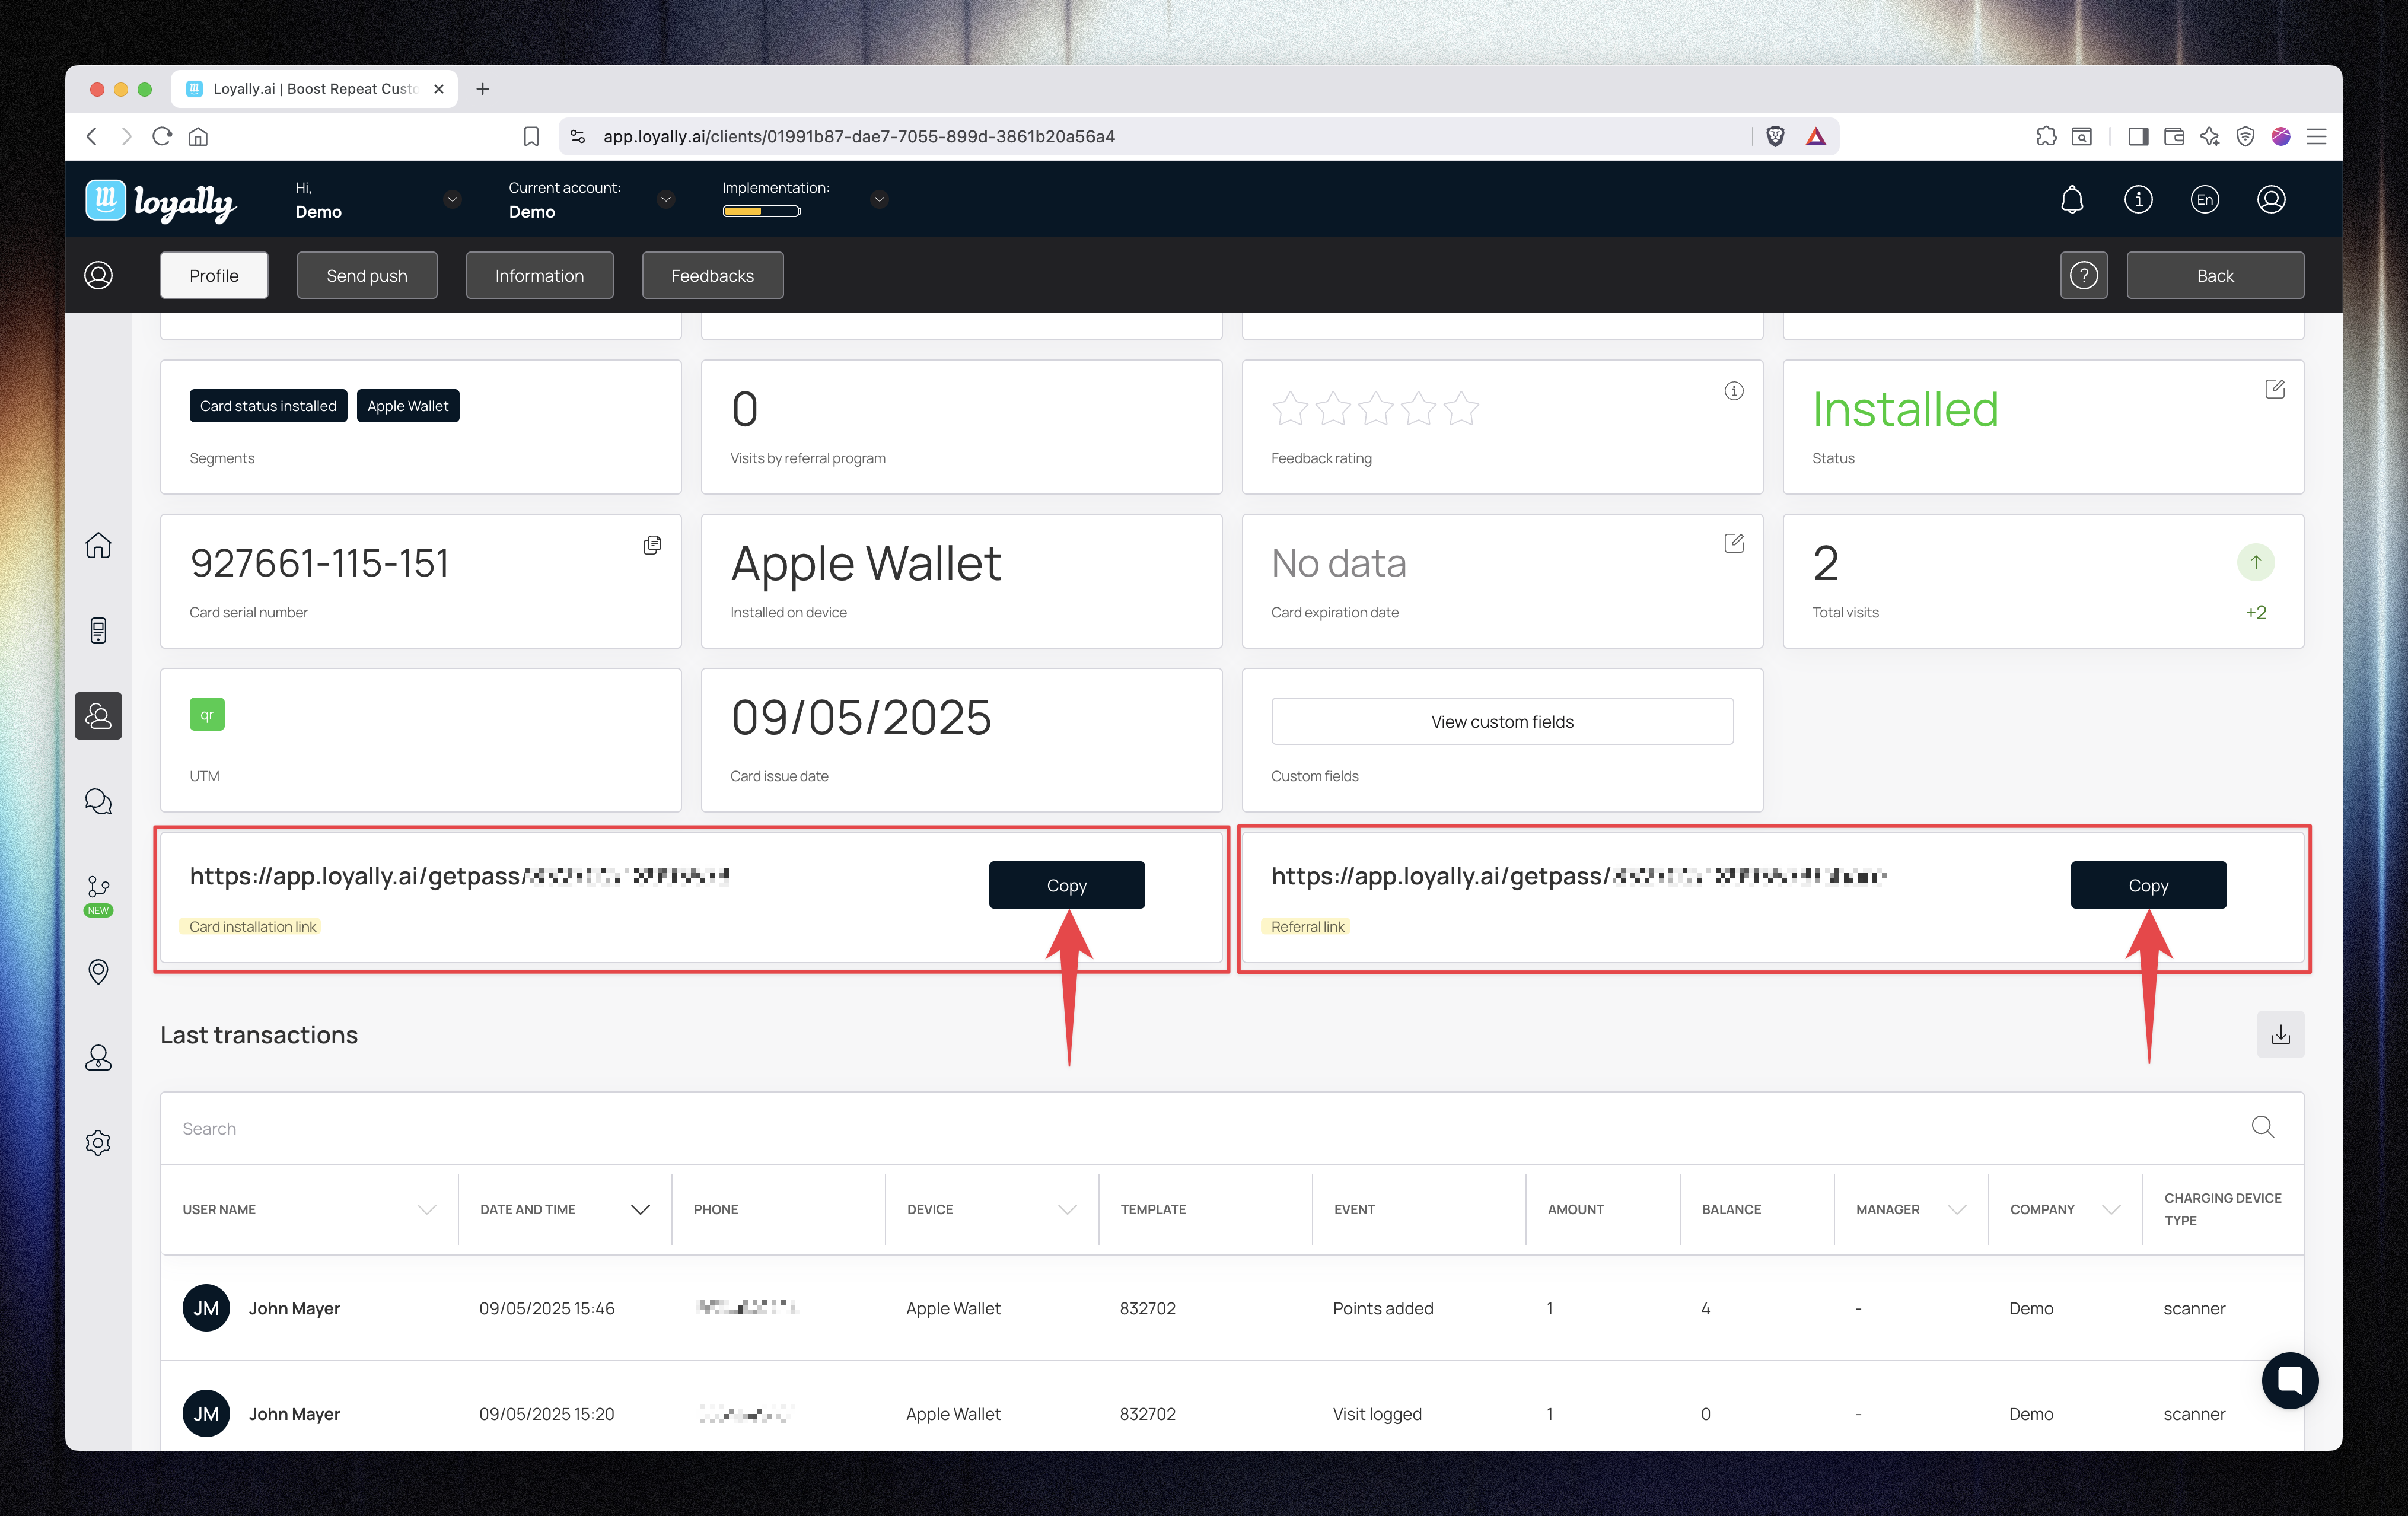
You can access and copy the customer’s unique card links directly from their profile:
Card Installation Link → Click Copy to resend or share the card link.
Referral Link → Click Copy to share the customer’s personal referral link.
These links are unique for each customer and can be used for reinstallation or referrals.
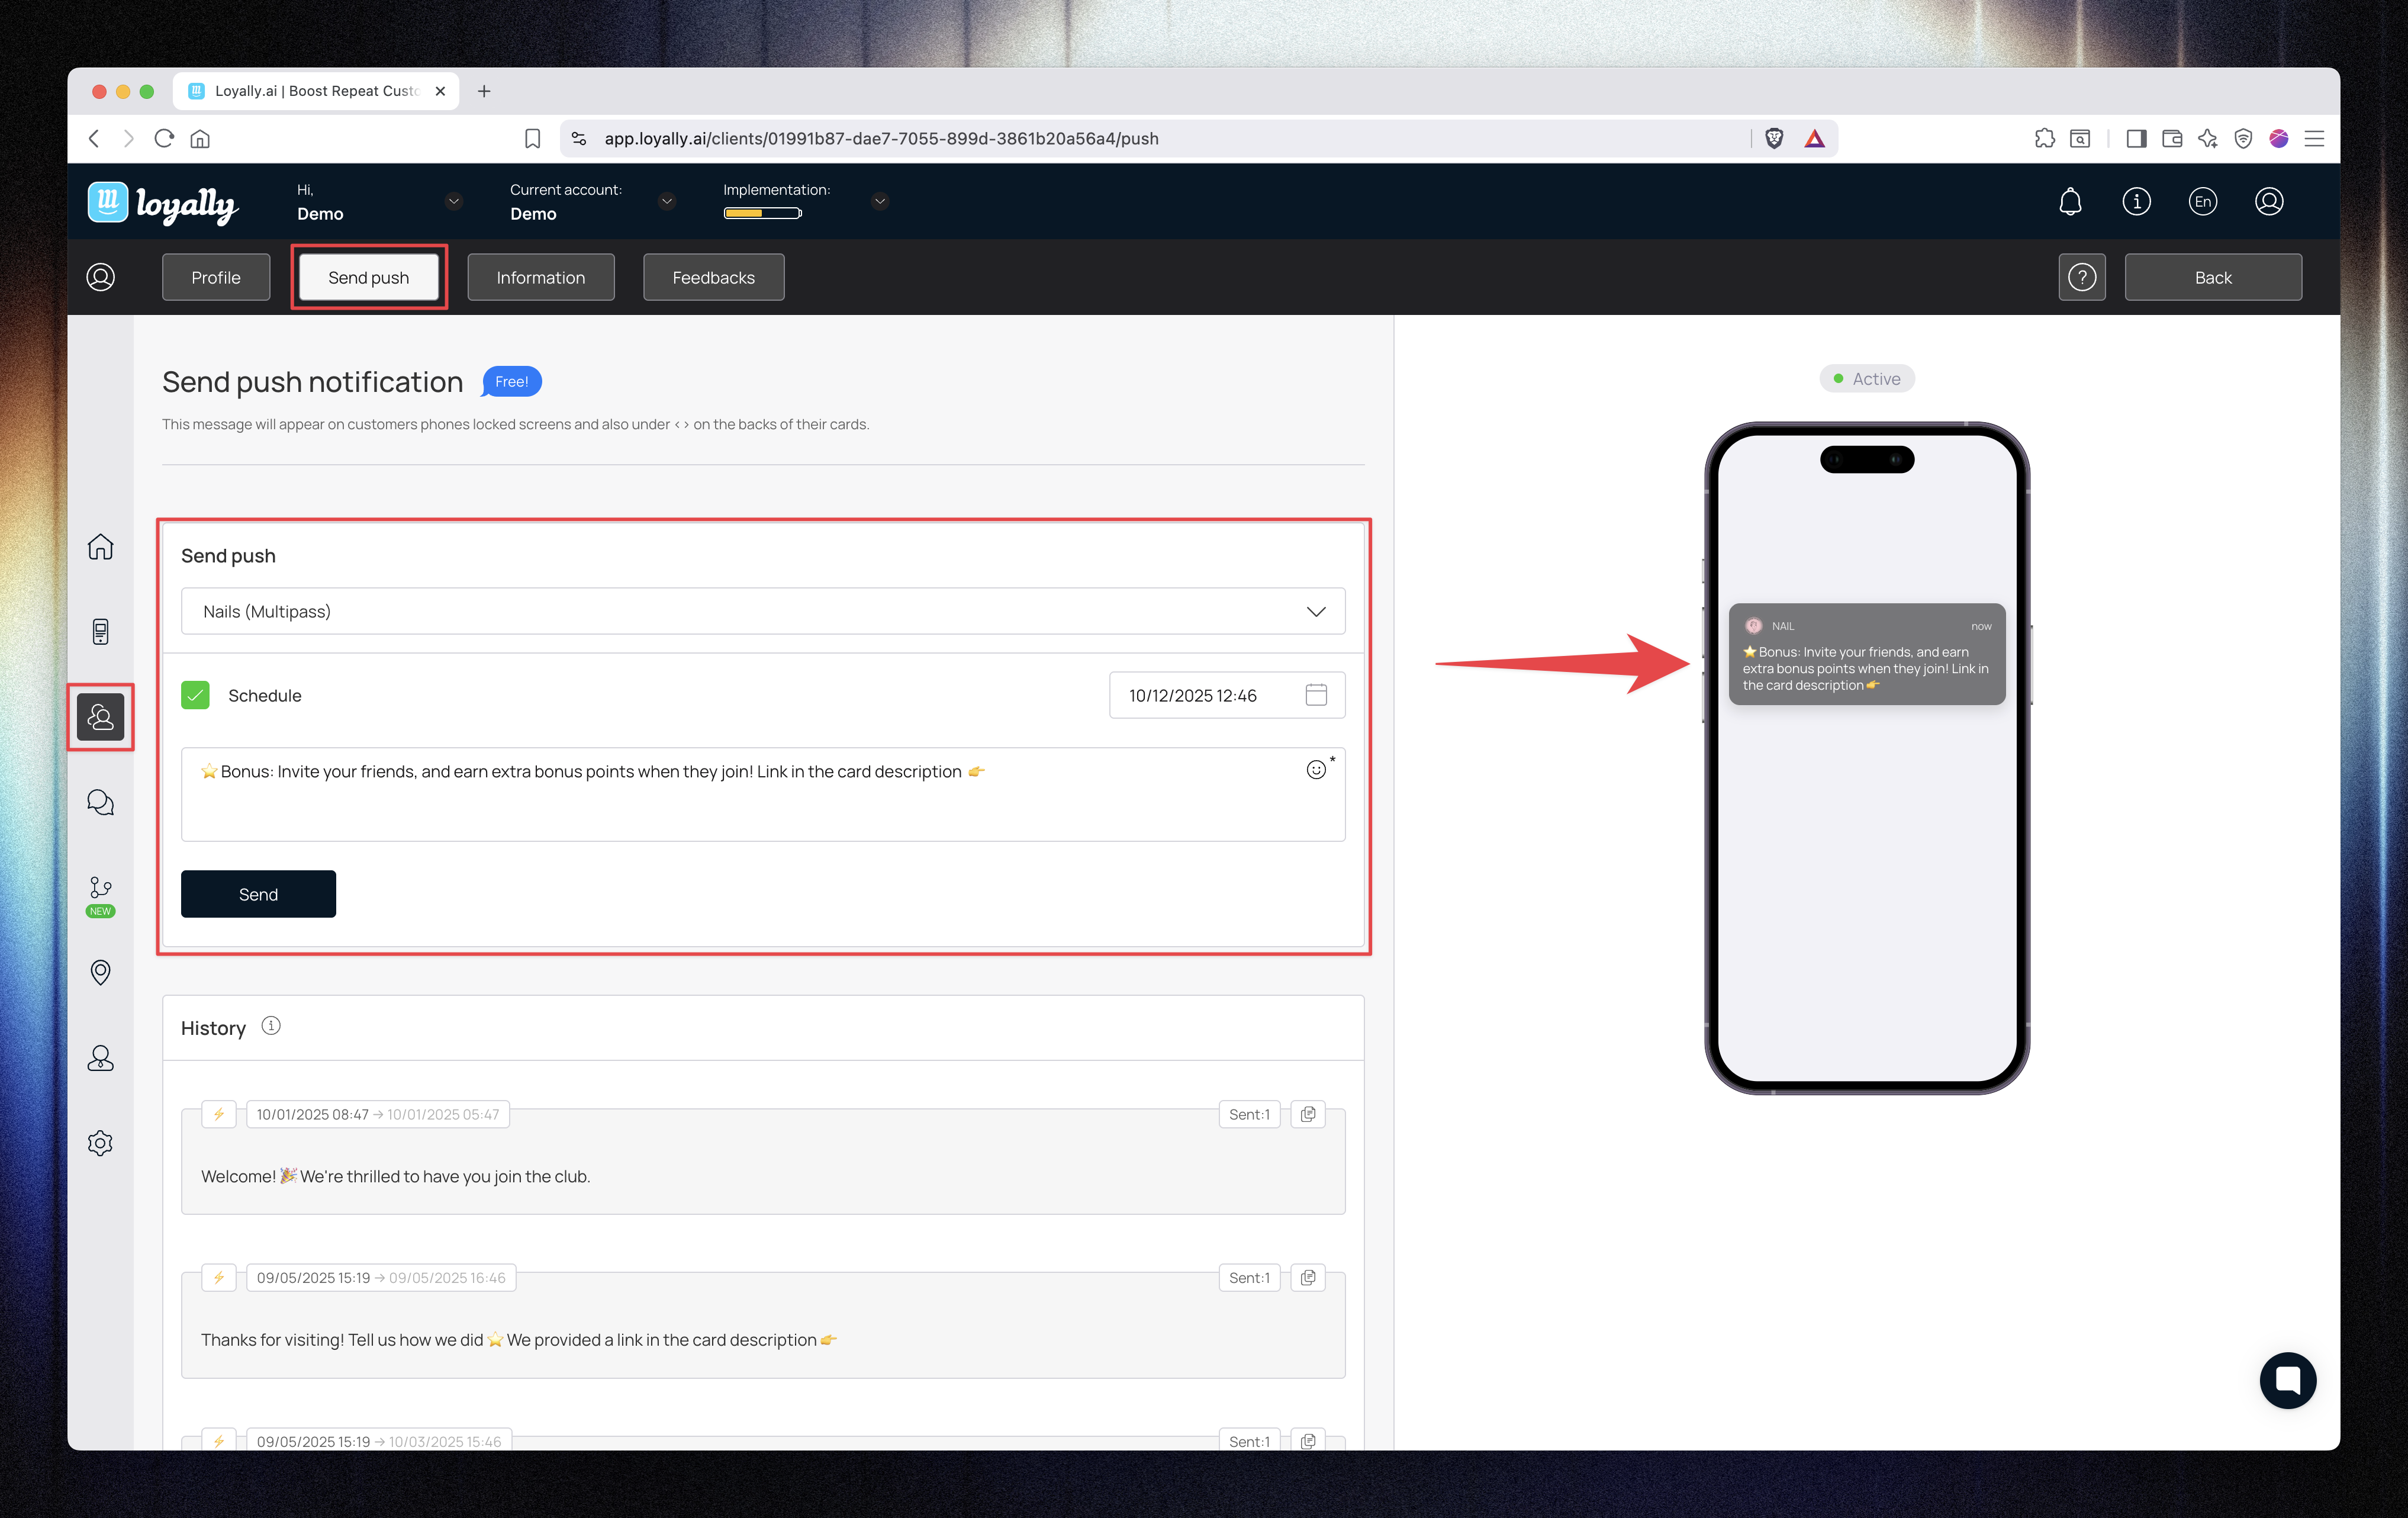
You can send a push notification directly to an individual customer from their profile.
Open the Send Push tab.
Select the card to send from.
(Optional) Schedule the message.
Enter your message content.
Click Send.
✅ The message will be delivered only to that customer’s device.
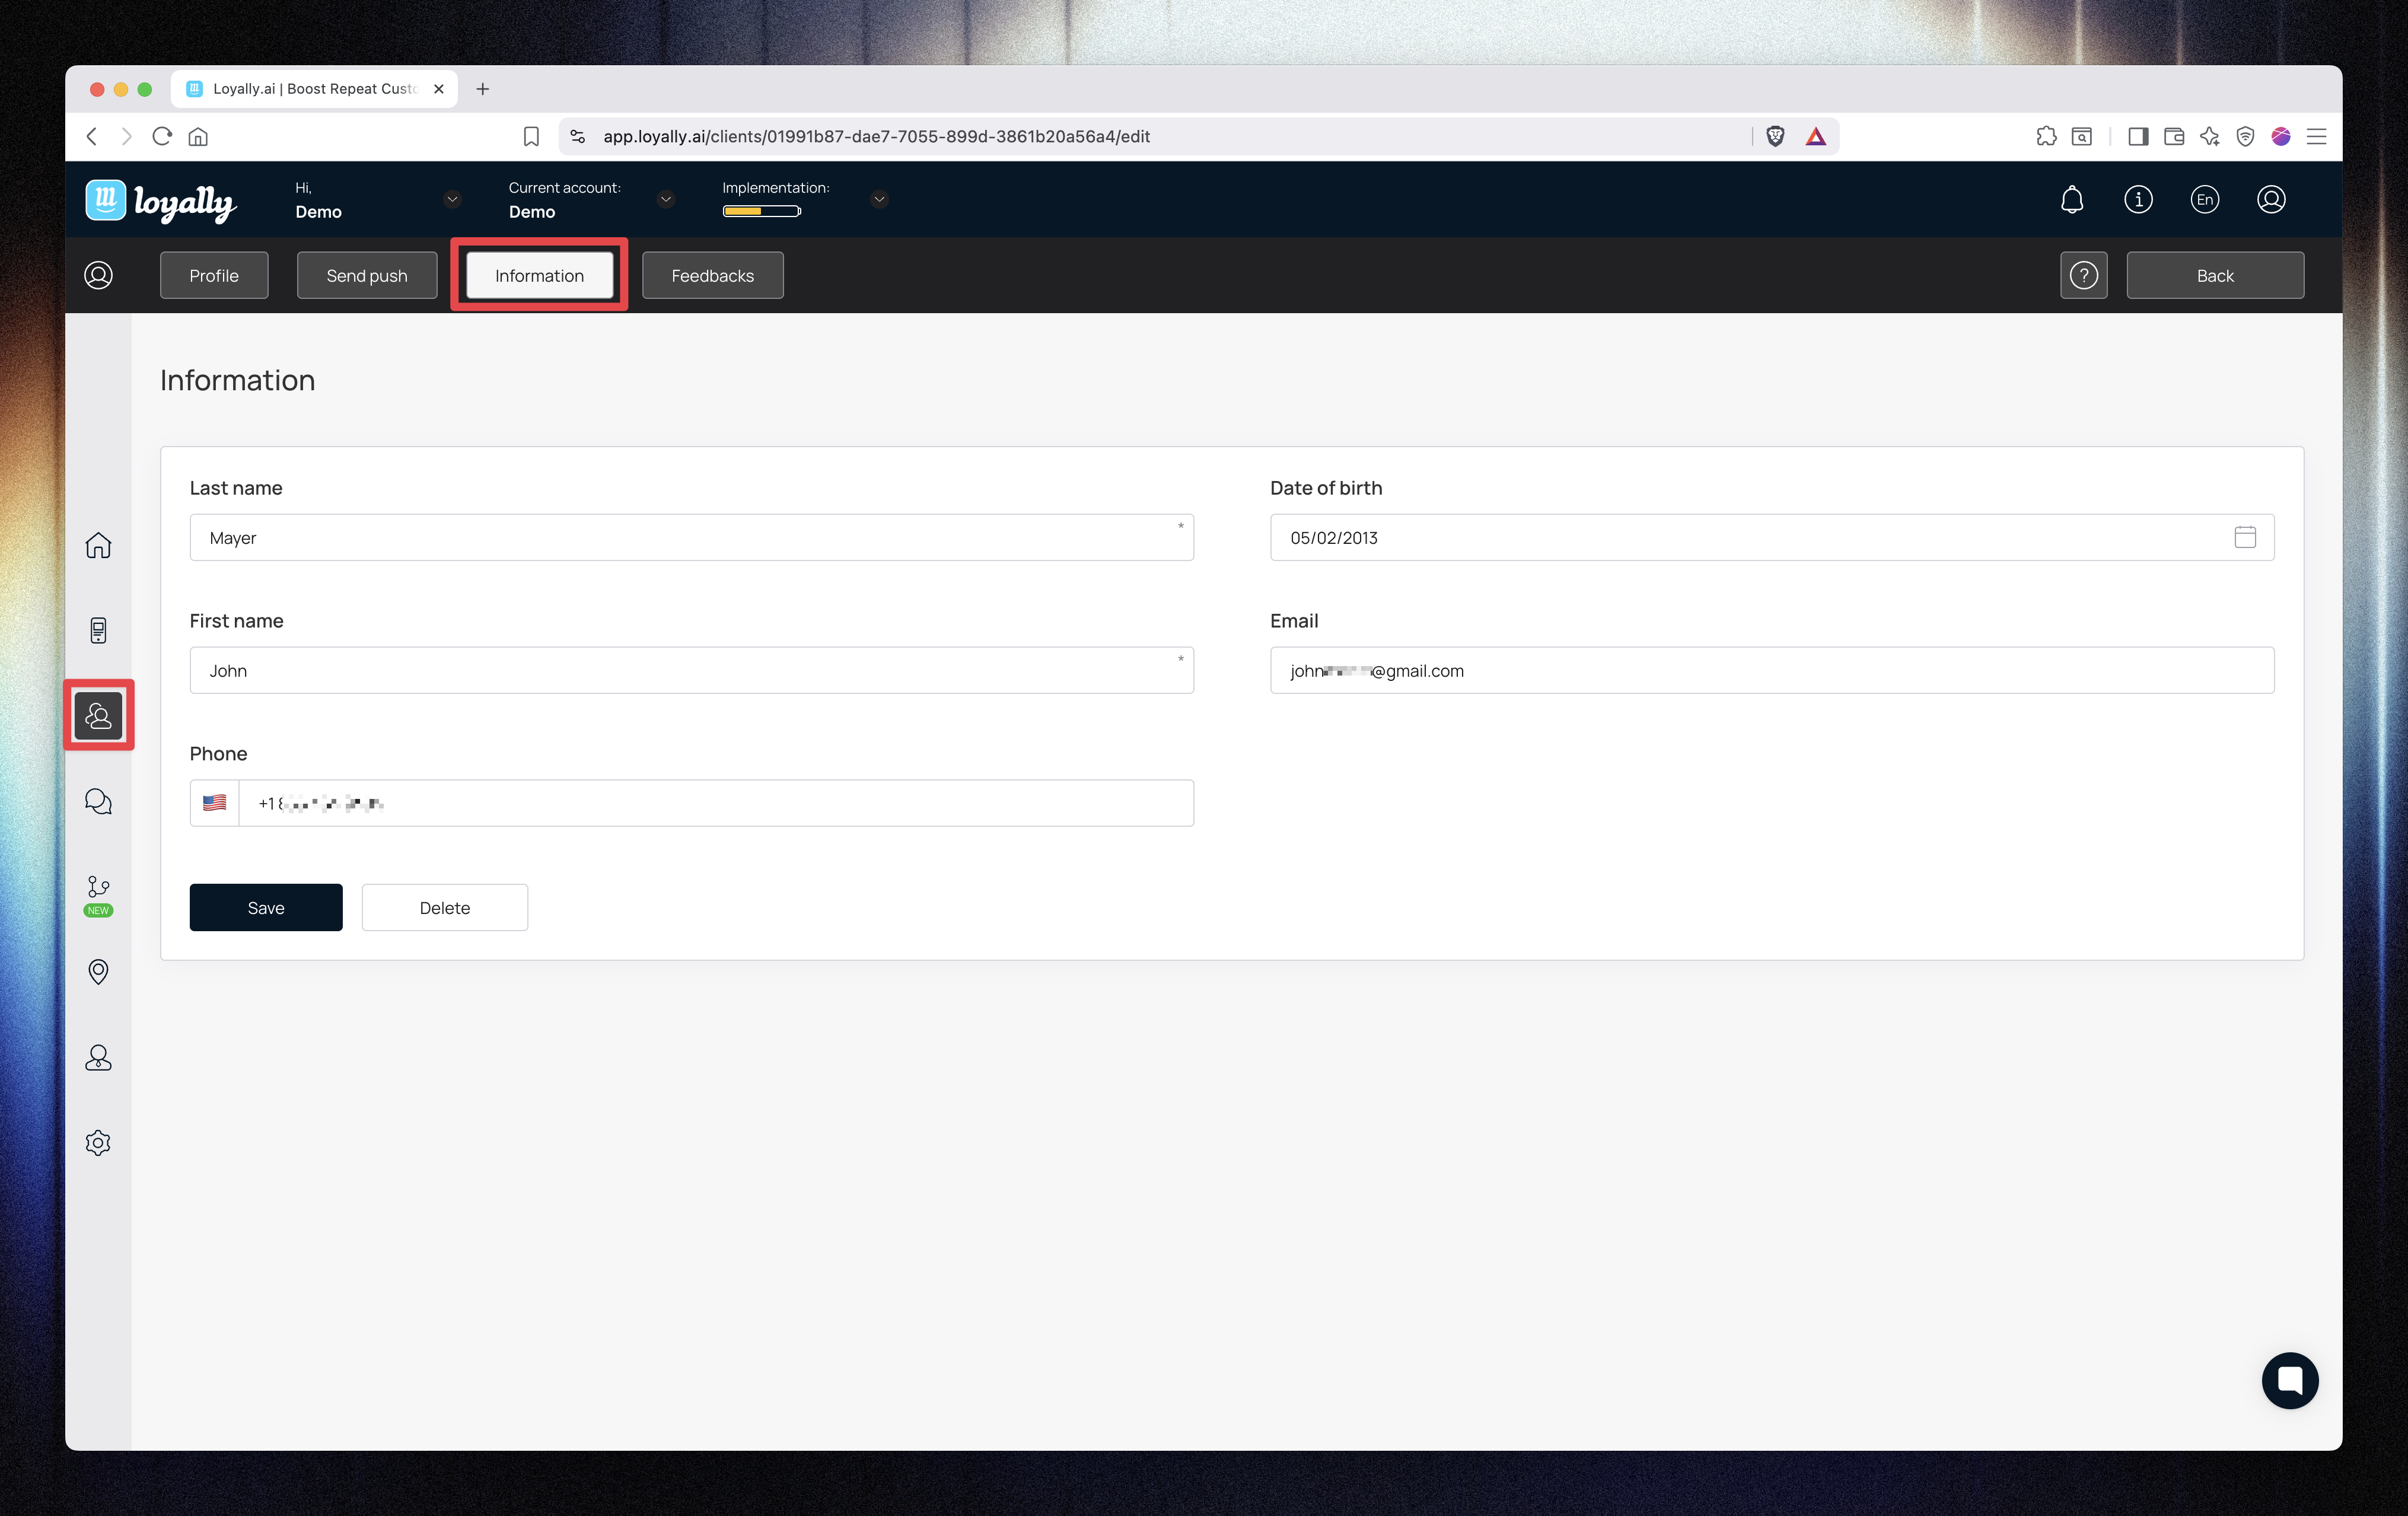
The Information tab displays the customer’s personal and registration details:
Full name, phone number, and email address
Registration and issue dates
Contact and device details
You can also update personal information here.
(Note: Changes made in this section will not affect the card’s stored personal data.)
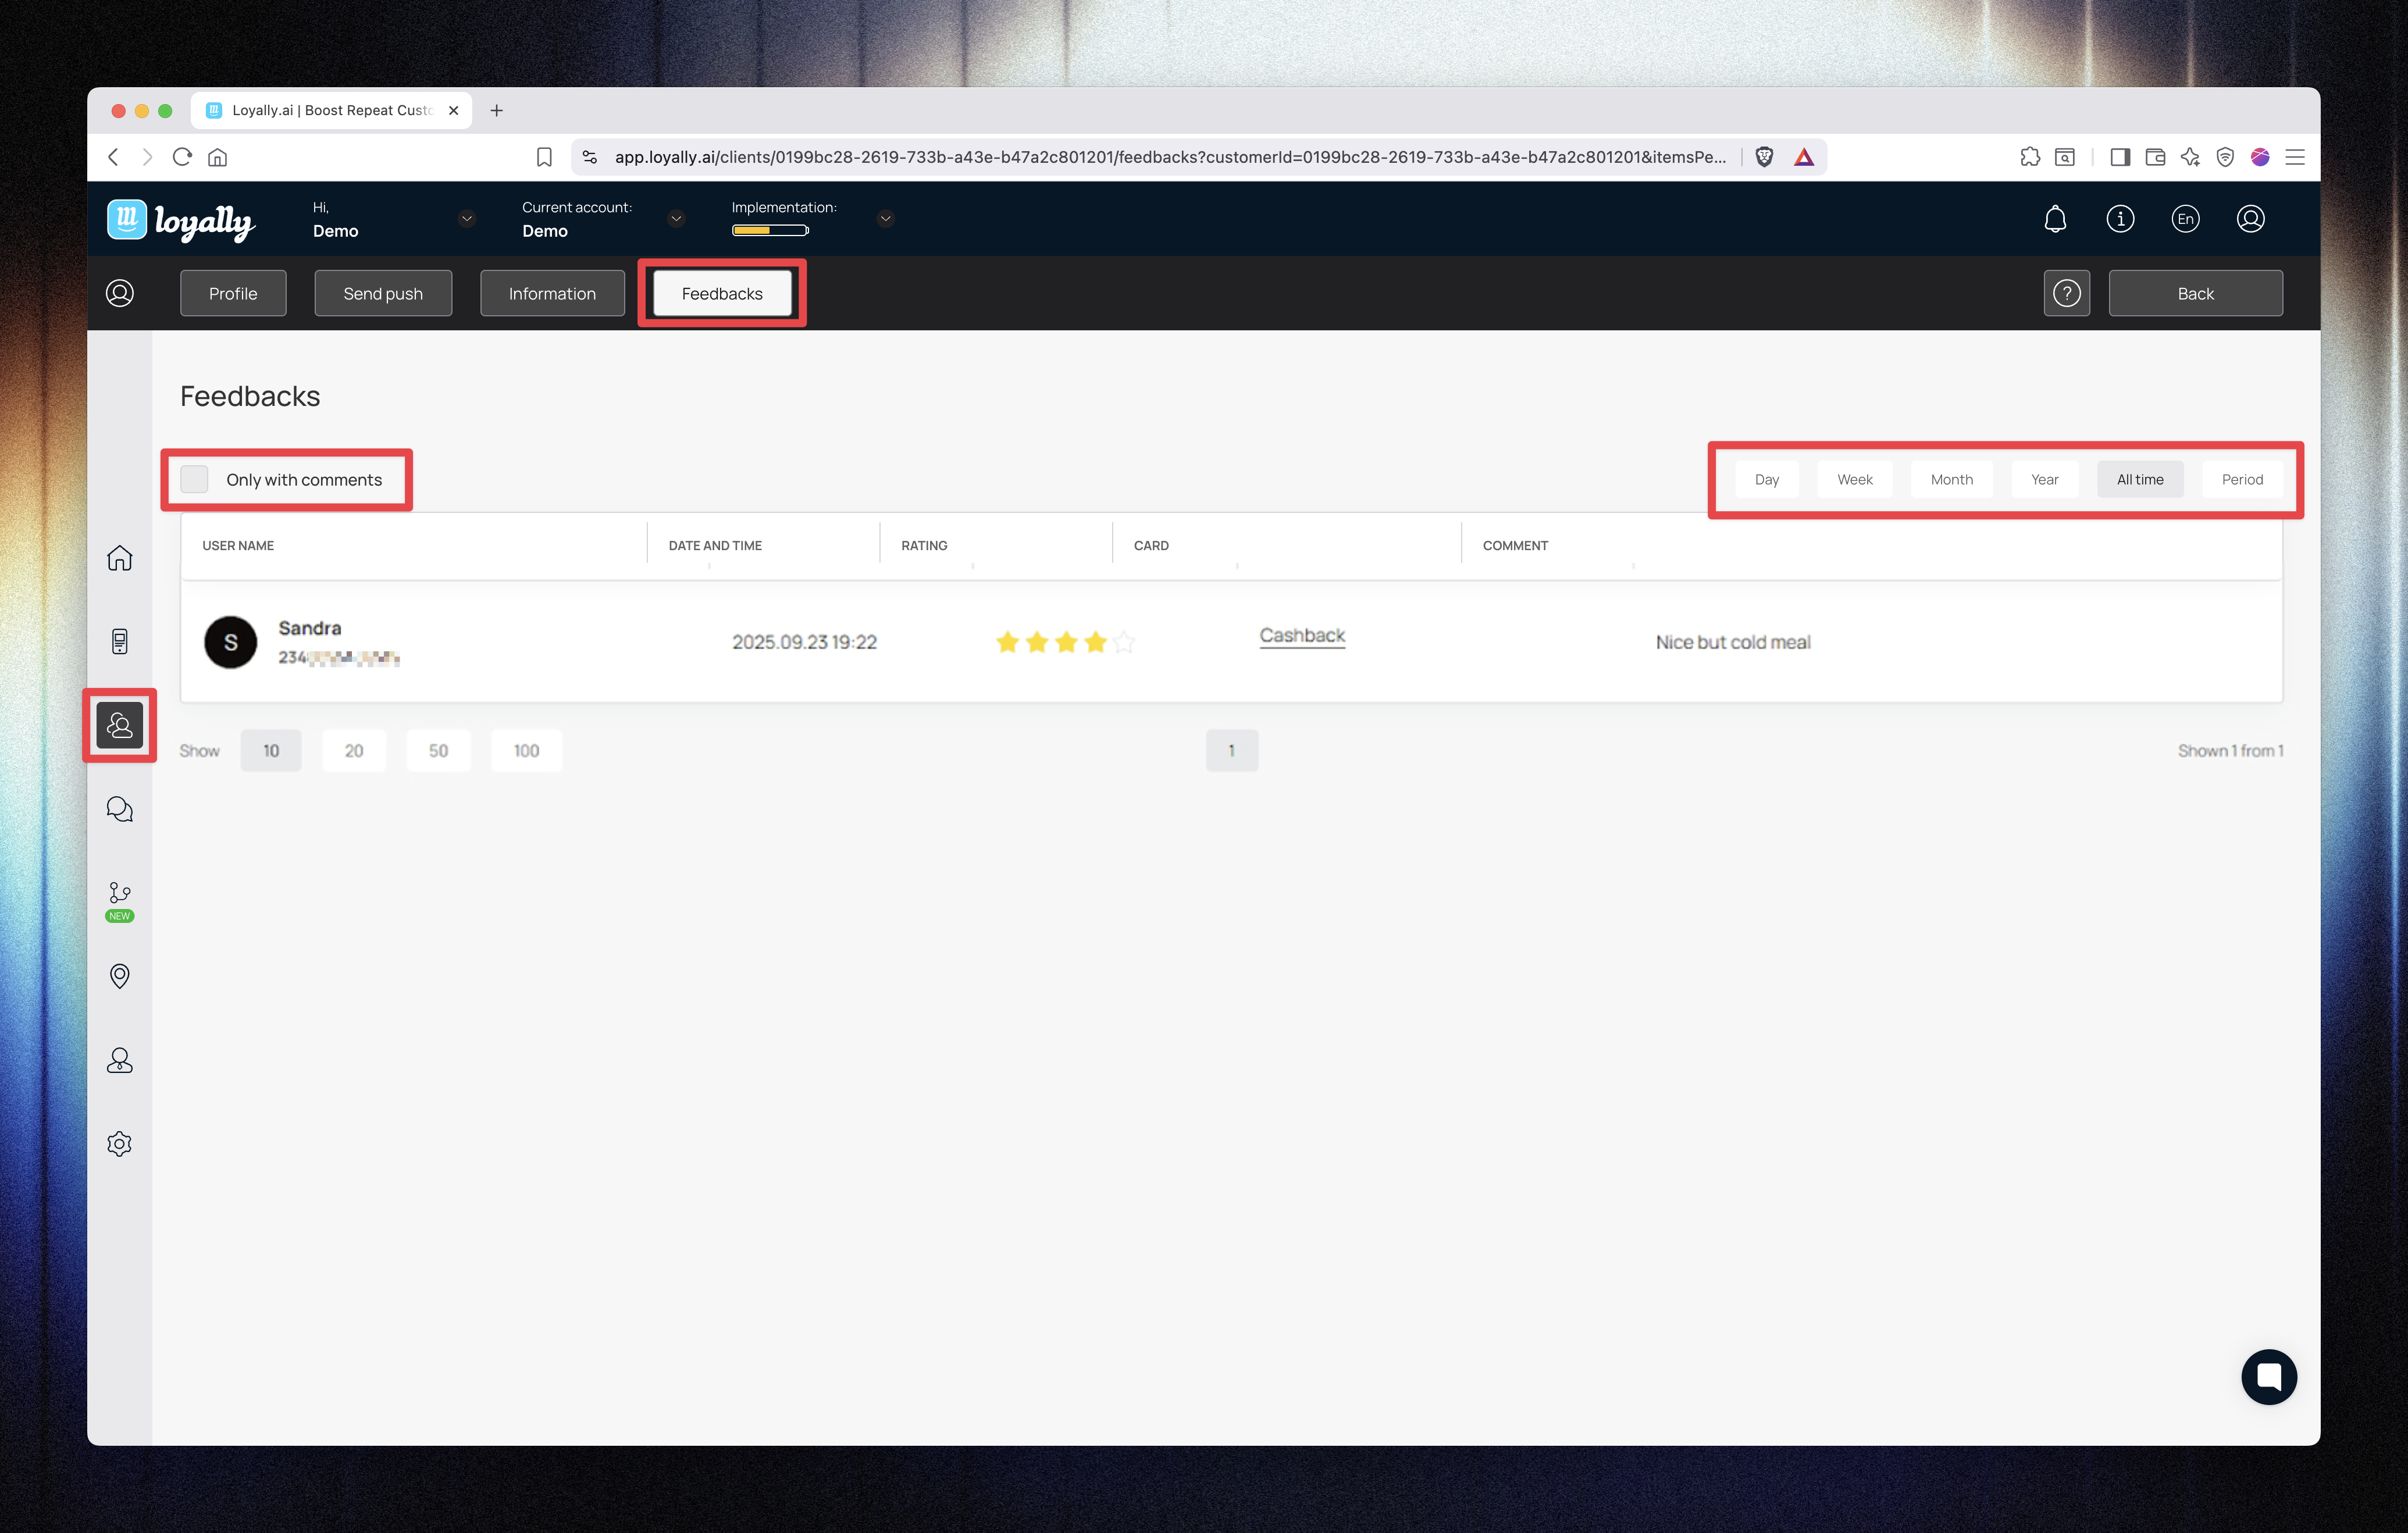
Use the Feedback tab to view and filter customer feedback.
You can:
Filter by day, week, month, year, all time, or a custom period.
Enable Only comments to display feedback that includes written messages.
This helps you monitor satisfaction and follow up with engaged customers.
The Customer Profile (Multipass Card) view provides a detailed overview of each customer’s visit and bonus history.
You can manage visit balances, adjust bonus points, track LTV, and communicate directly with customers — all from a single interface.