Connect your Mailgun account for direct Email communication with your customers!
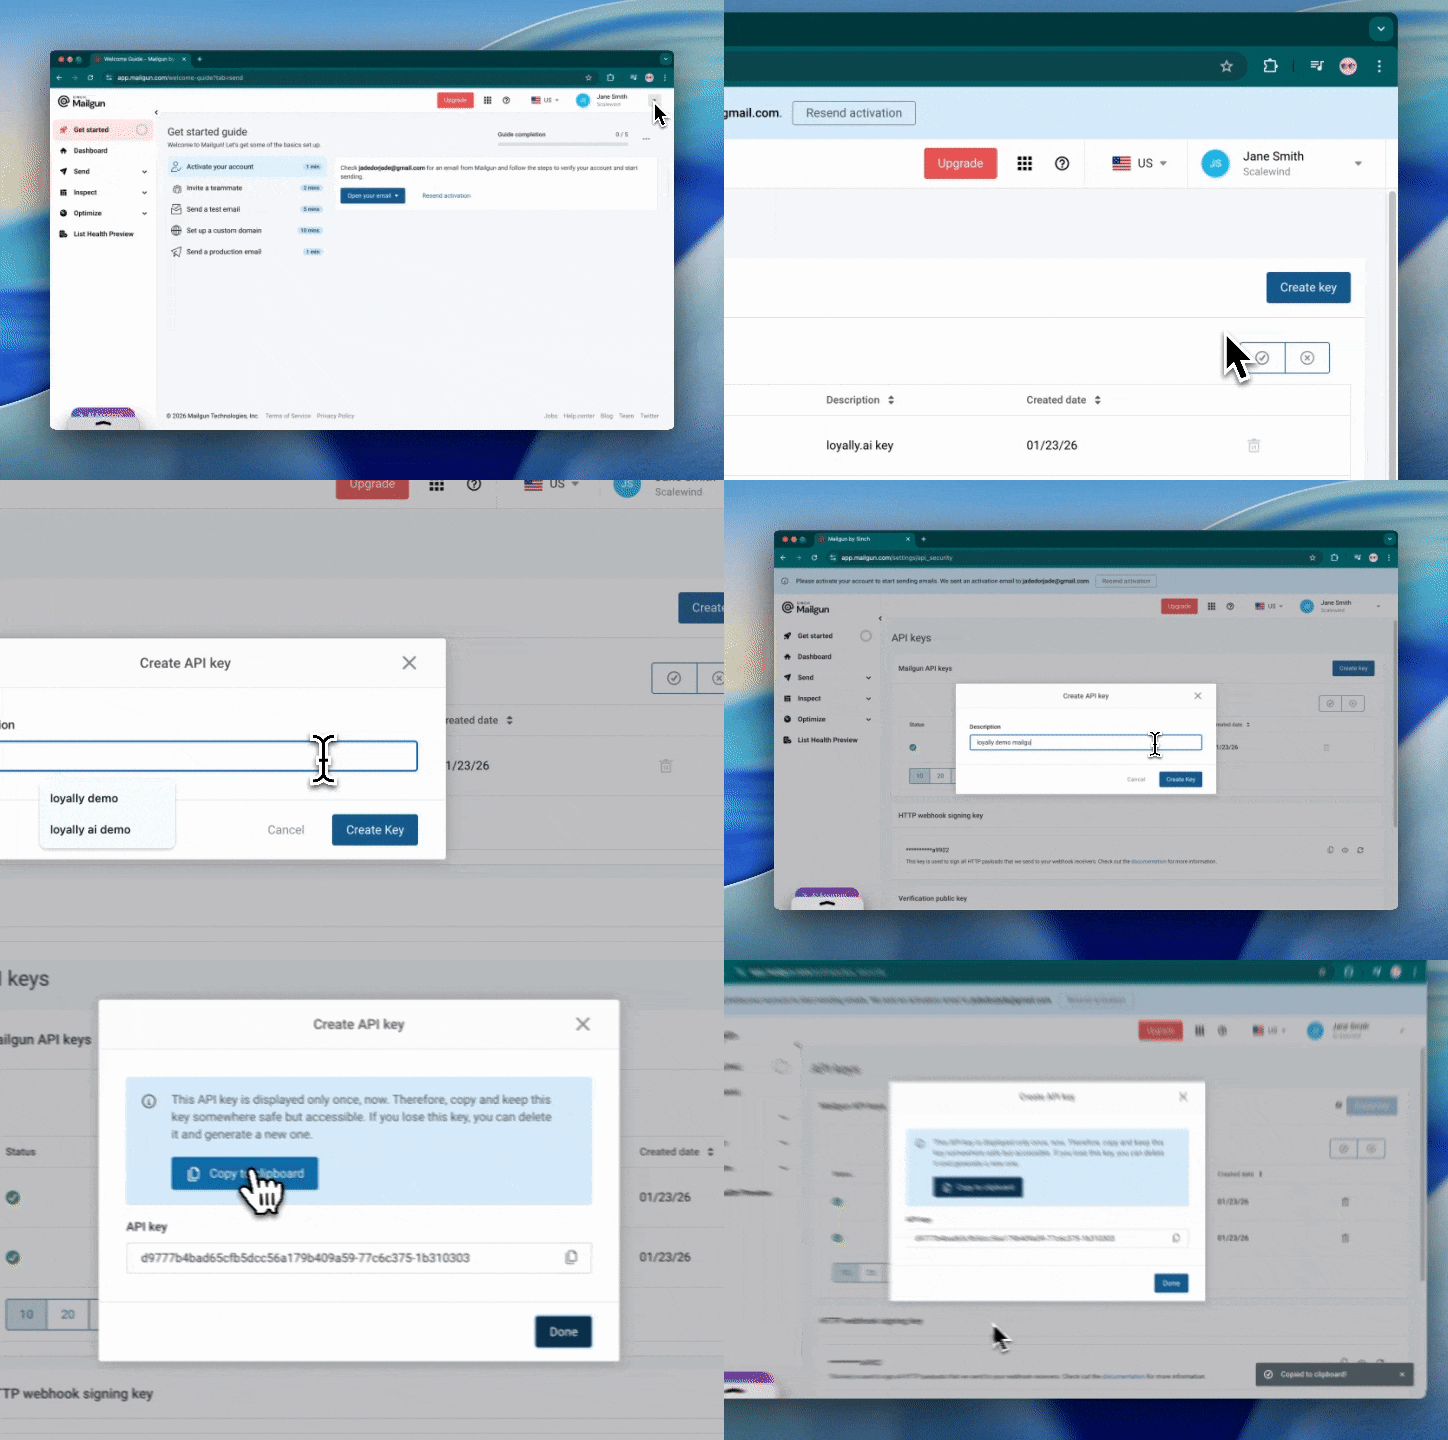
Log in to your Mailgun Control Panel.
Click on the drop down arrow next to your Profile Name or Avatar in the top-right corner.
Select ‘API Security’ from the dropdown menu.
Find the Mailgun API keys section and click the ’Create key’ button.
Enter a description (e.g., "Main Web App") and, if available on your plan, select a Role (Admin, Developer, etc.).
Click ‘Create Key’ then copy the generated API key.
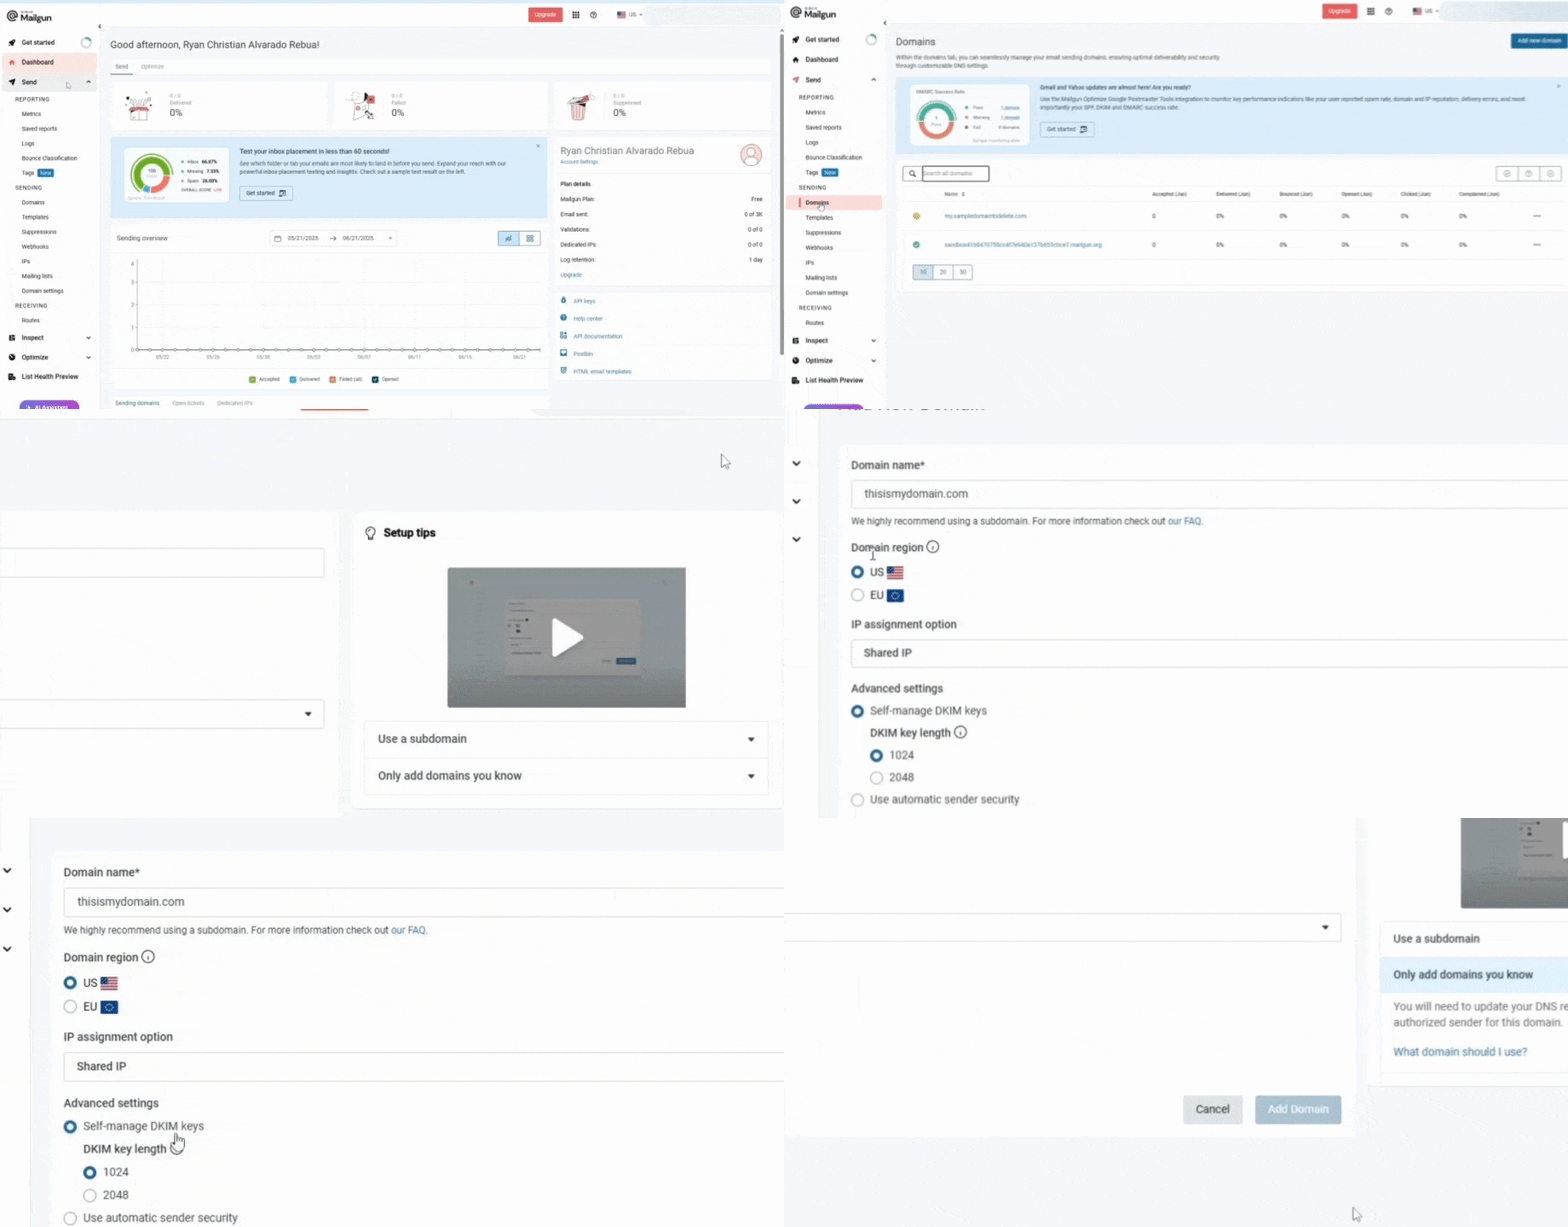
In the Mailgun Control Panel, navigate to Sending in the left-hand sidebar and select Domains.
Click the ‘Add New Domain’ button in the top-right corner.
Enter your domain name. We recommend using a subdomain for your loyalty emails (e.g., rewards.yourdomain.com). This protects the reputation of your main corporate email domain.
Choose the region (US or EU) that matches where your loyalty app data is hosted then click ‘Add Domain’.
After adding the domain, Mailgun will provide several DNS records. You need to log in to your domain registrar (e.g., GoDaddy, Namecheap, Cloudflare) and add these specific entries:
TXT Records (SPF & DKIM) - These act as your "digital signature." Copy the Hostname and Value for both records from Mailgun and paste them into your DNS settings.
MX Records - These tell the internet where to send email-related information. Add two MX records with the priorities and values provided by Mailgun.
CNAME Record - This is used for tracking when customers click on reward links in your emails.
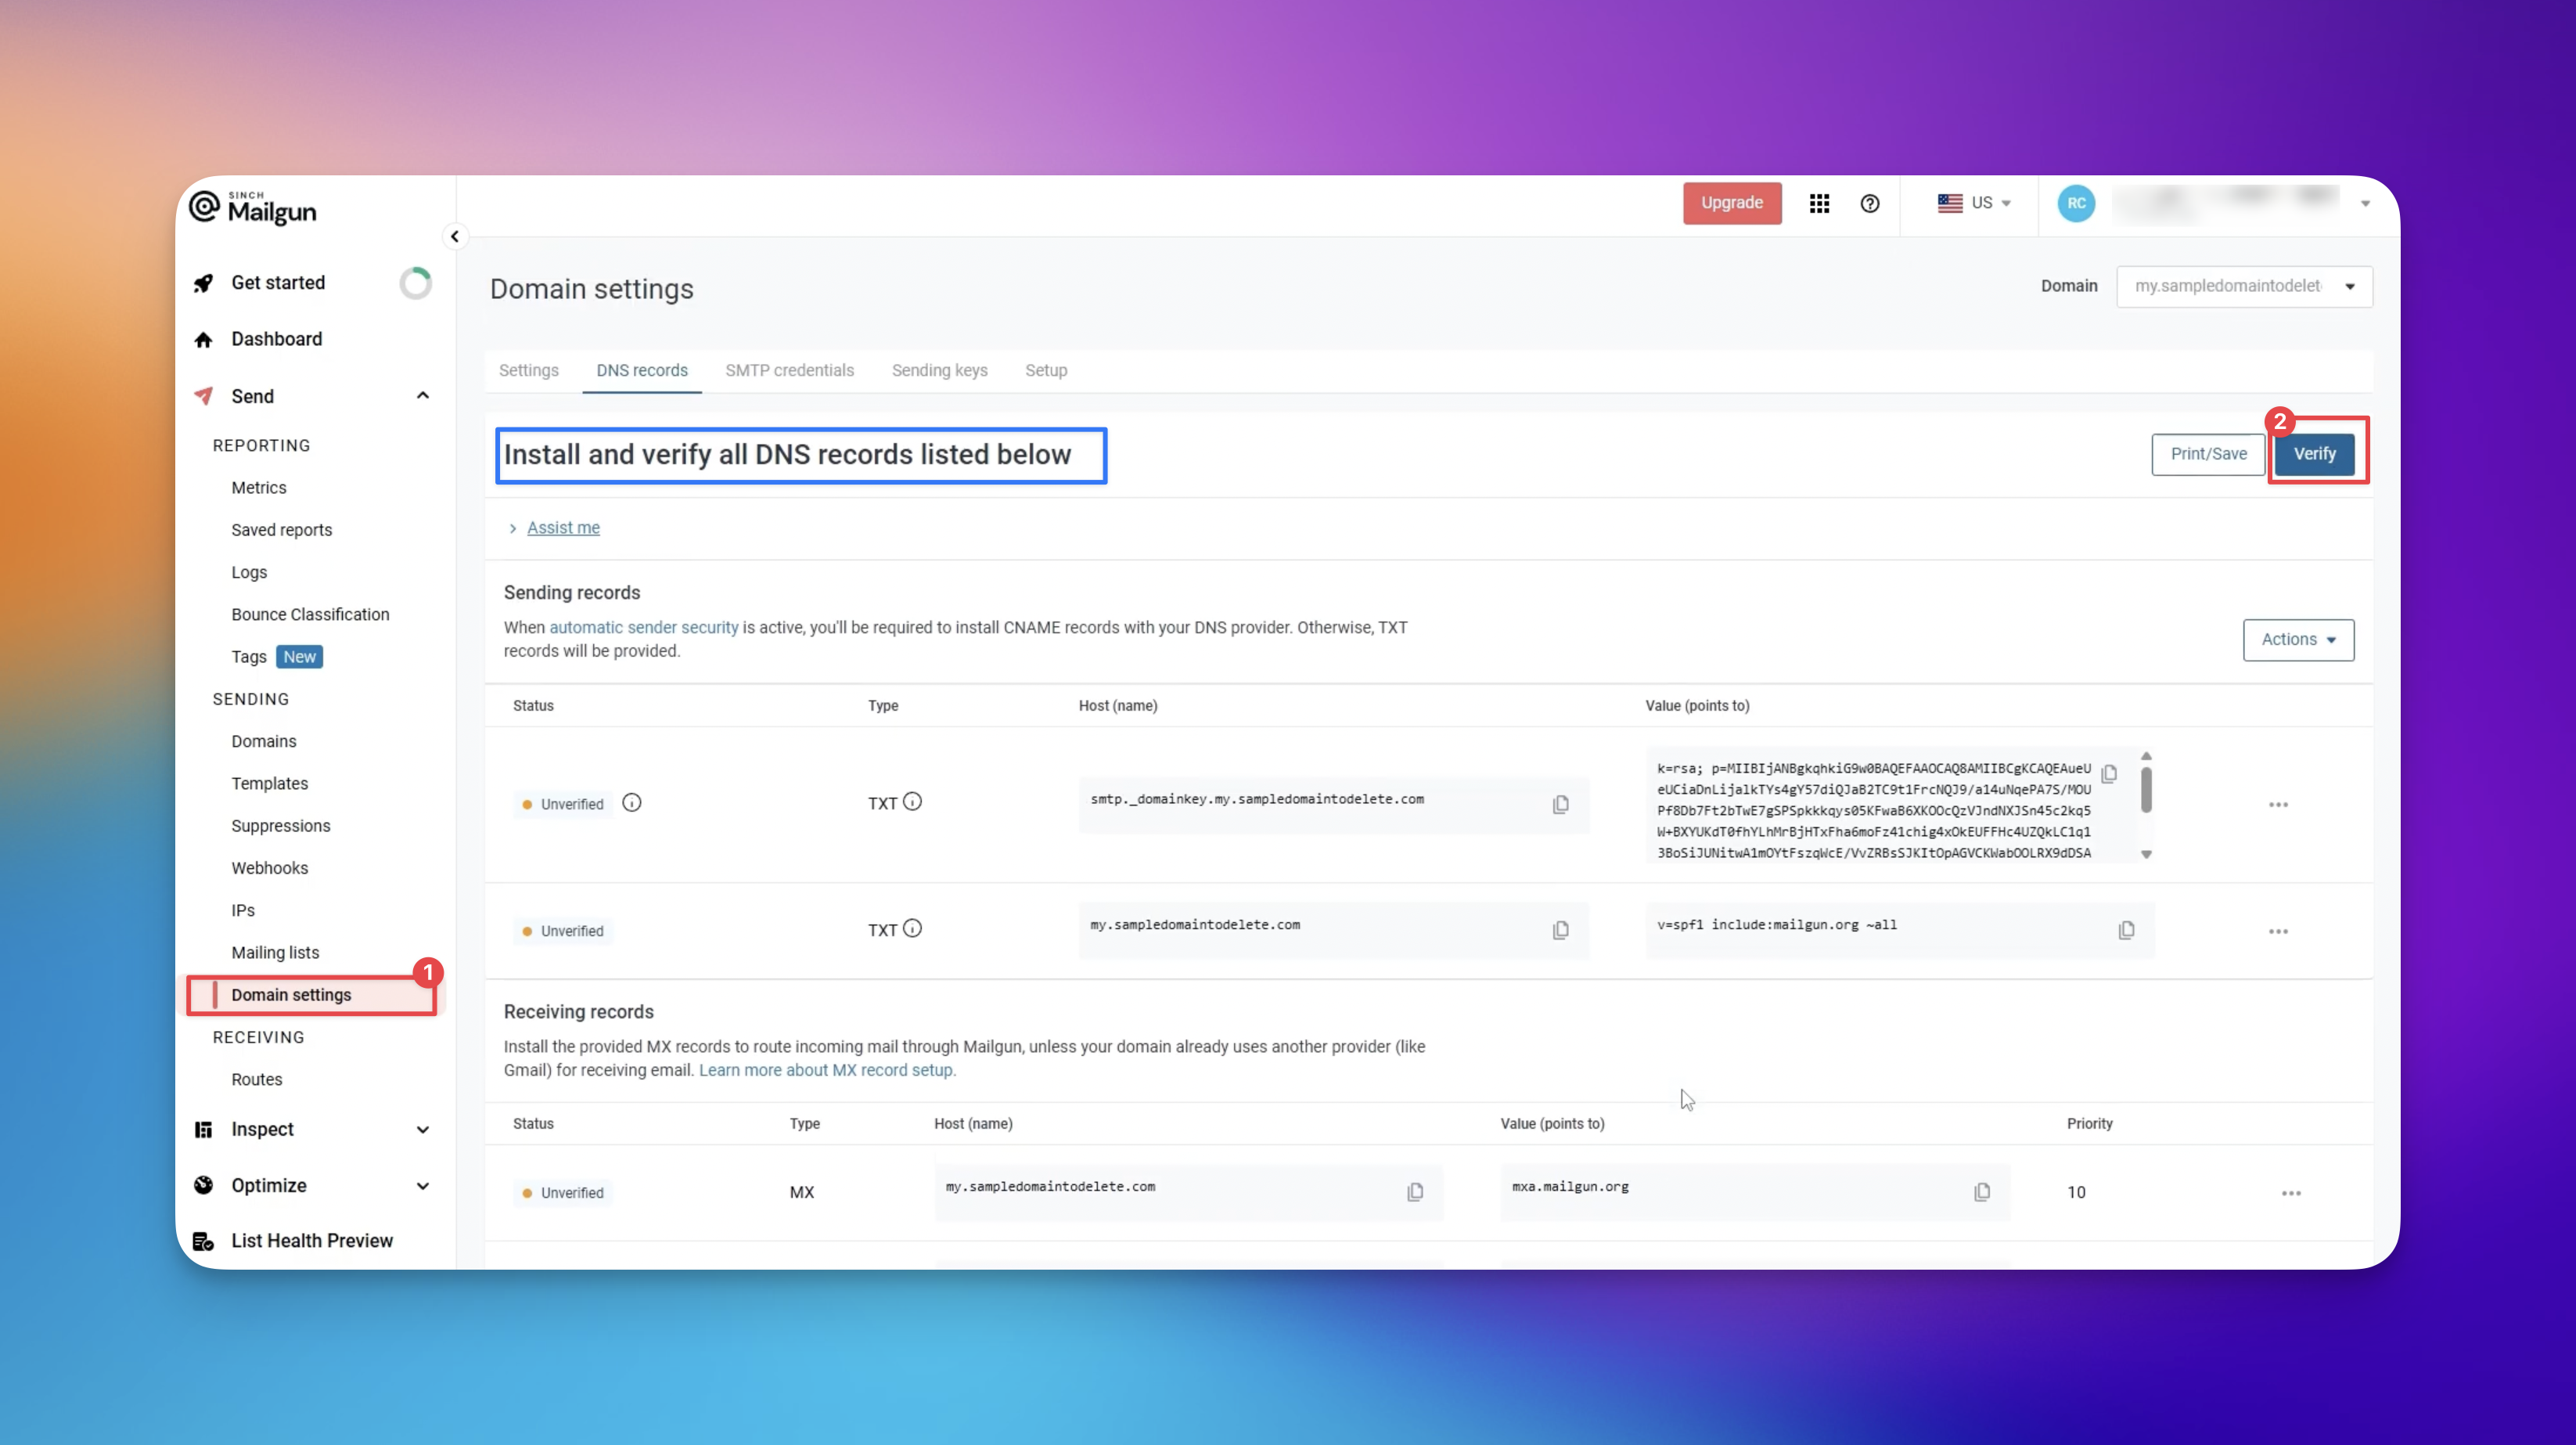
Once you have added the records to your DNS provider, return to the Mailgun Domains page.
Click on the domain you just added.
Click the Verify DNS Settings button.
Once you see green checkmarks next to your records, your domain is Active.

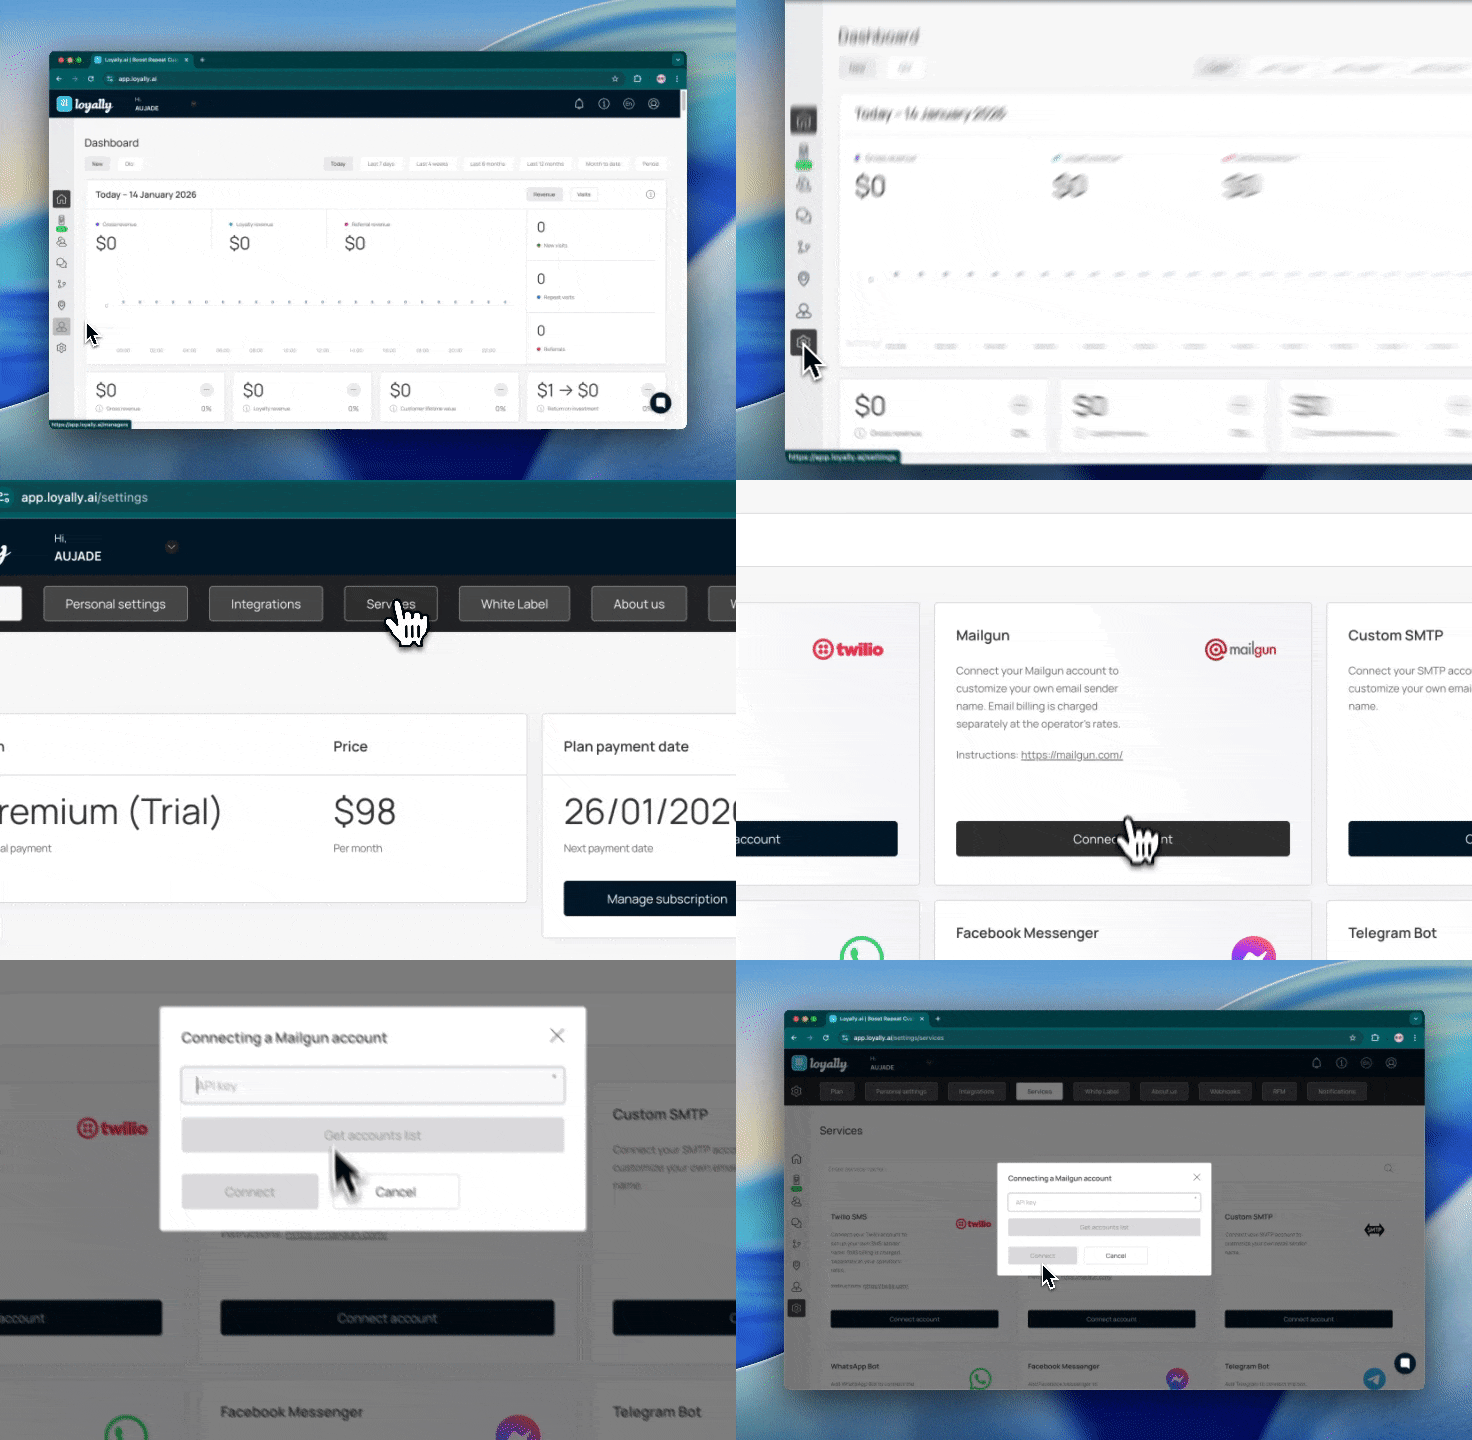
Sign in to Loyally.ai and go to 'Settings’ in the Menu Panel.
Navigate to 'Services' section.
Under "Mailgun", click 'Connect account' fill in your API Key from your Mailgun Account then select ‘Get accounts list’ and click ‘Connect‘
Creating an email campaign
How to create your email campaign