Connect your WhatsApp Business API with Loyally to send automated messages, point updates, and loyalty offers directly through WhatsApp.
This setup uses the Meta (Facebook) Developer platform to link your verified WhatsApp Business number with Loyally.
Before starting, make sure you have:
A Facebook Business Account
Access to Meta for Developers
A WhatsApp Business Account connected to your Facebook Business Manager
A Facebook Page linked to the same Business Manager
Admin access in your Loyally account
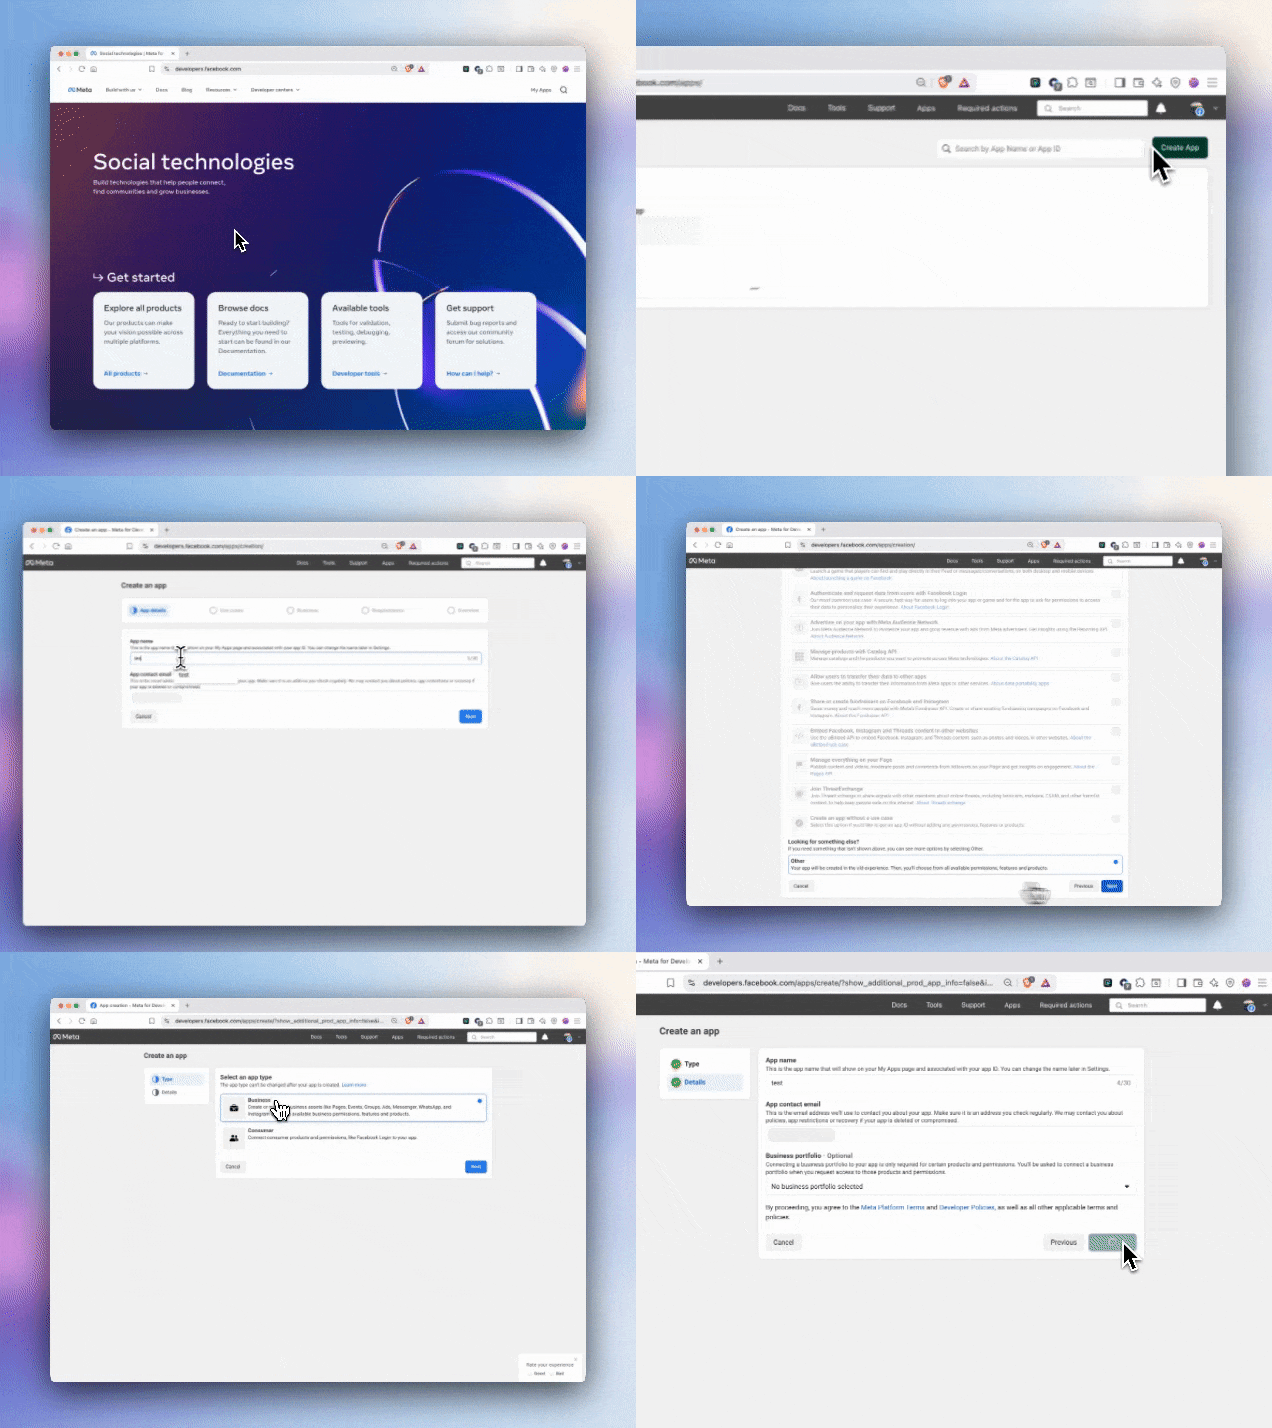
From the top-right, select My Apps → Create App.
On the App Type screen, select Other.
Then choose Business.
Enter your Application Name, email, and select or create a Business Manager.
Click Create App.
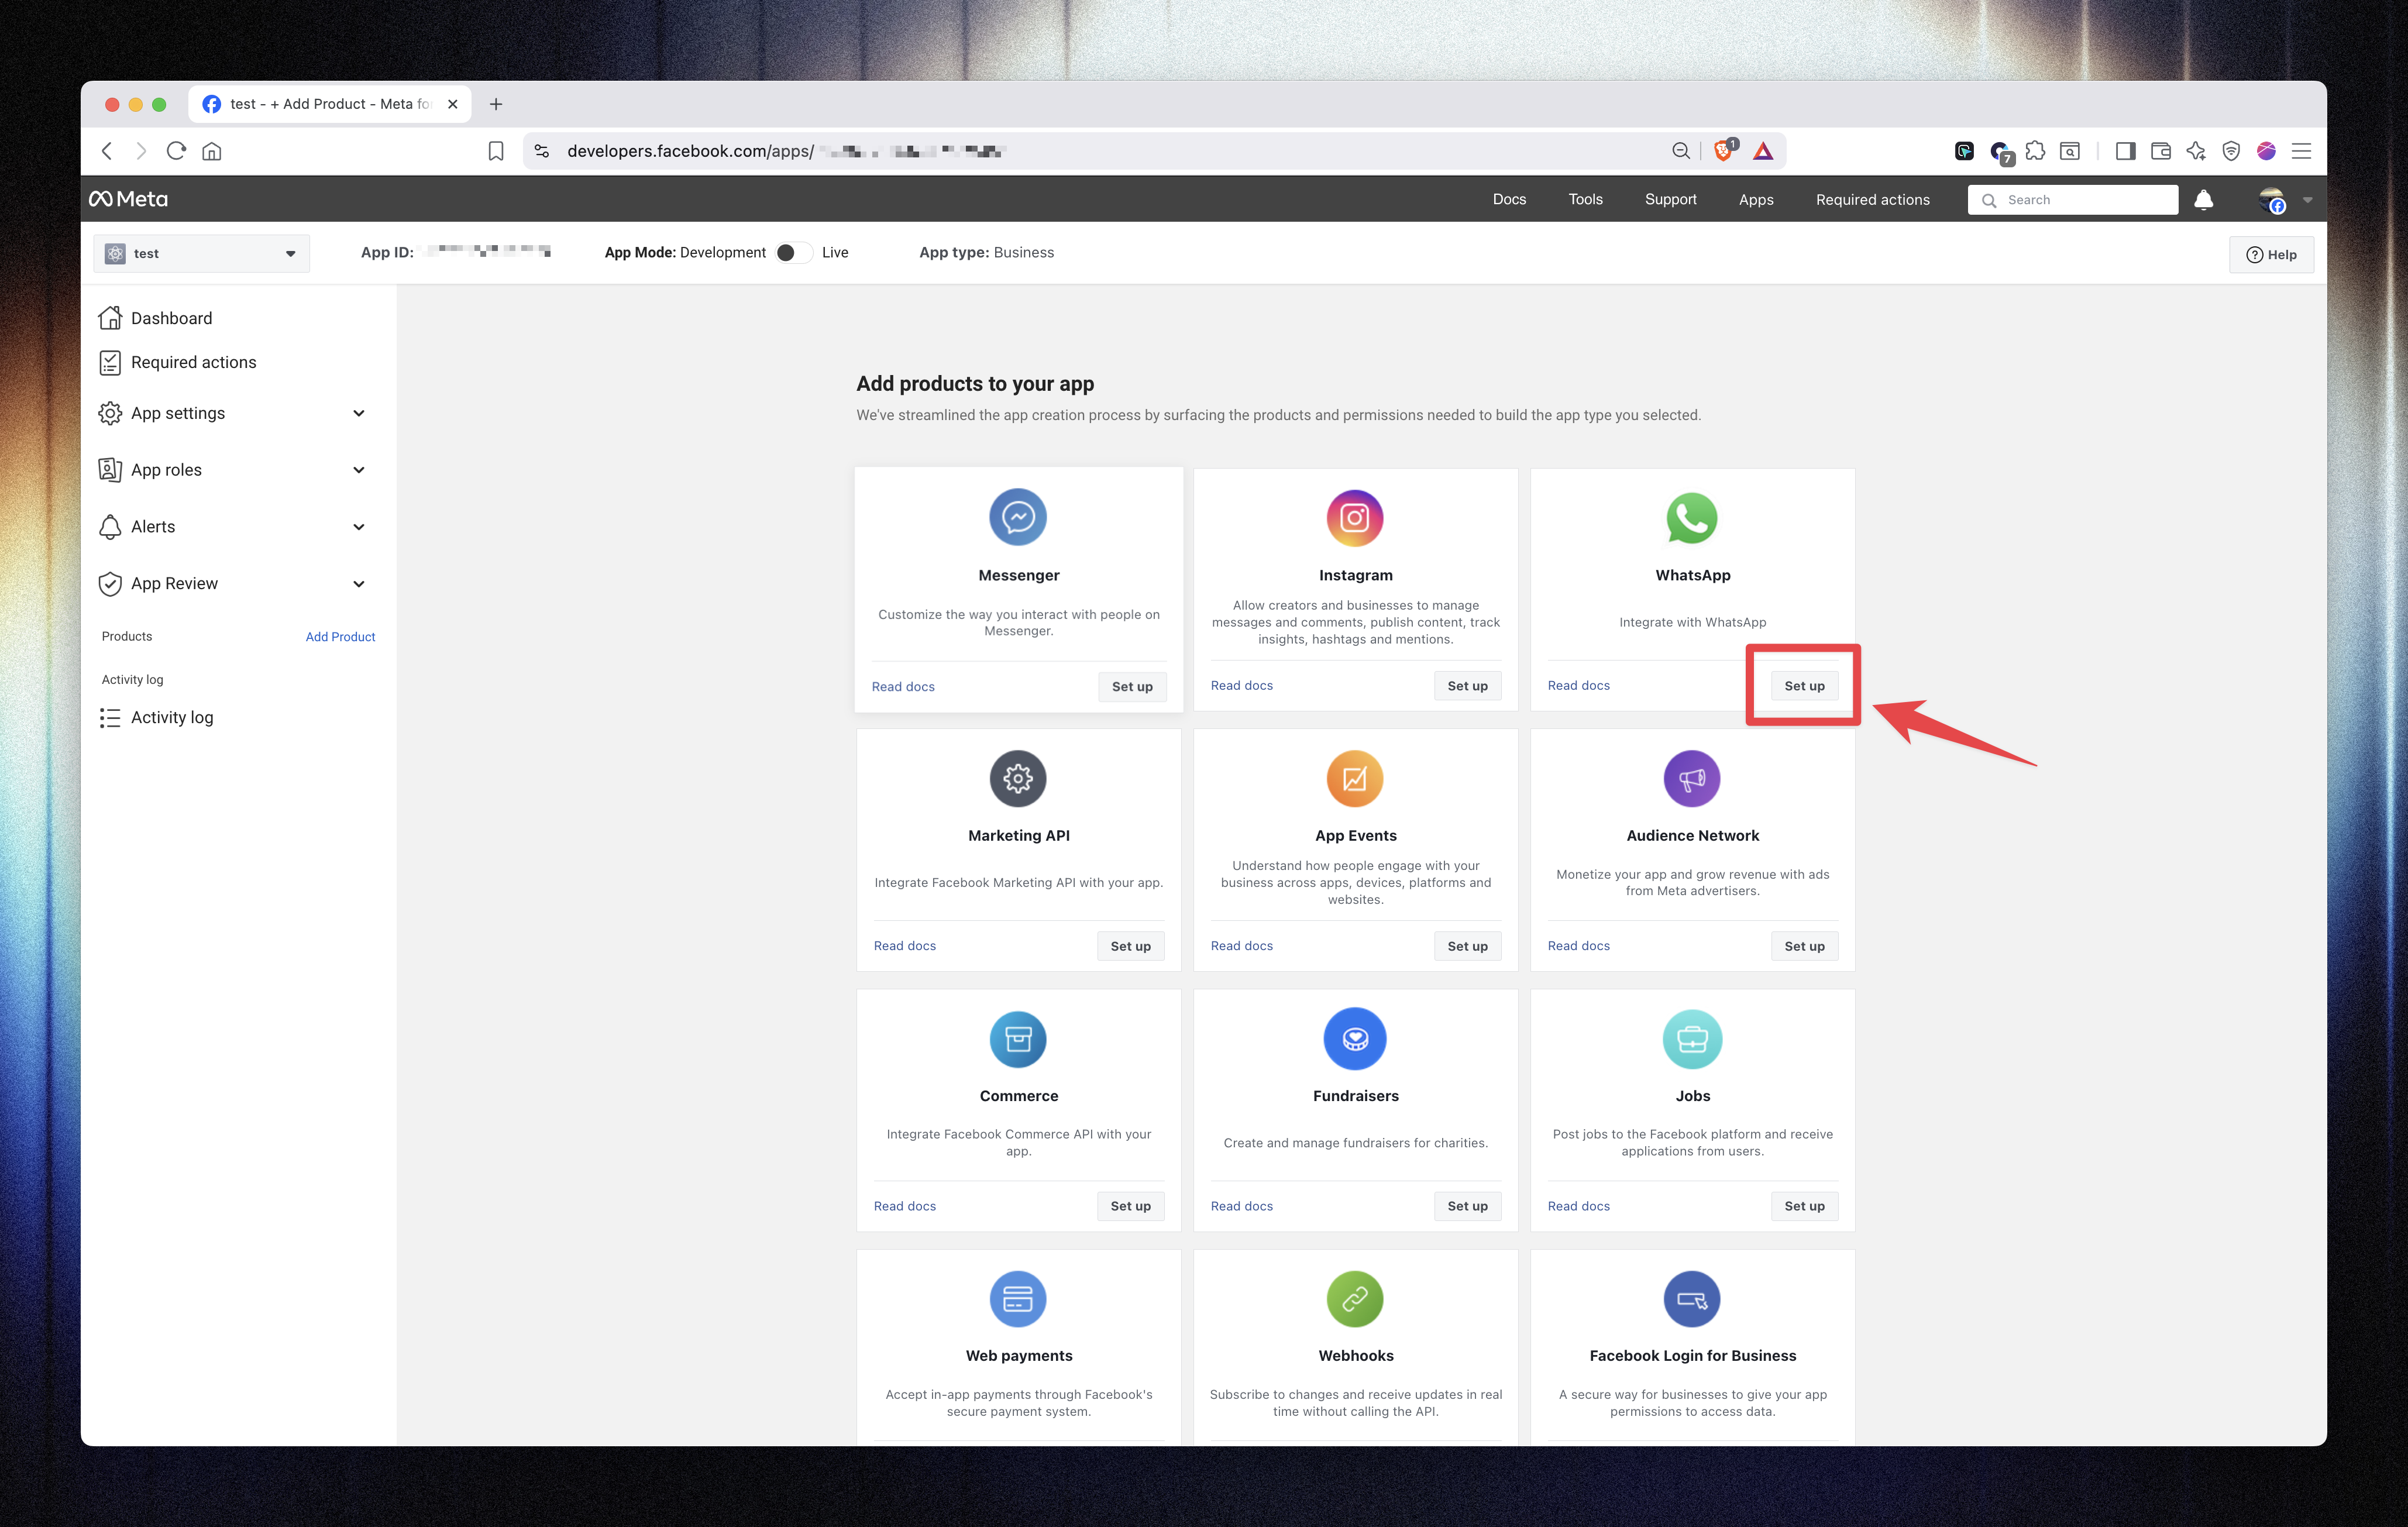
Once the app is created, scroll down and find WhatsApp.
Click Set up.
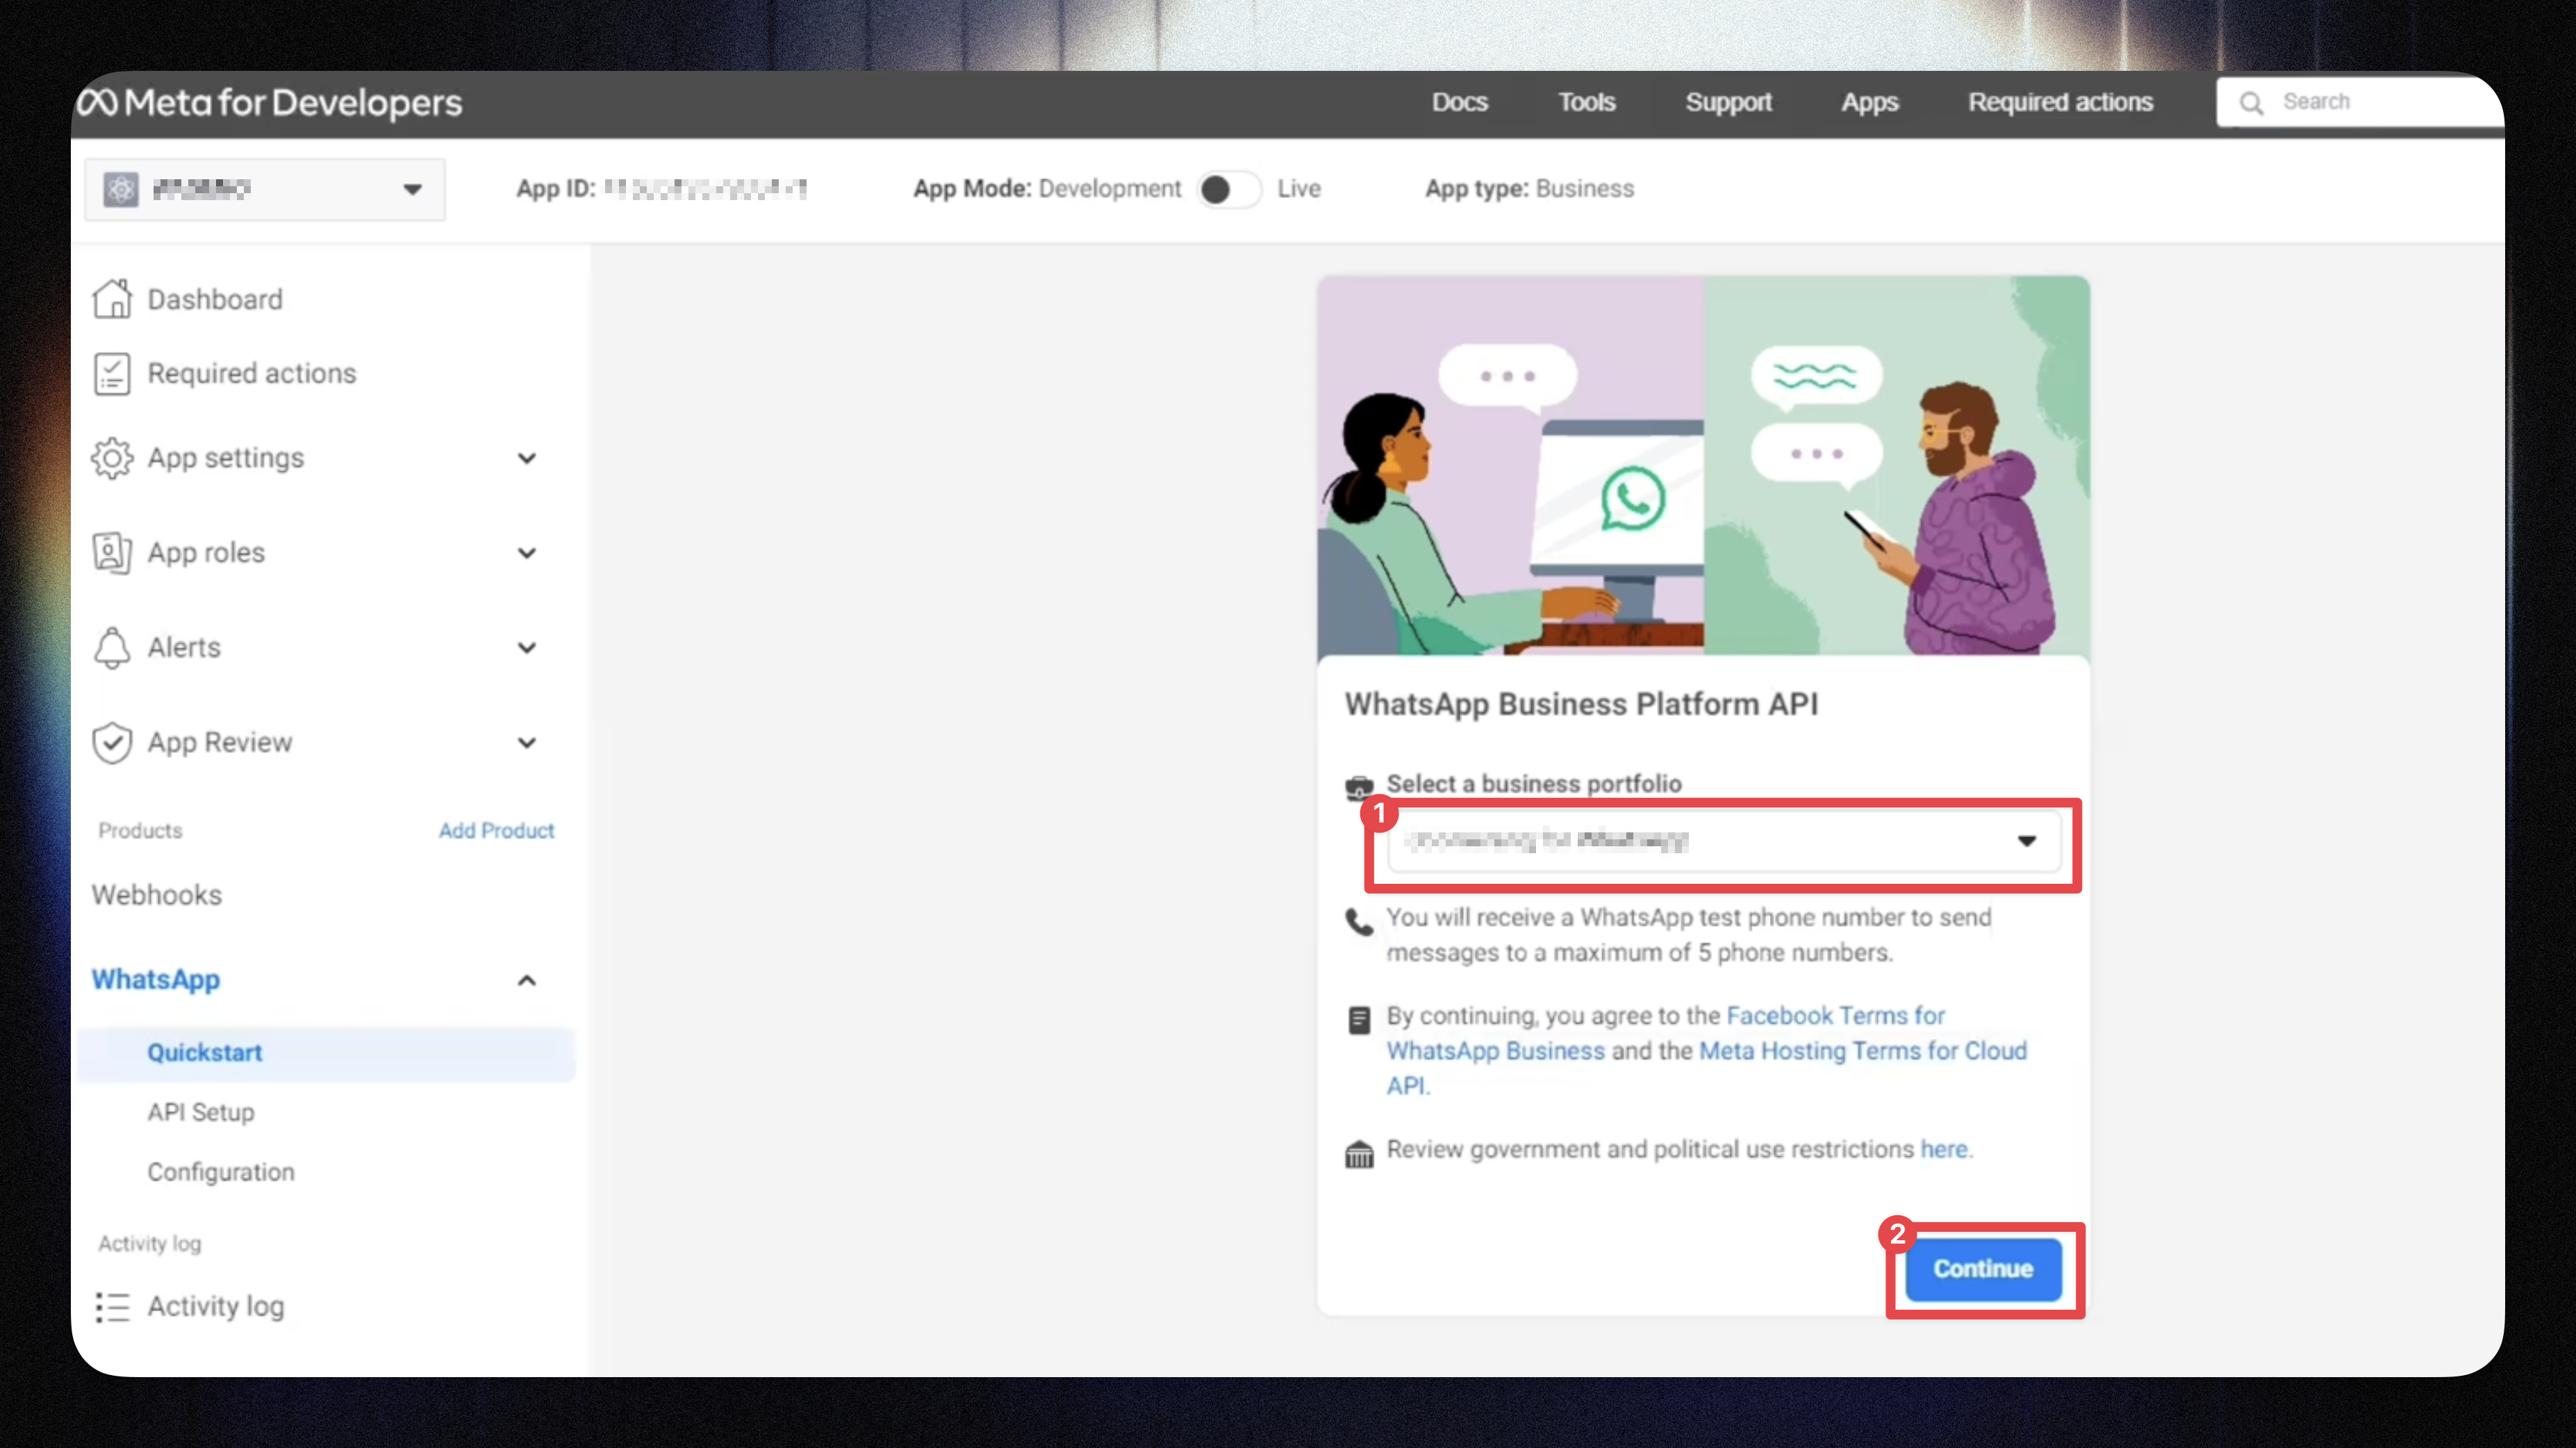
On the next screen, select your Business Profile and click Continue.
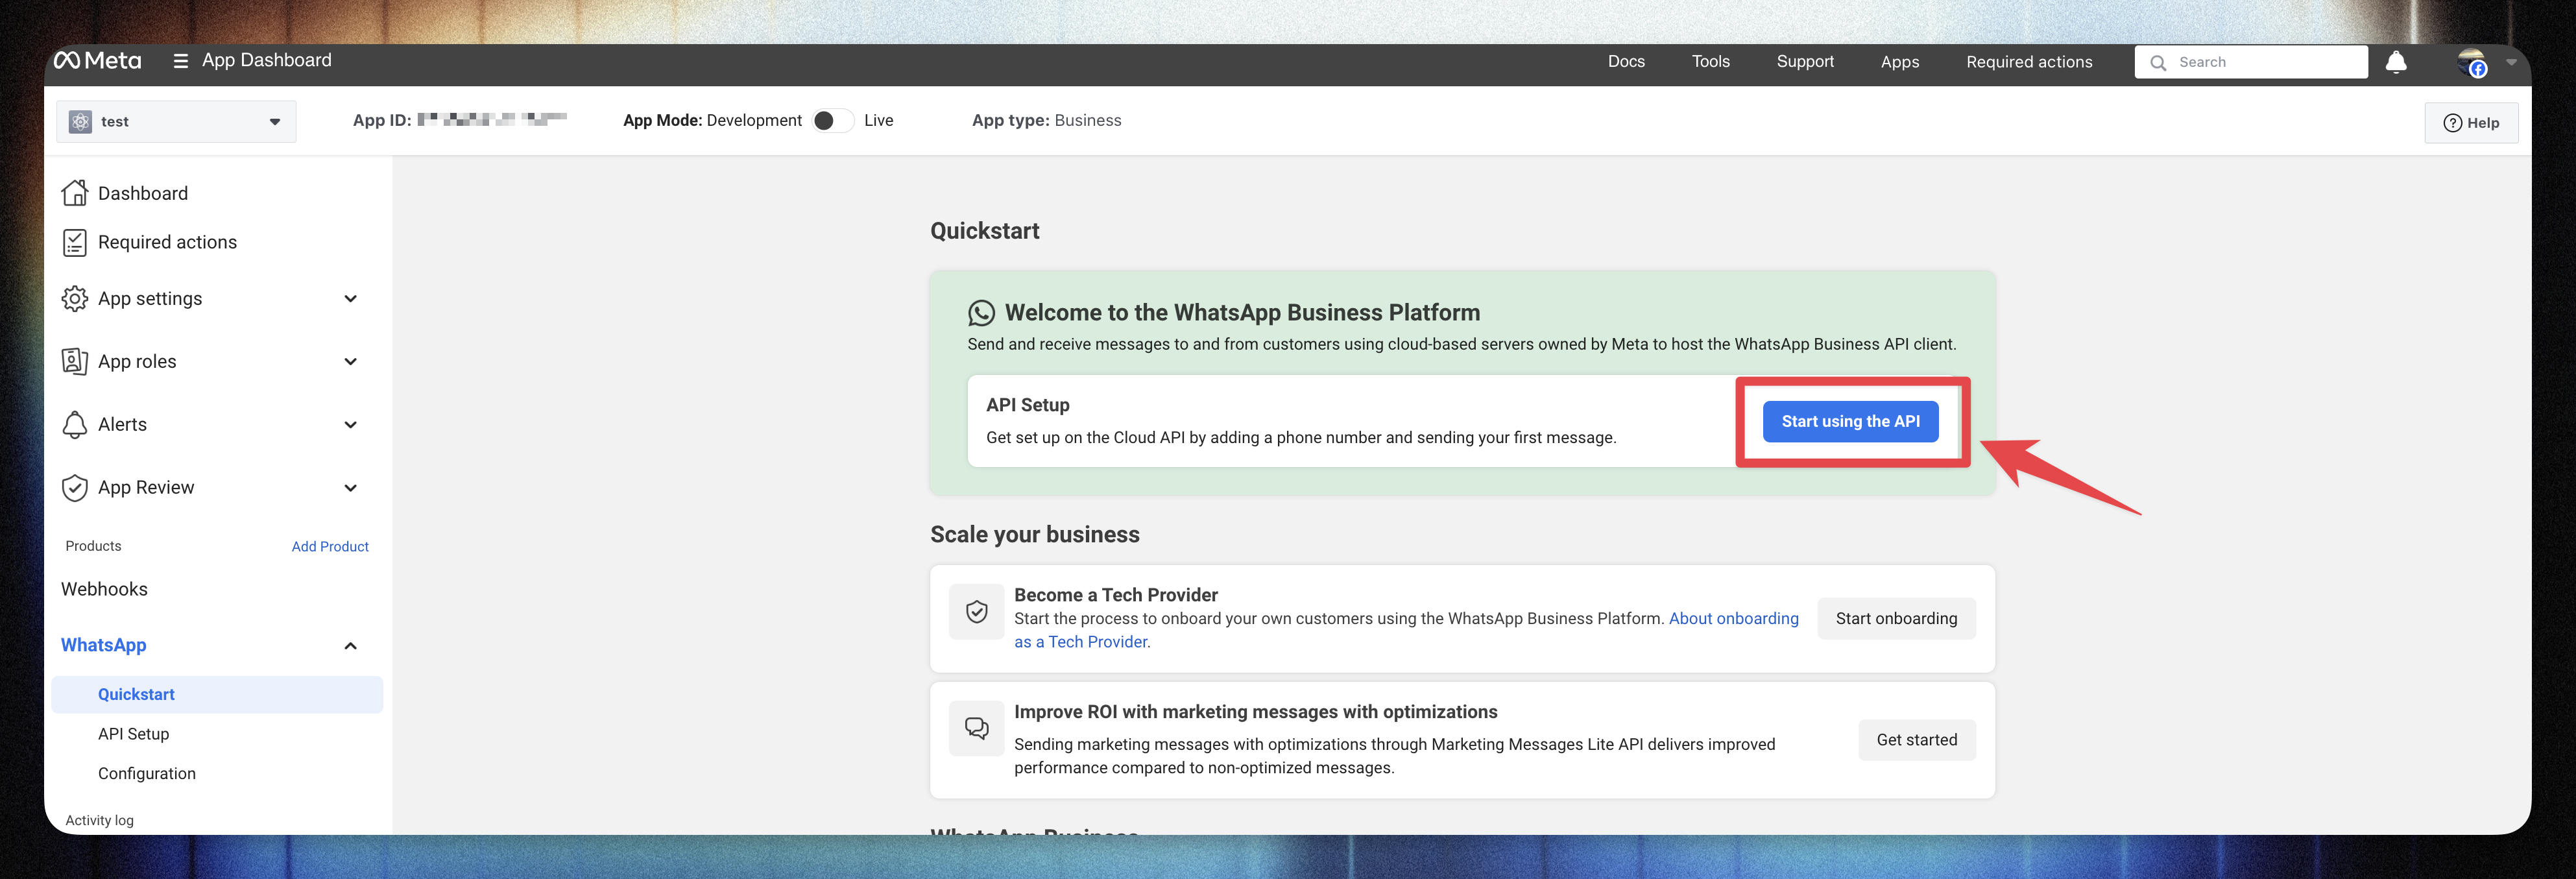
Click Start Using the API.
Add the phone number you’ll use to send WhatsApp messages.
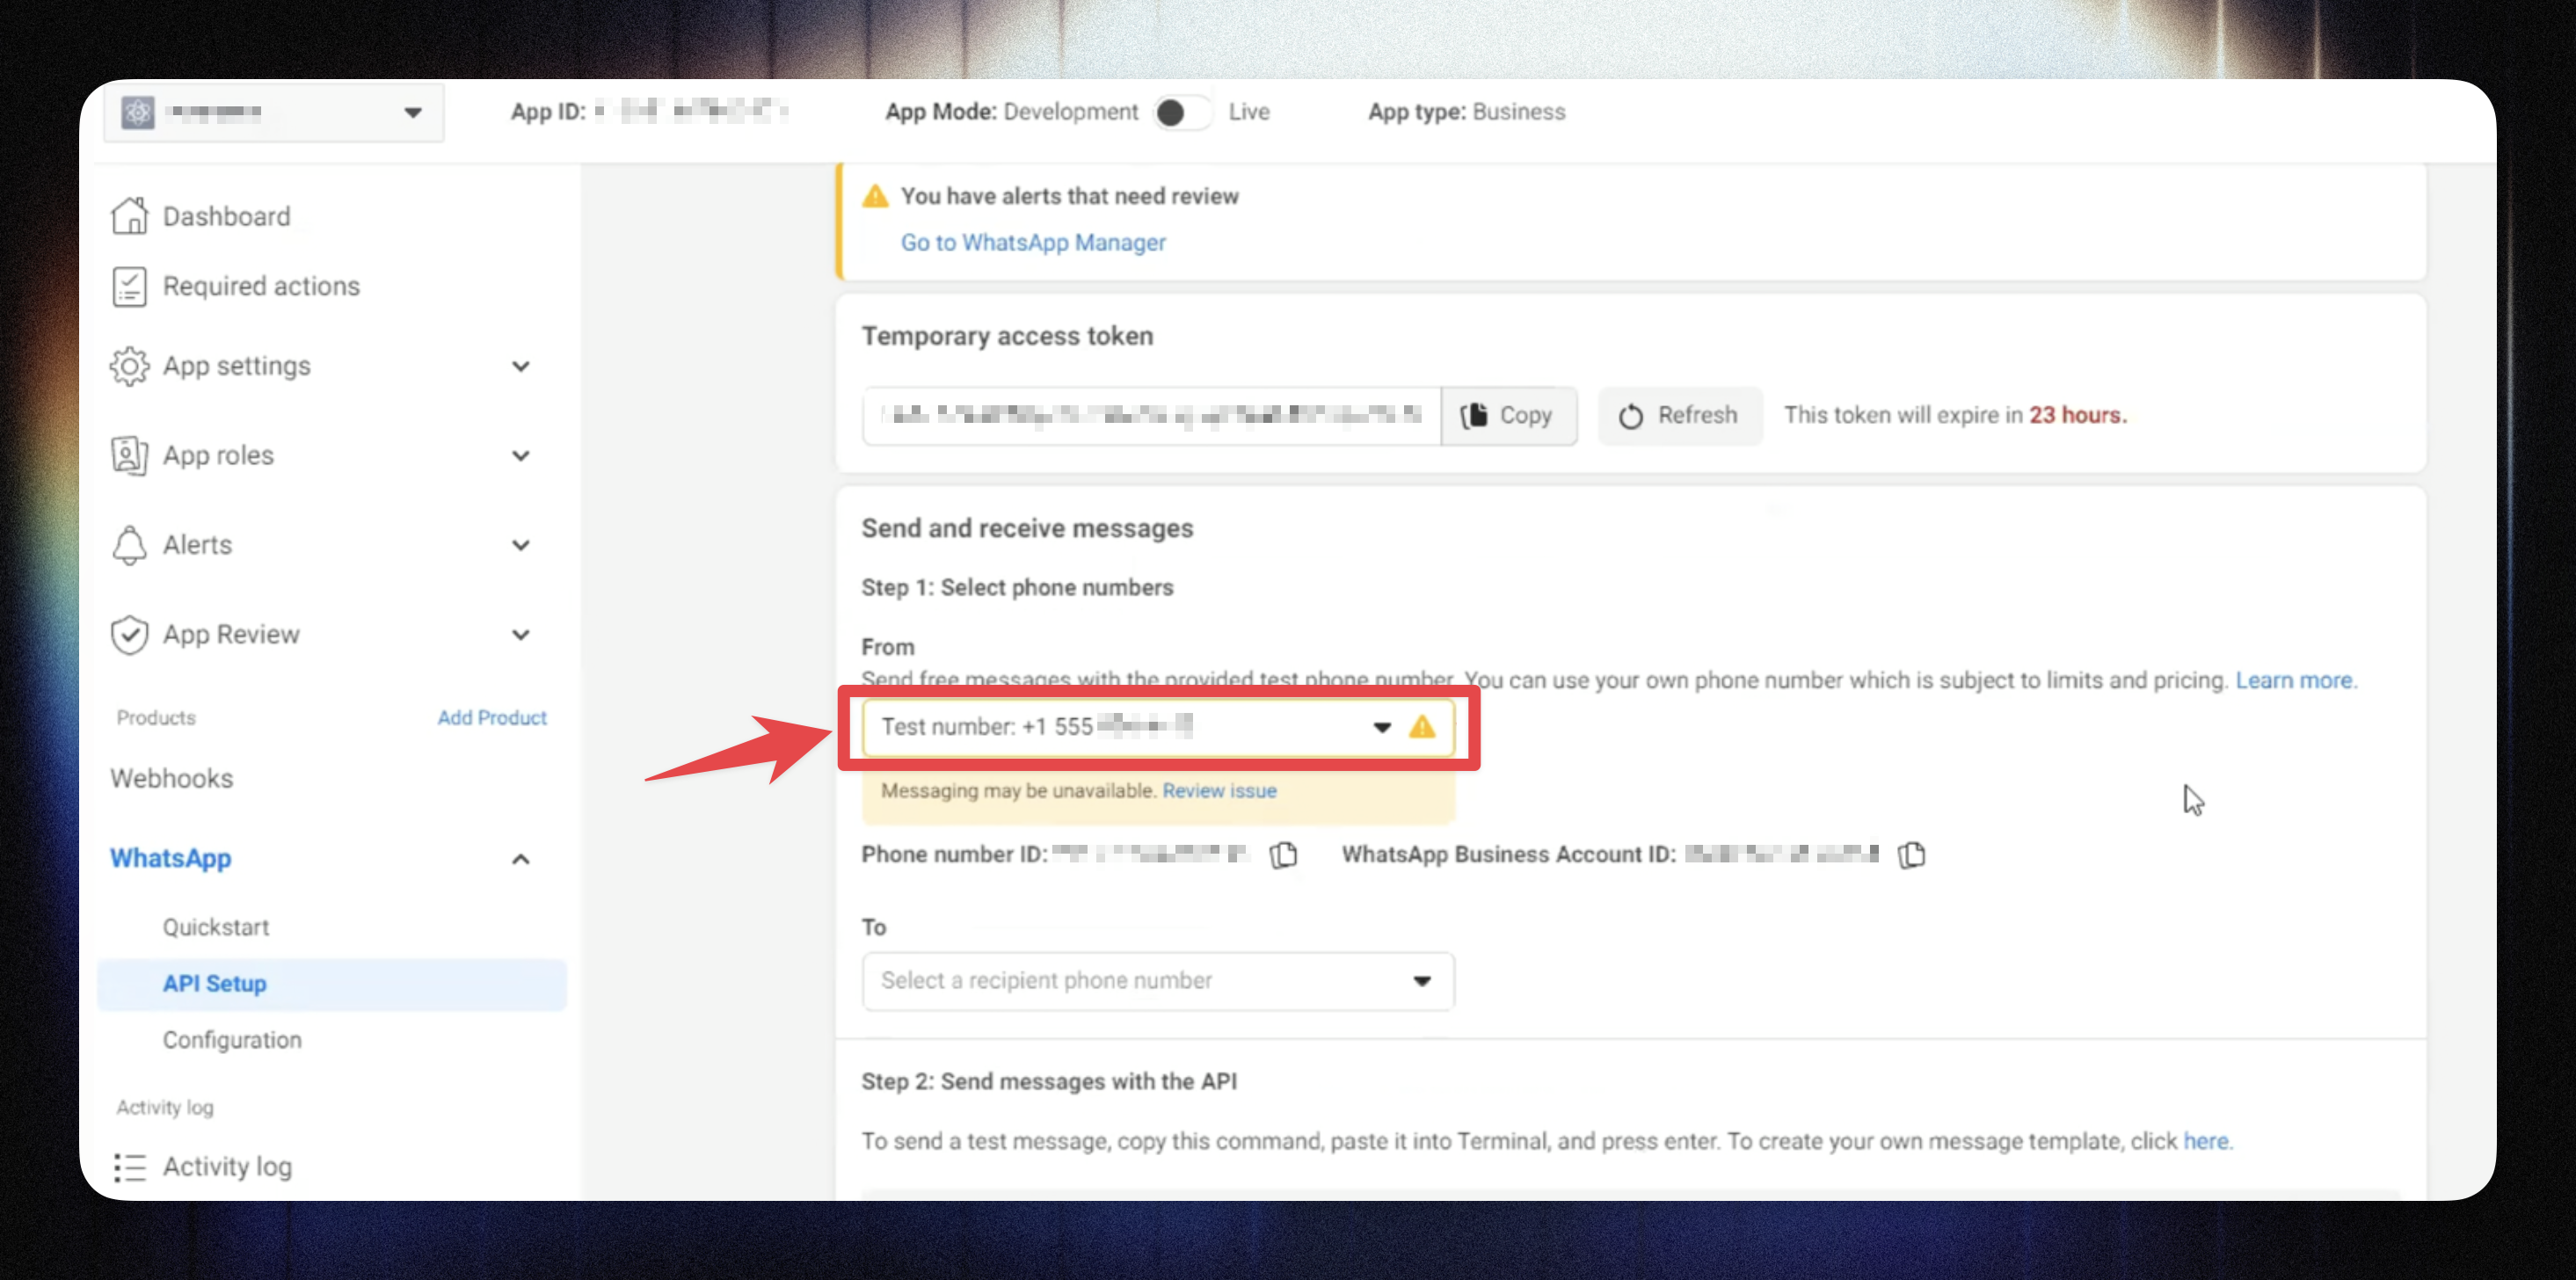
You can use a test number initially to check message delivery.
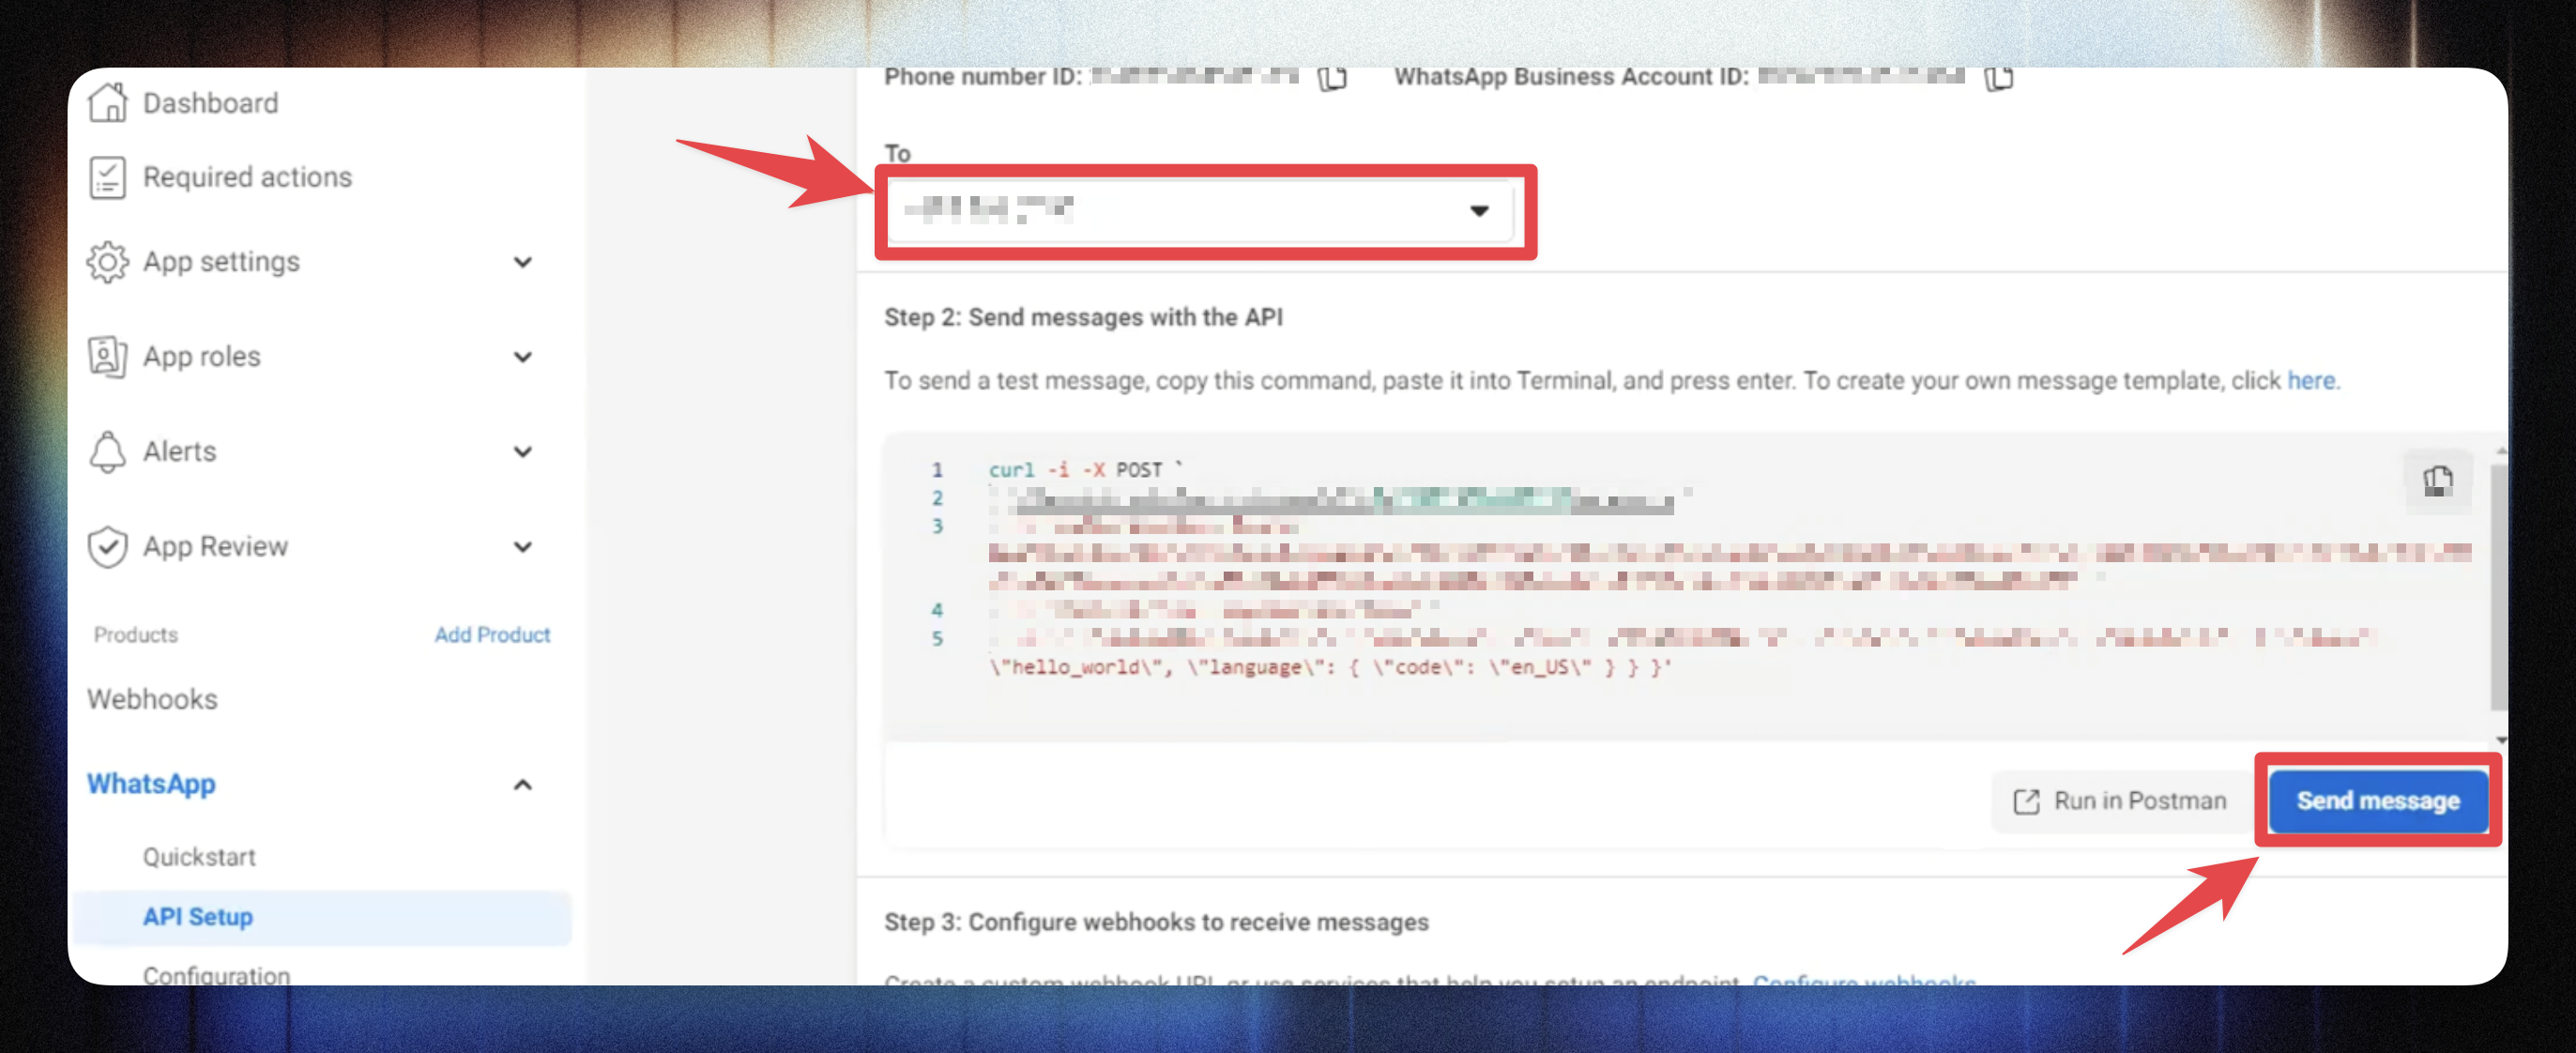
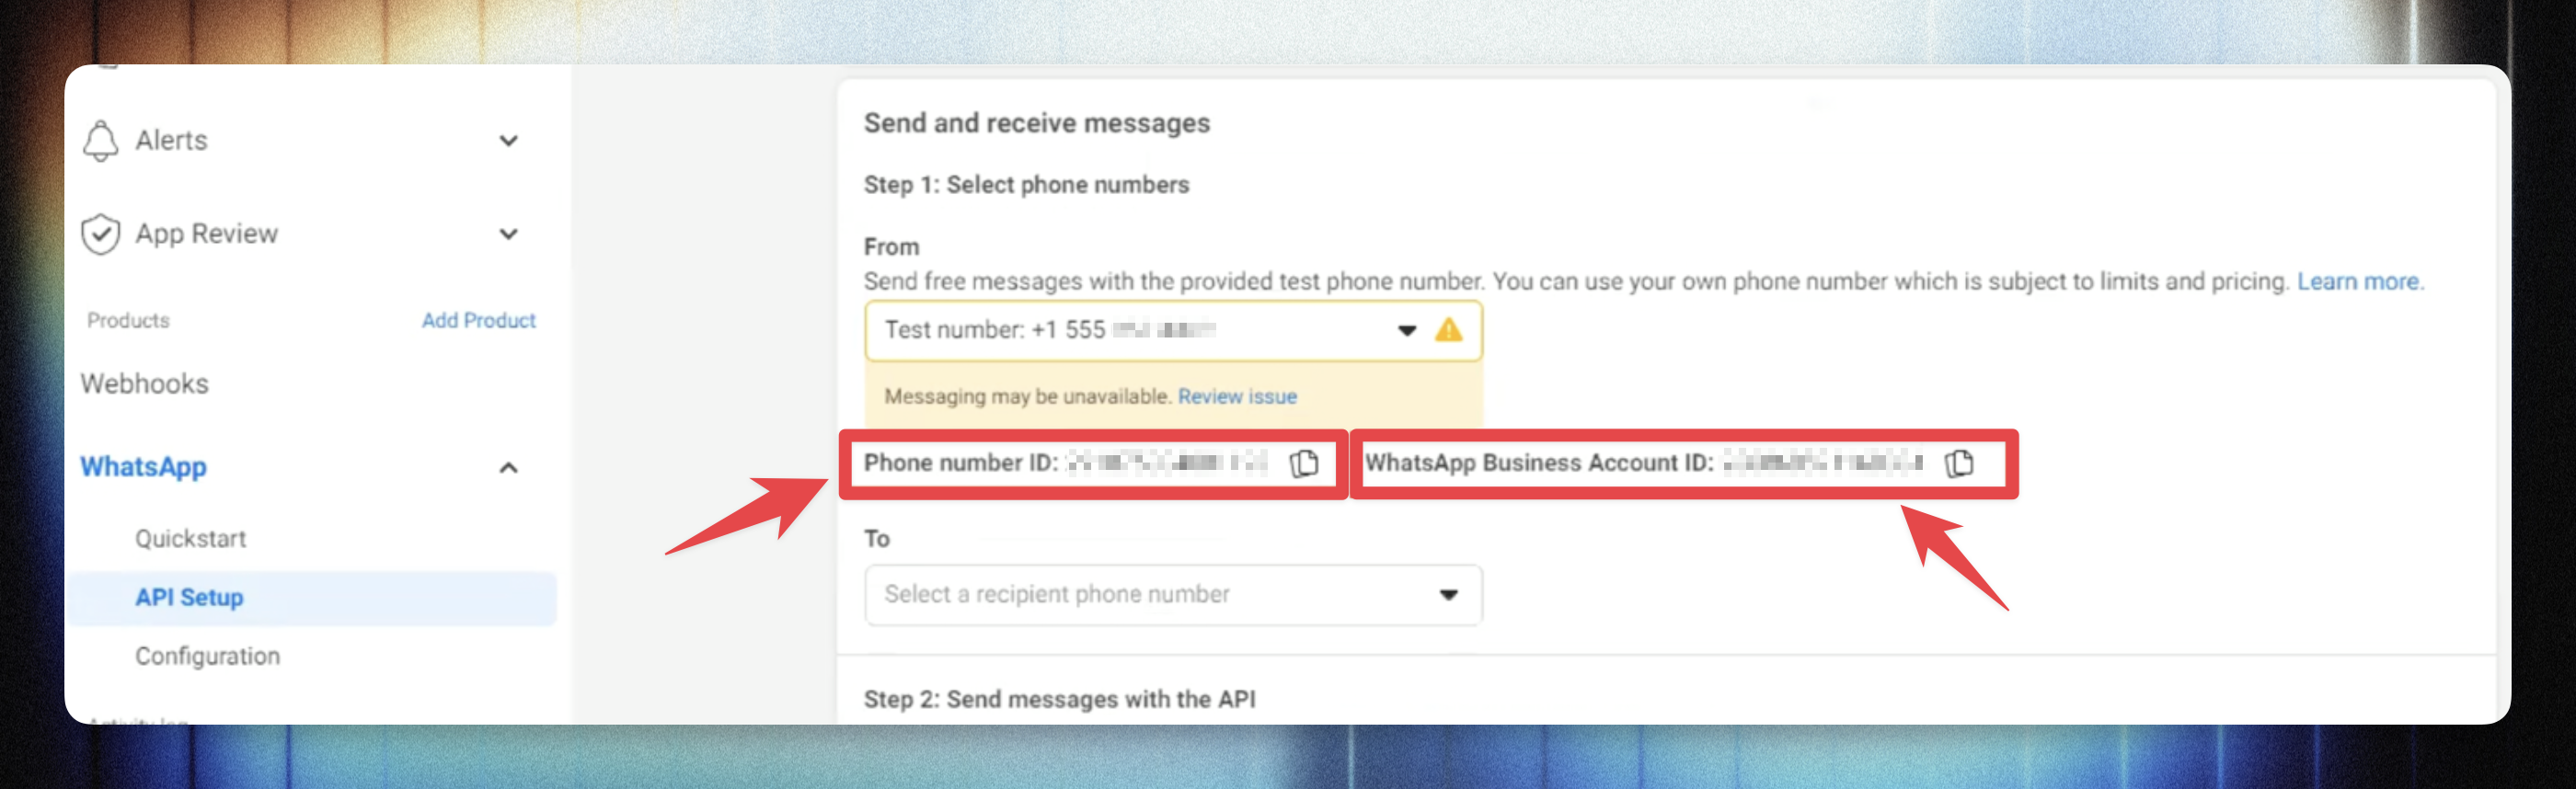
Once added, you’ll see your:
Phone Number ID
WhatsApp Business Account ID

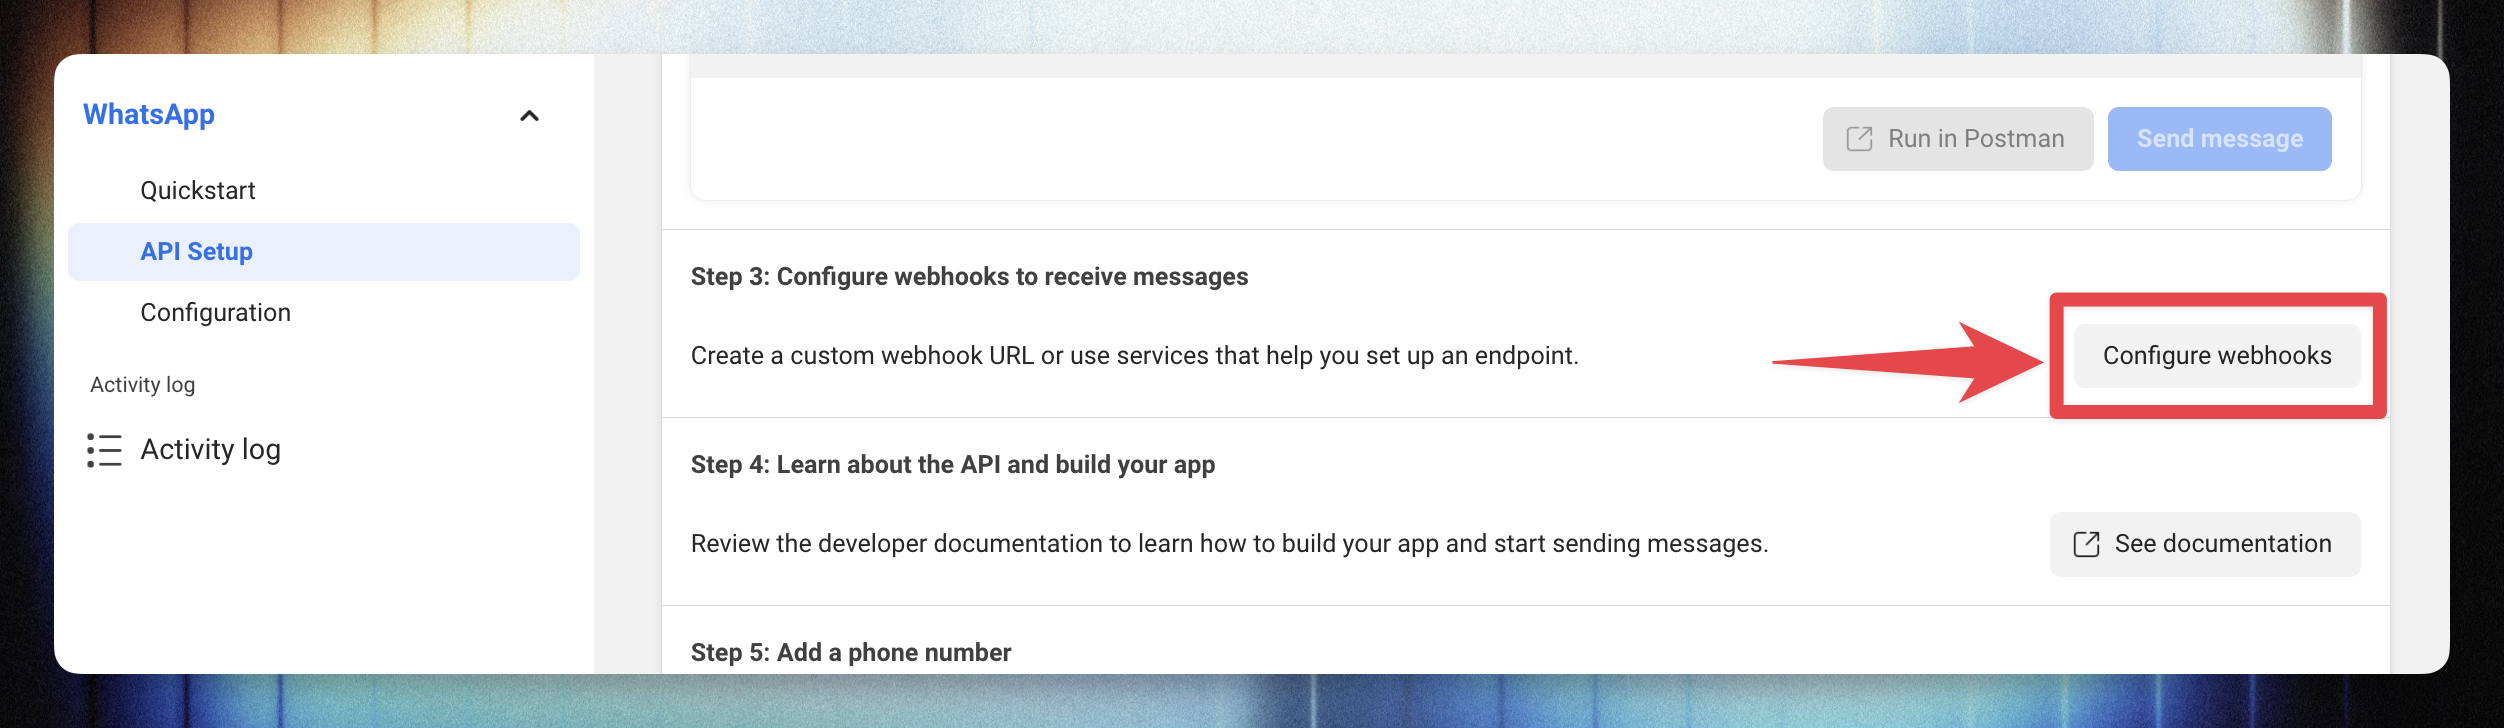
Webhooks allow Loyally to receive WhatsApp message data (for example, delivery status, inbound replies).
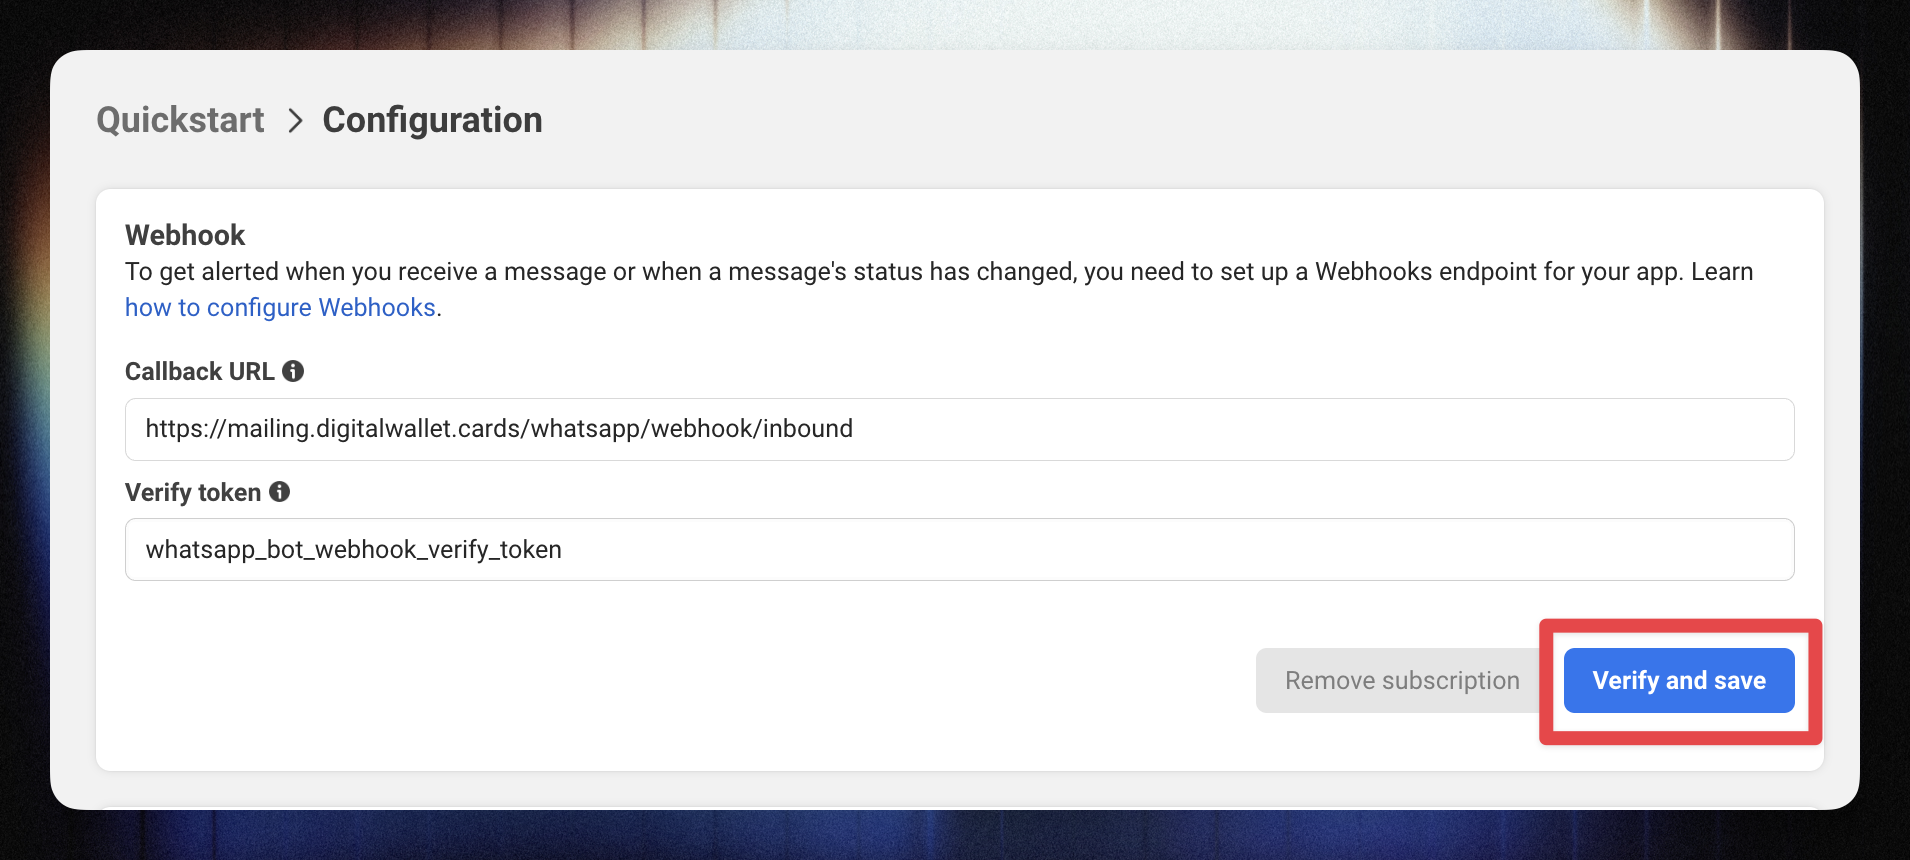
In your app’s sidebar, go to WhatsApp → Configuration.
Click Callback URL – Edit.
Fill in the following fields:
Callback URL:
https://mailing.digitalwallet.cards/whatsapp/webhook/inboundVerify token:
whatsapp_bot_webhook_verify_tokenClick Verify and Save.
You should see a success message confirming webhook verification.
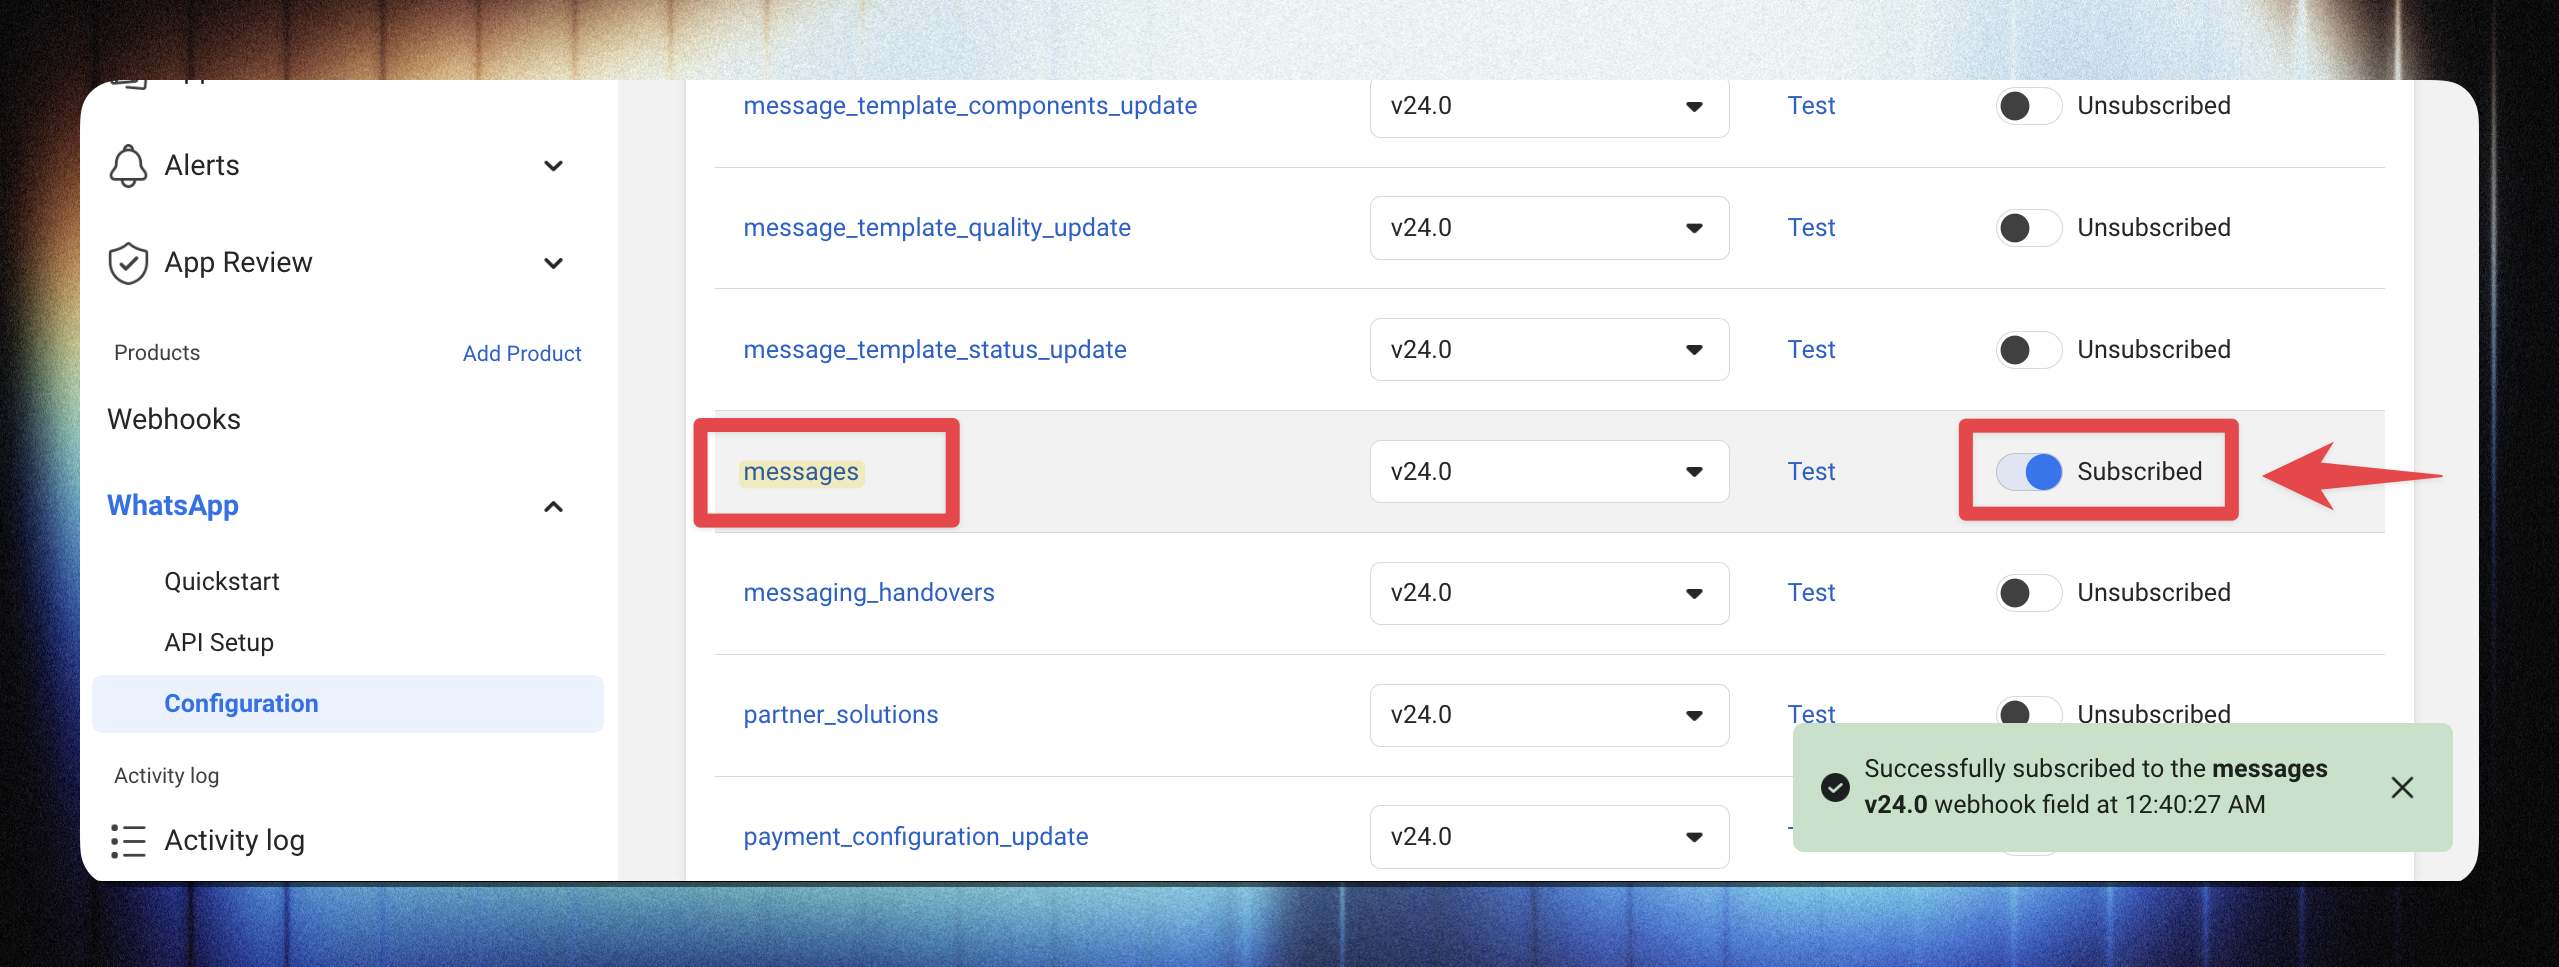
Go to Webhooks → Manage.
Find Messages in the list and Enable it.
Temporary tokens from Meta expire in 24 hours, so you’ll need a permanent one.
Select the Business Manager you used earlier.
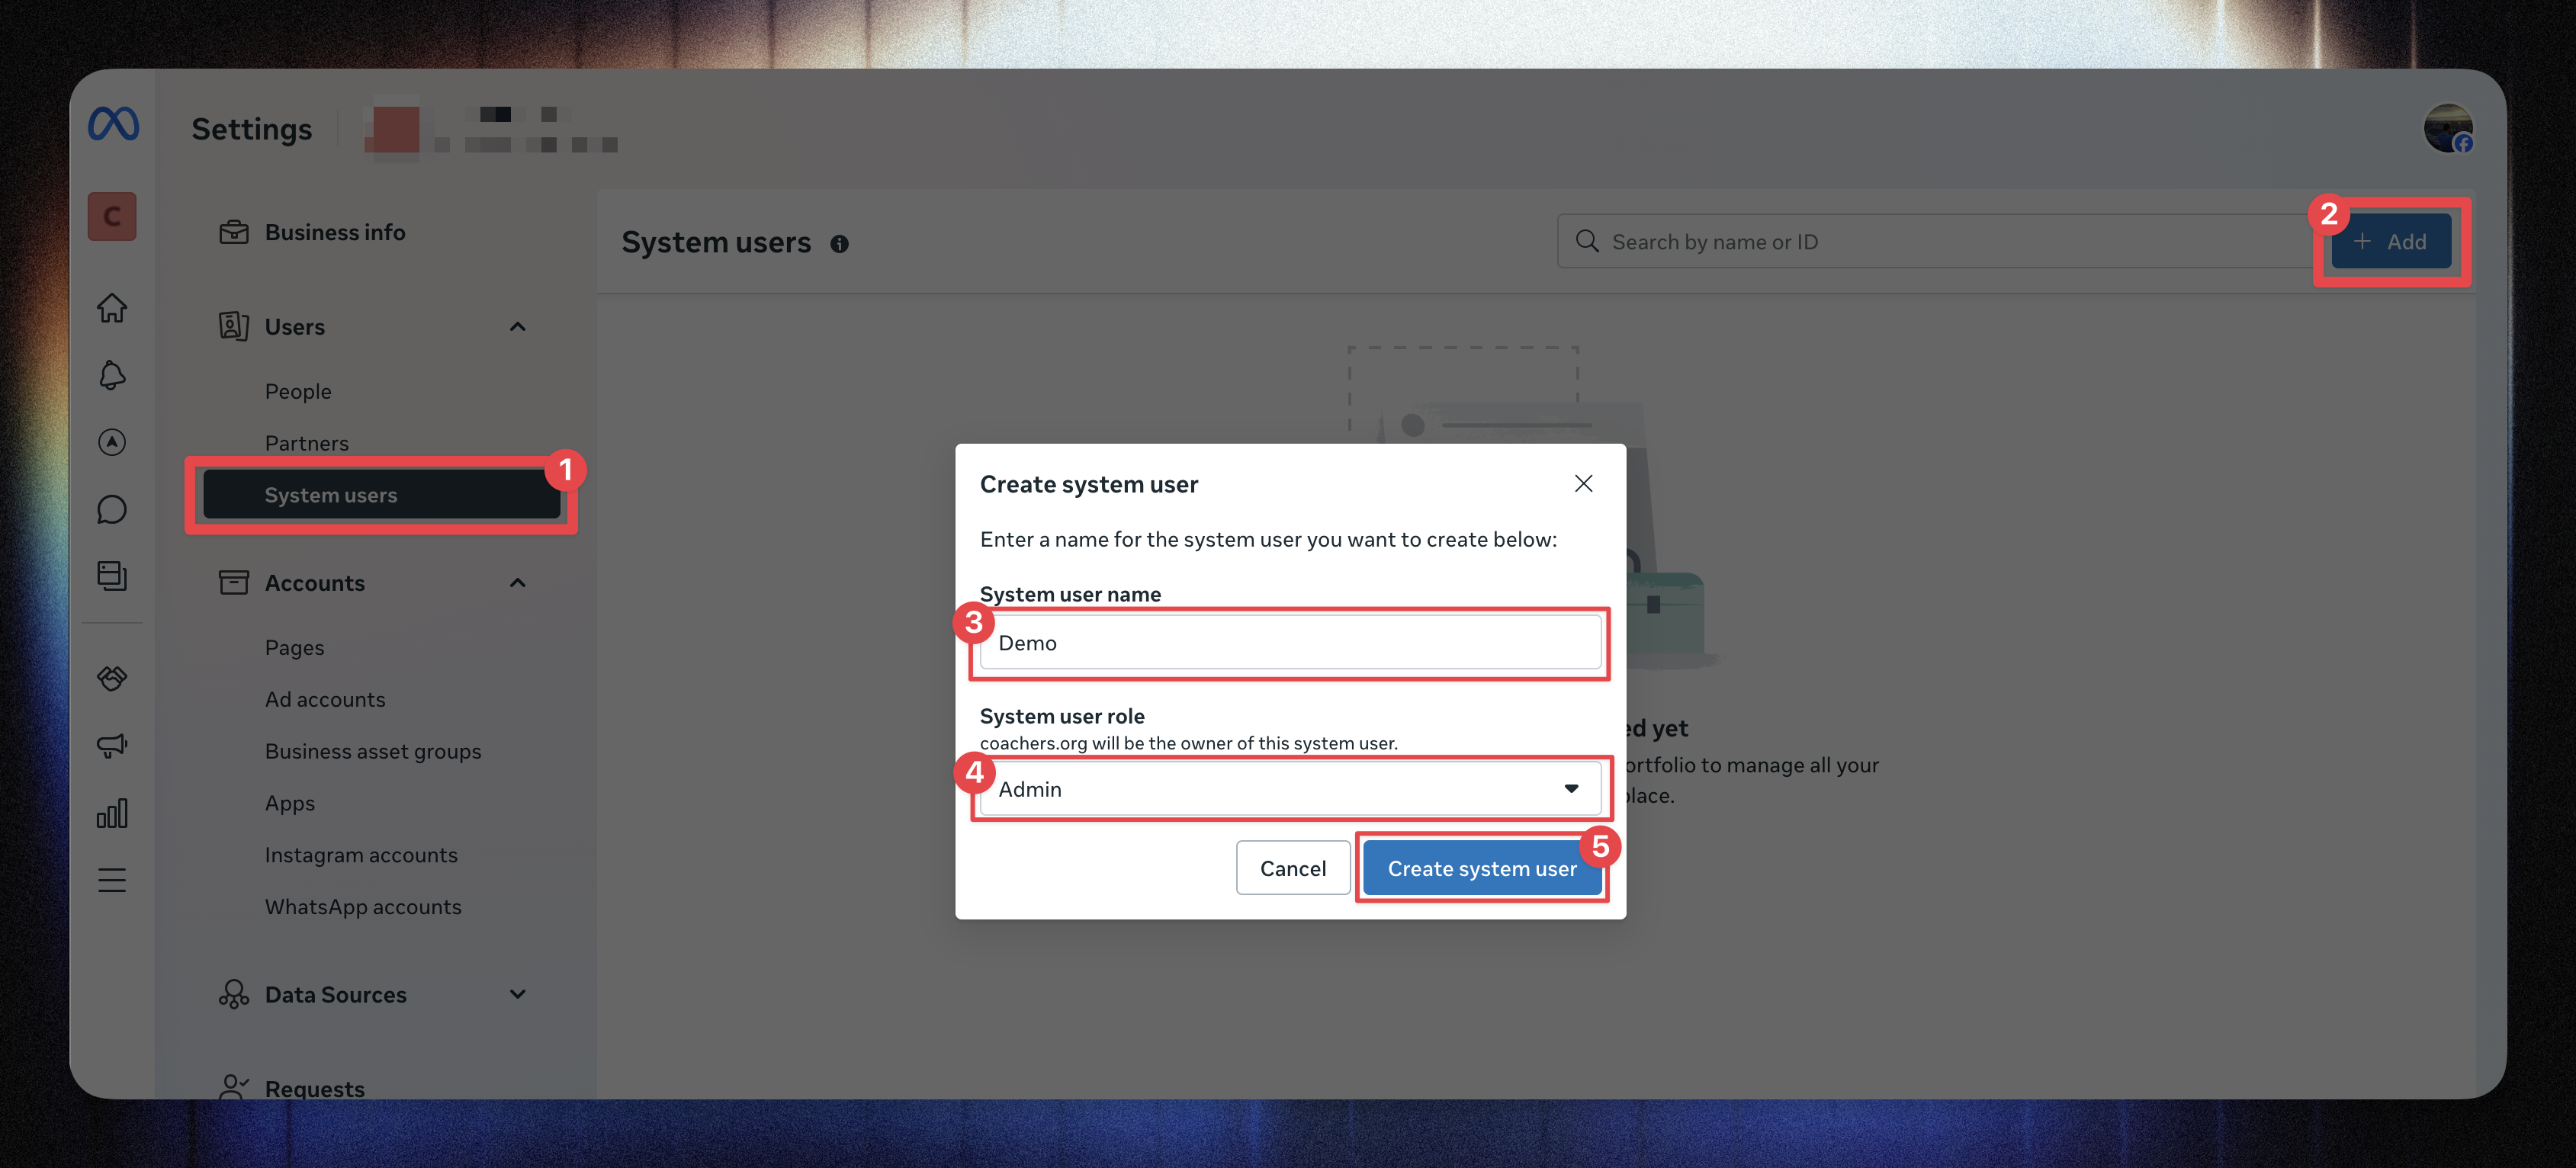
Navigate to Users → System Users.
Click Add.
Enter a name (e.g., Loyally Integration) and select the Admin role and click Create system user.
Open the new user → click Generate New Token.
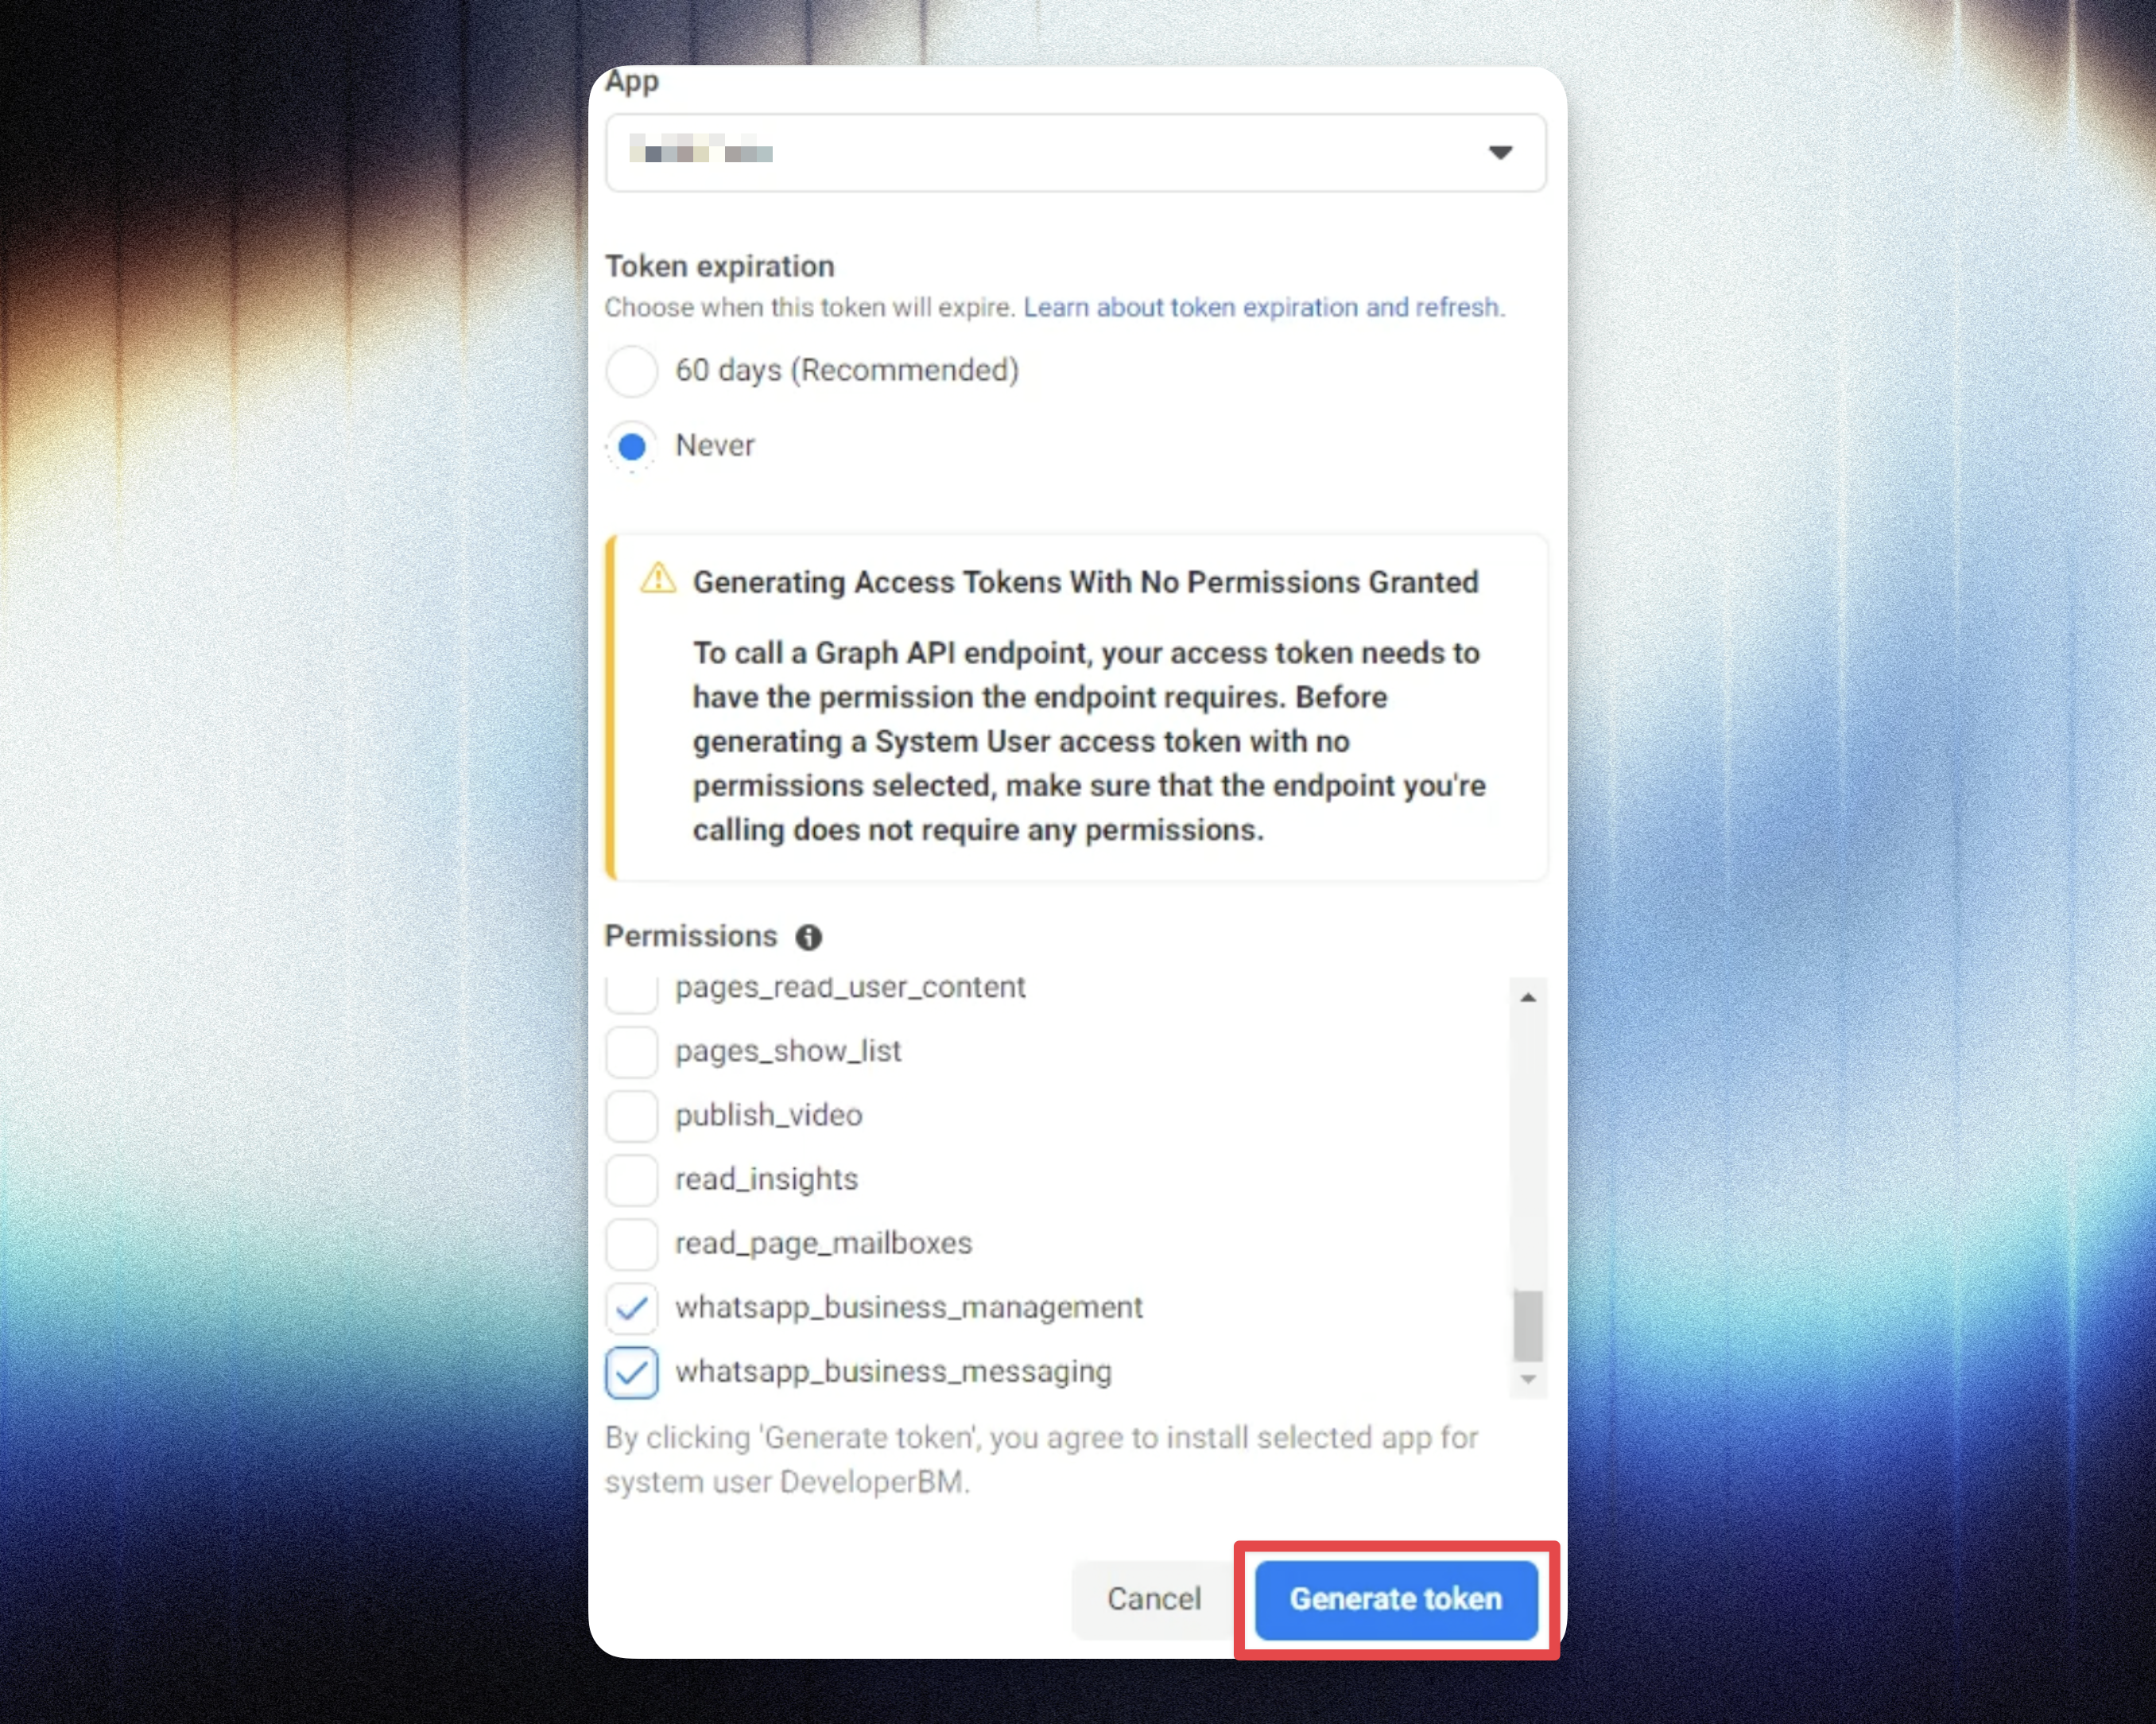
Choose your App.
Set Token Expiration to Never.
Enable the following permissions:
business_management
catalog_management
whatsapp_business_management
whatsapp_business_messaging
Click Generate Token.
Copy and save the generated permanent token.
💡 Keep this token in a secure password manager.
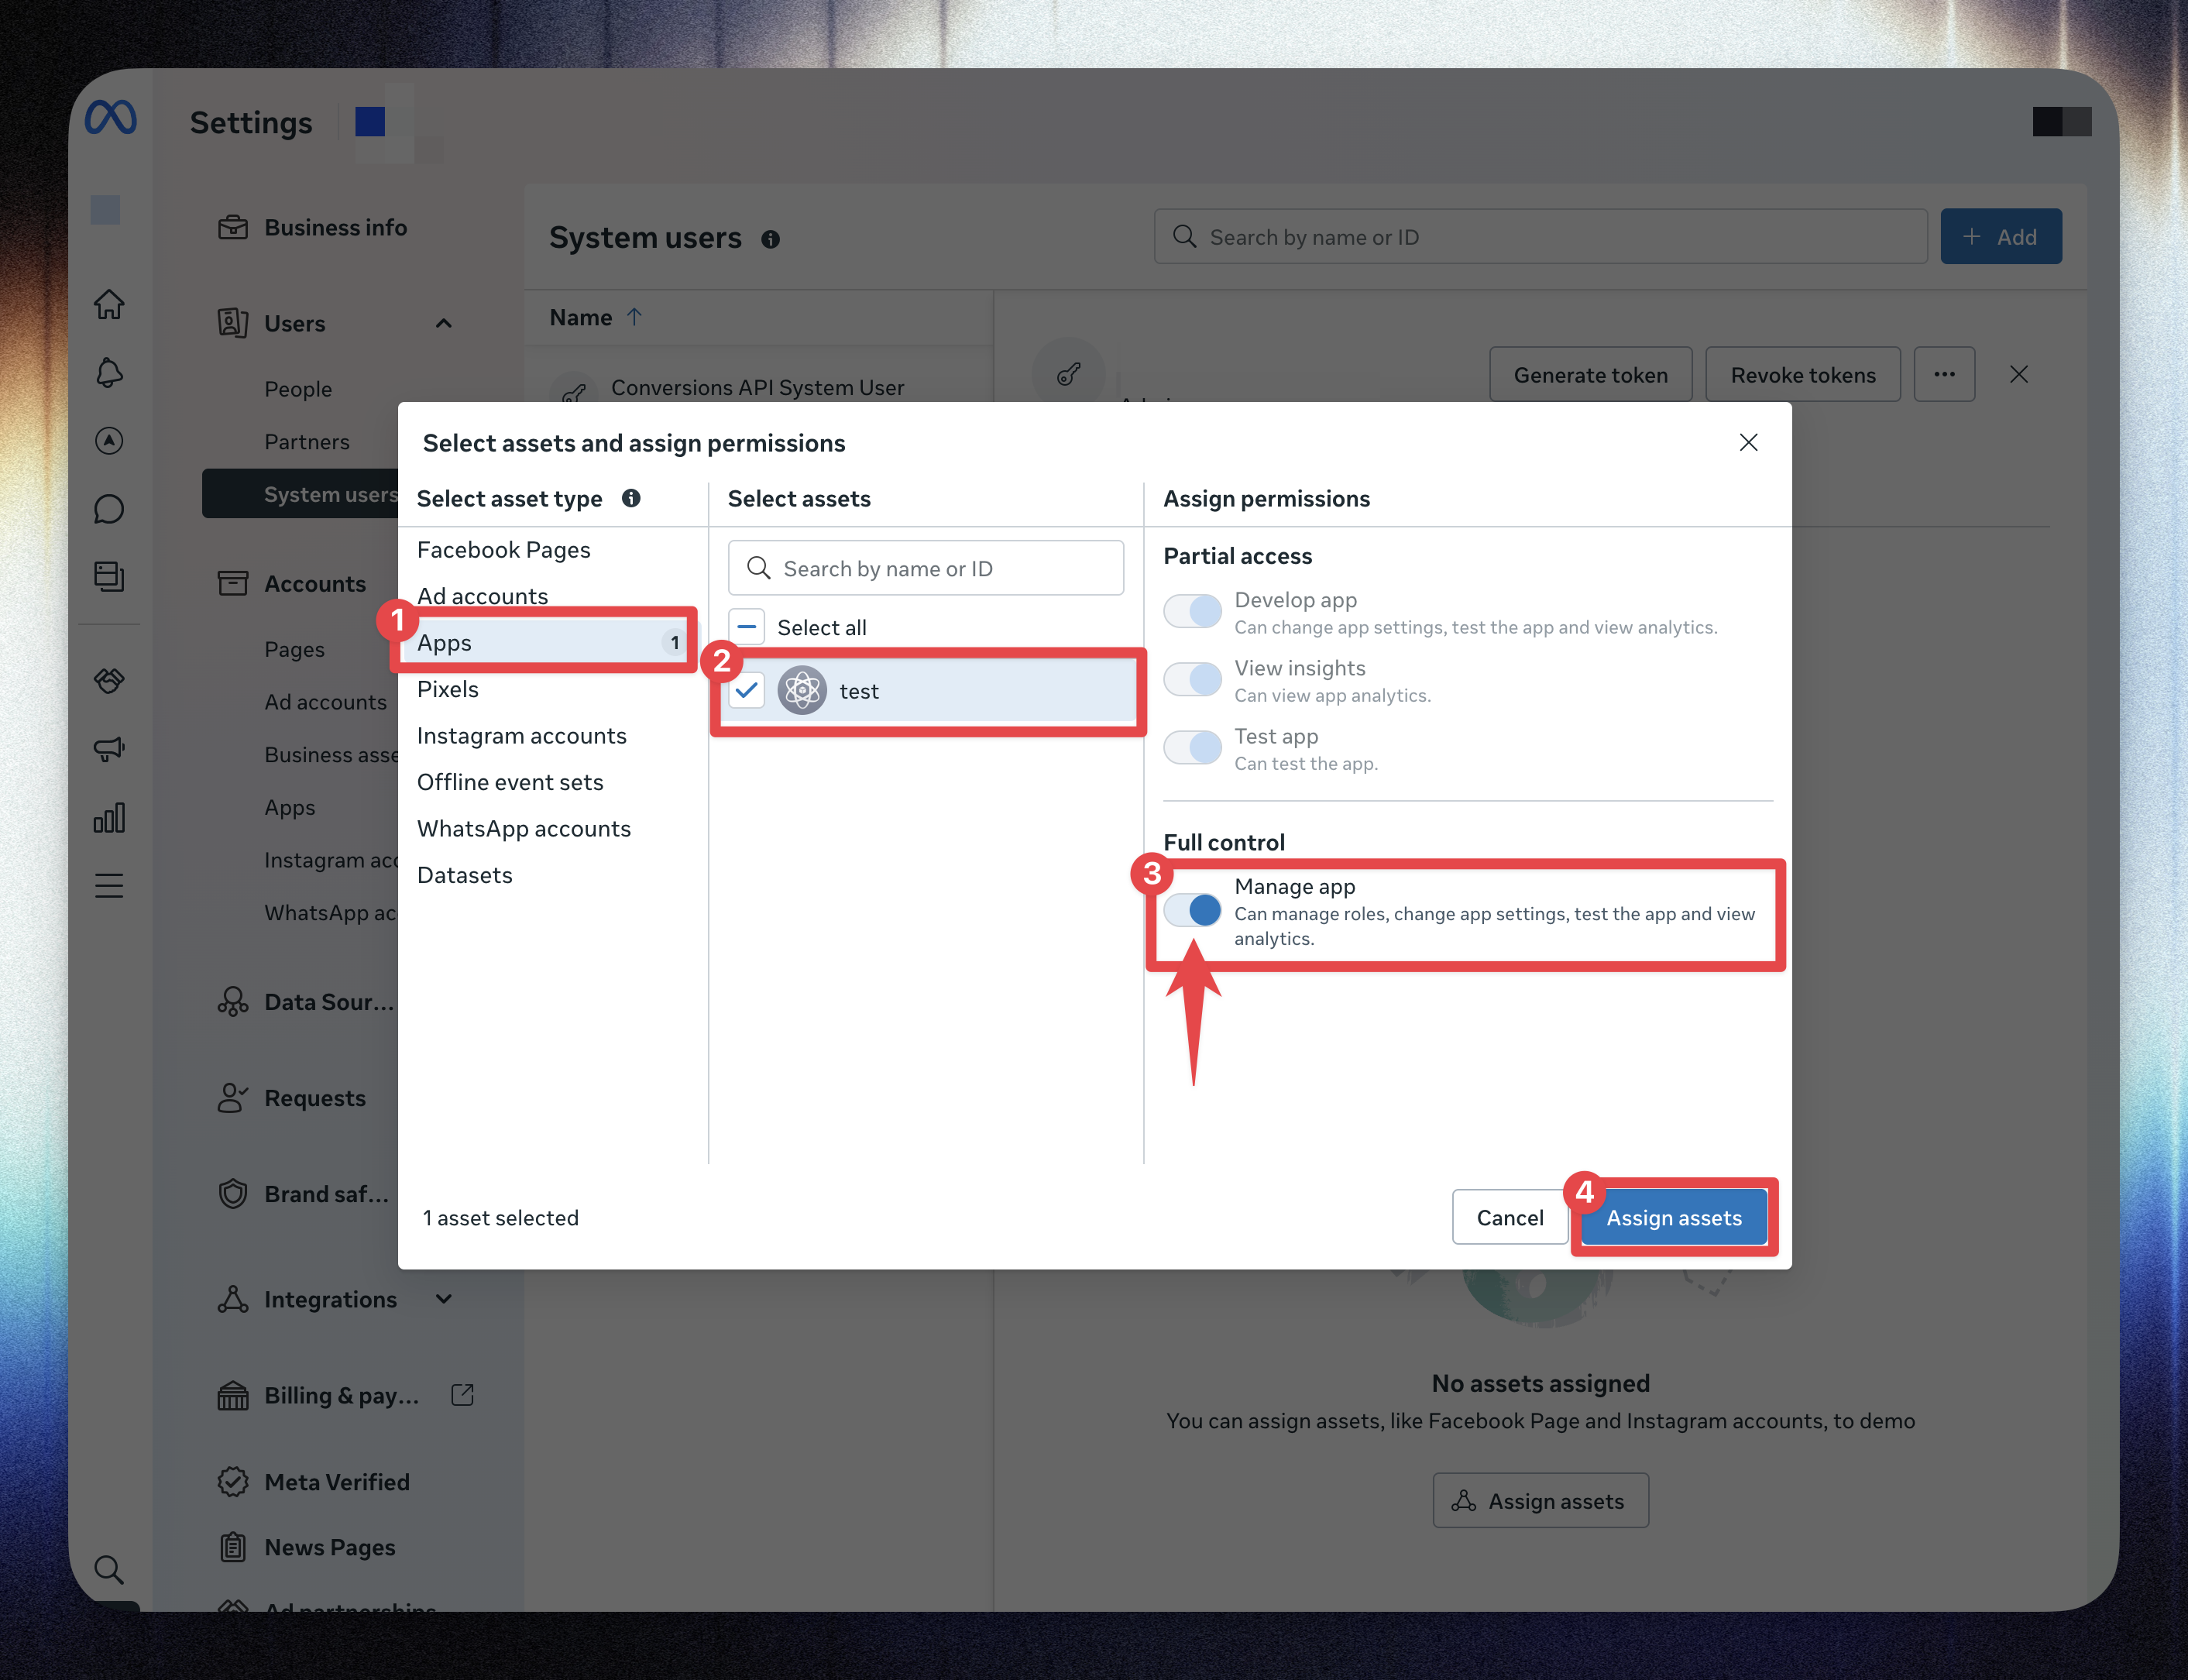
In the System Users tab, click your user.
Open Assign Assets → Apps.
Enable Manage App.
Save your changes.
Go back to your App Dashboard in Meta.
Switch the app from Development to Live Mode.
Confirm your app is connected to your verified Business Account.
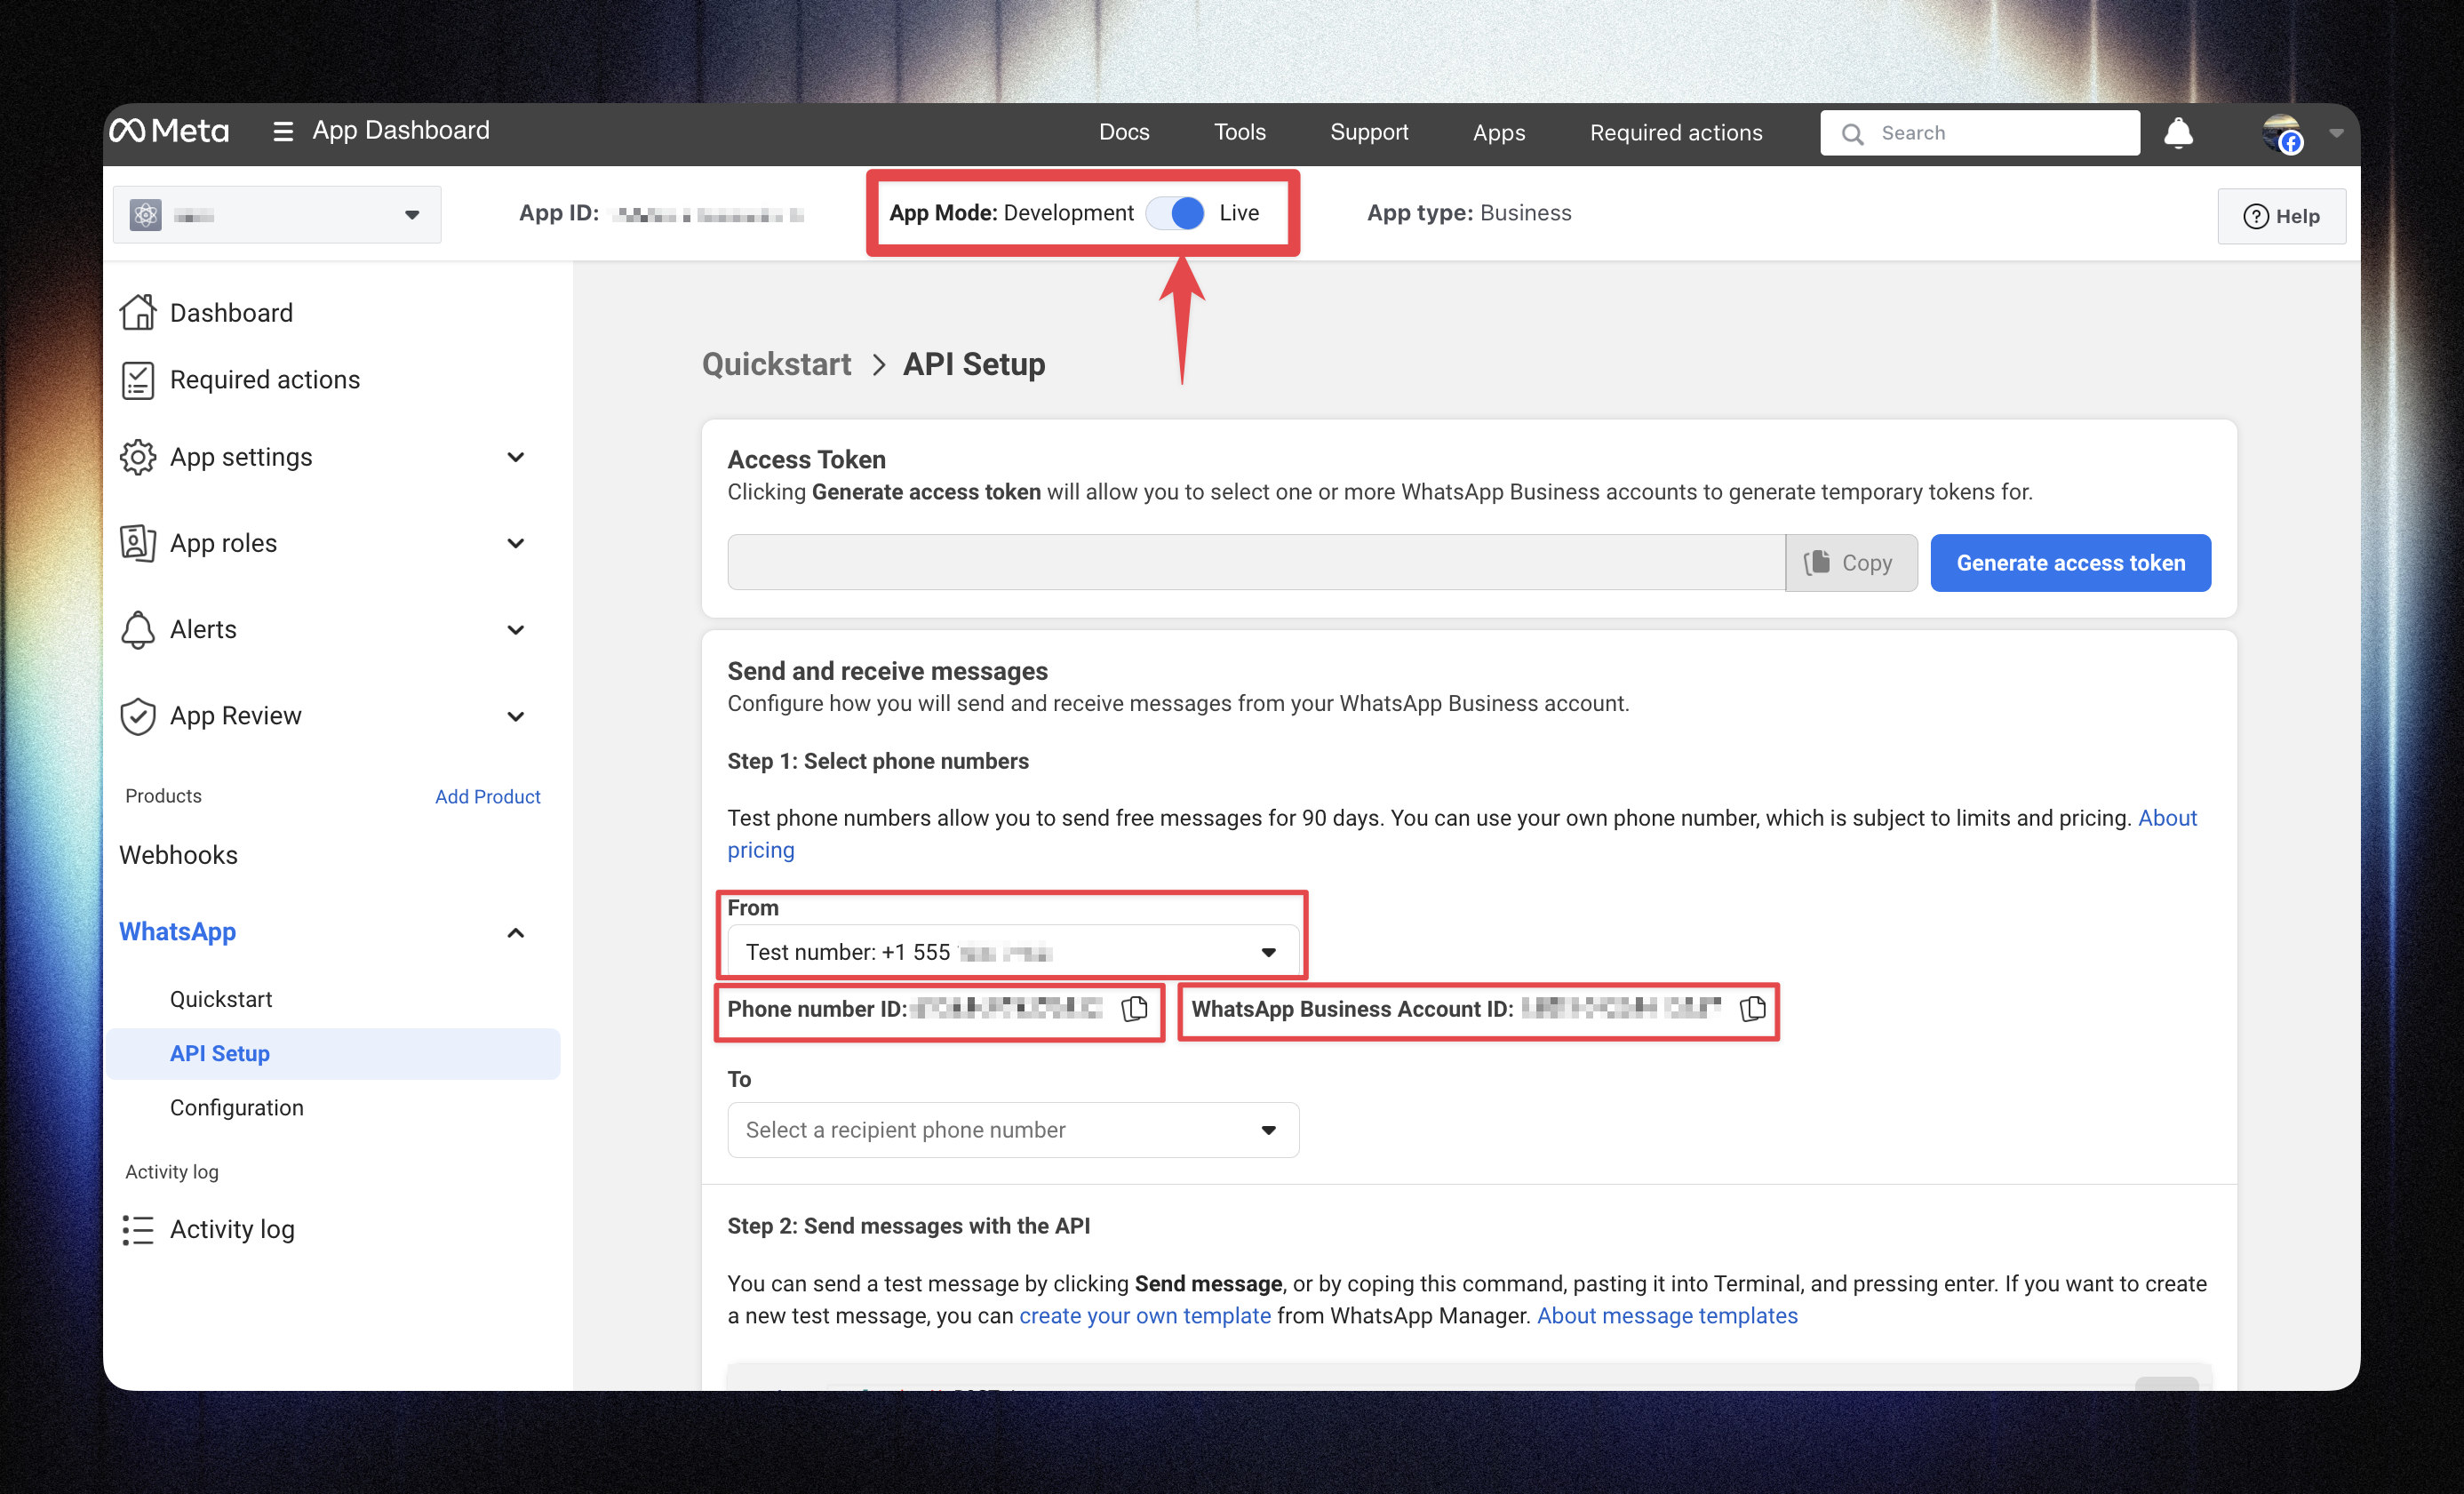
💡 Live mode is required for sending real messages through the API.
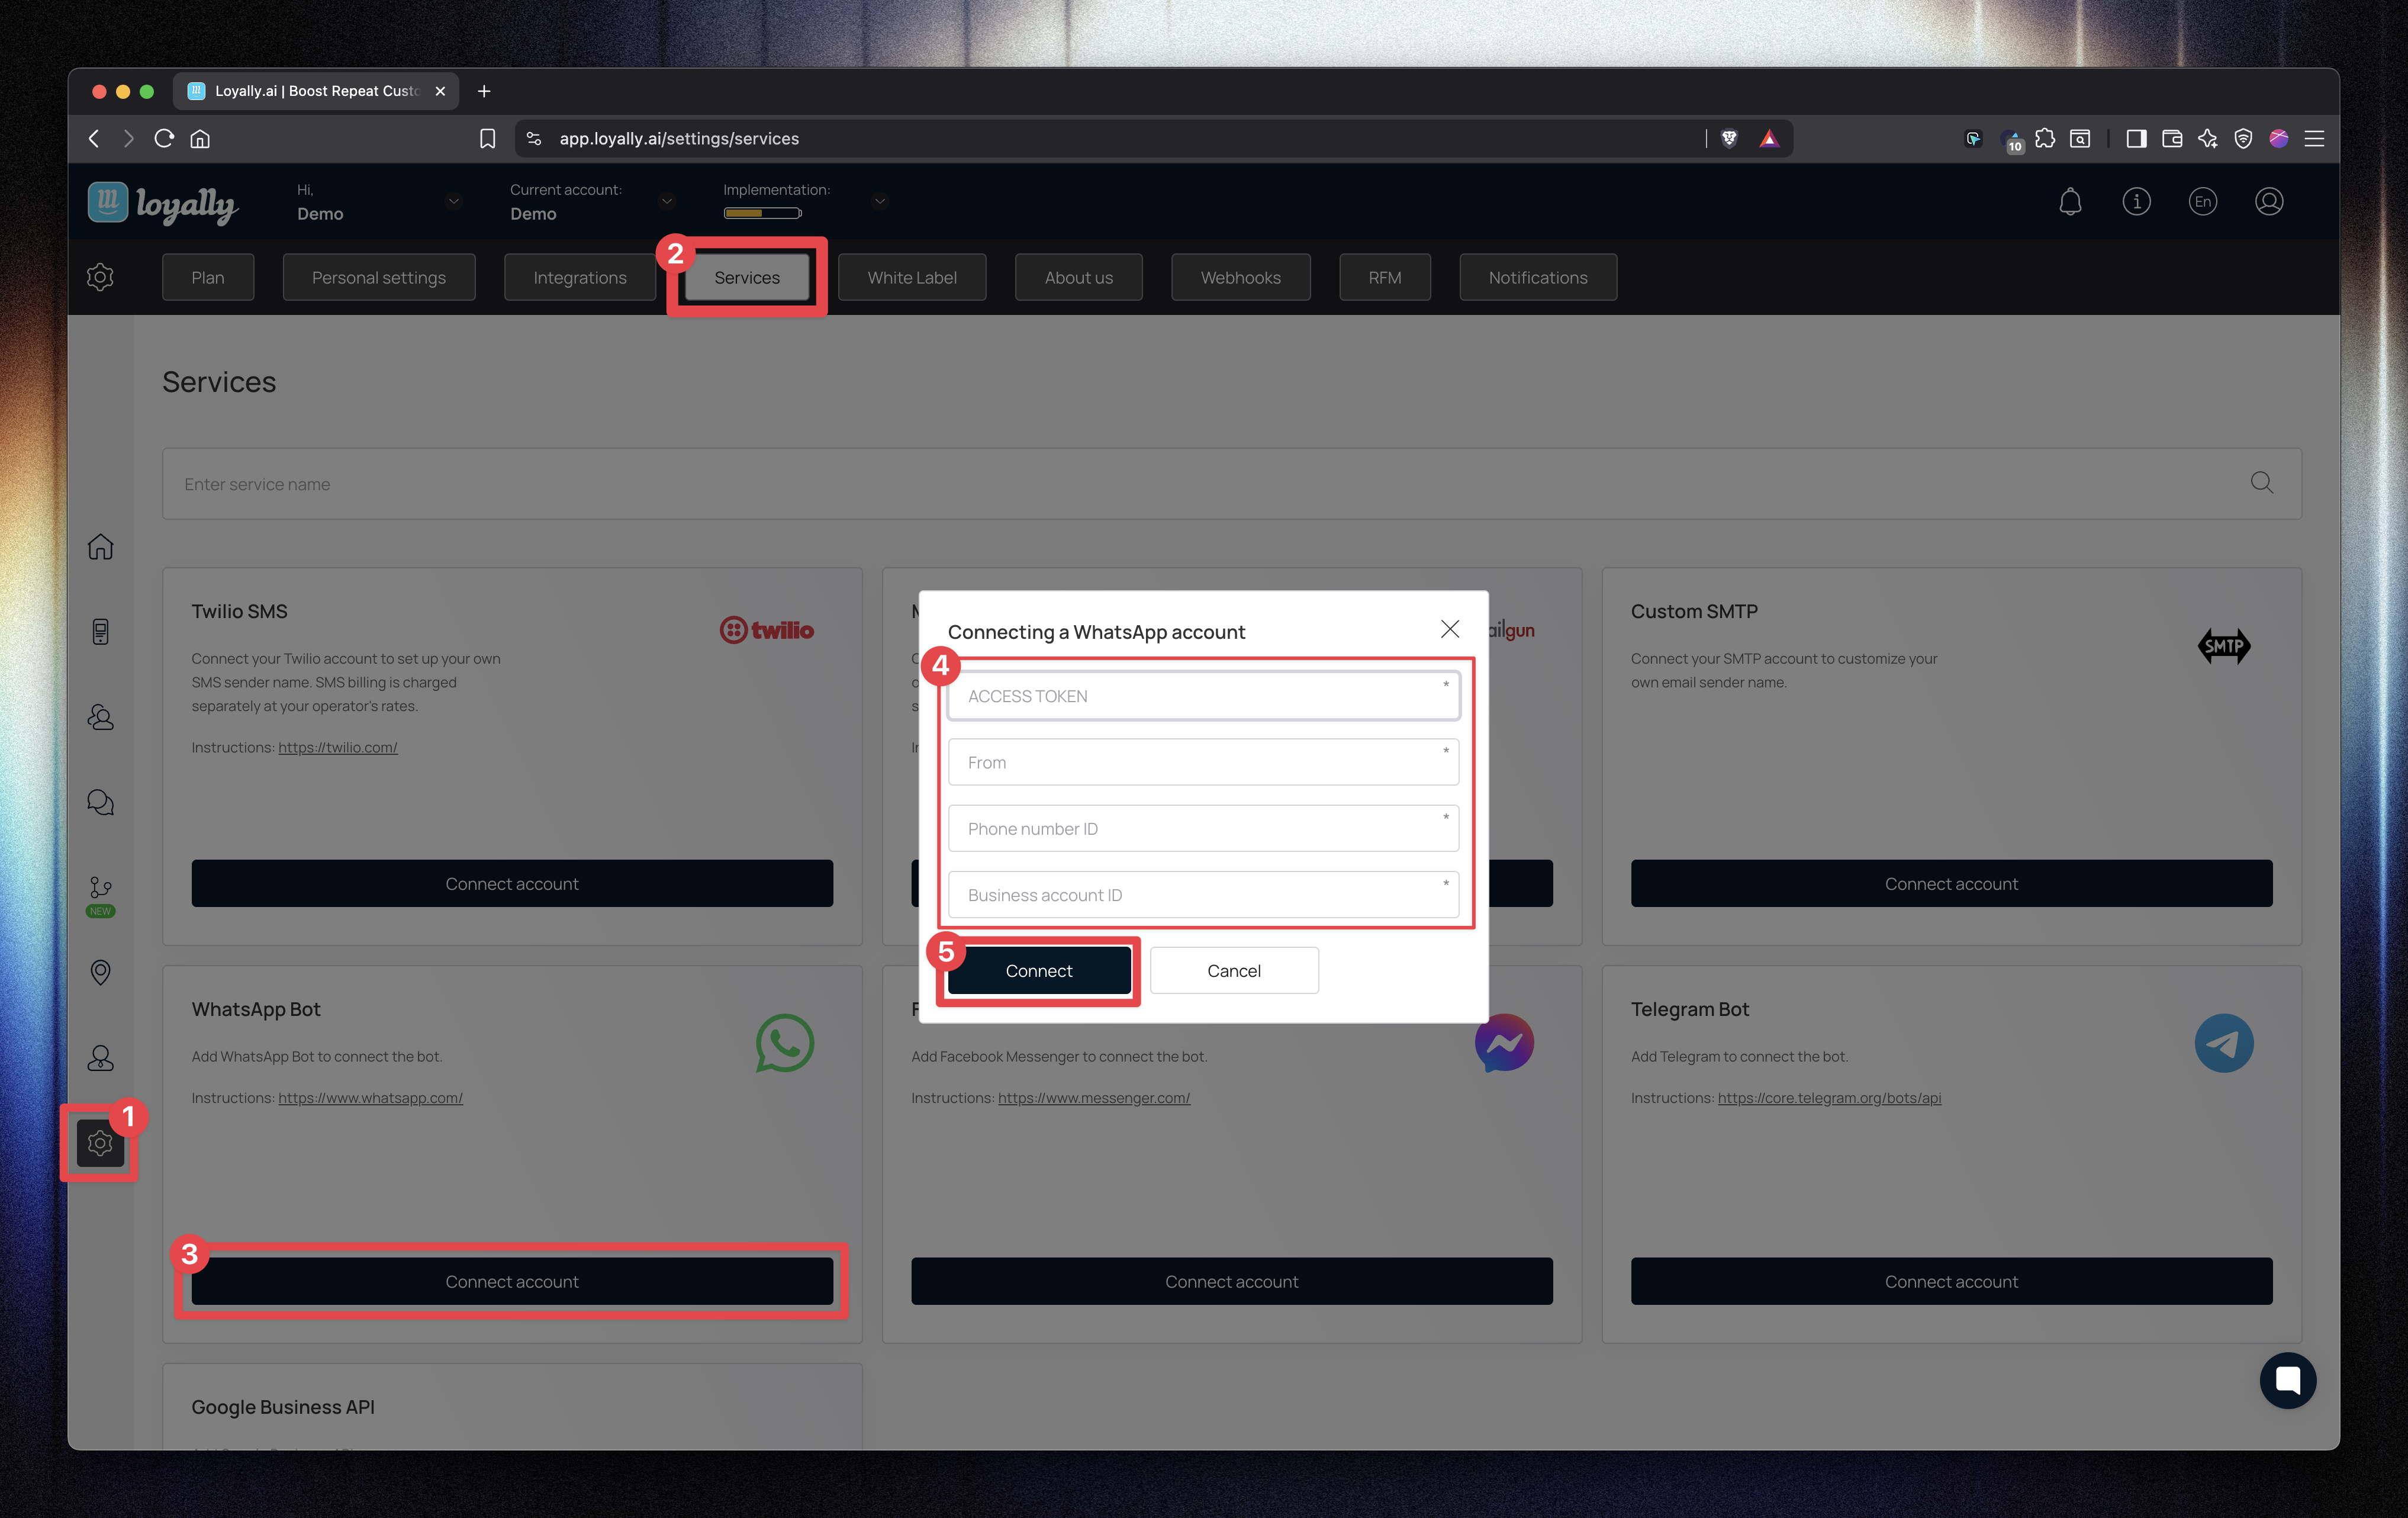
Go to your Loyally Dashboard.
Navigate to Mailings → Settings.
or visit directly: https://app.loyally.ai/mailings/settings
Click Connect WhatsApp Bot.
Fill in the required fields:
Token: [your permanent access token]
Phone number: [your business number]
Phone Number ID: [from Meta]
WhatsApp Business Account ID: [from Meta]
Click Connect.
Once connected, the status will show Active.
✅ Your WhatsApp Bot integration is complete 🎉
Issue | Likely Cause | Solution |
Token expired | Temporary token still in use | Generate and use a Permanent Access Token. |
Webhook not verifying | Wrong token or URL mismatch | Recopy the Loyally Webhook URL and Verification Token. |
Test message not delivered | Unapproved message template | Get your template approved in the Meta dashboard. |
Message delay | Meta API rate limits | Avoid sending too many messages at once; space them out. |
💡 Tip: Check your Meta Developer Logs → WhatsApp → Activity for detailed error messages.
Connecting the WhatsApp Bot to Loyally lets you send automated, personalized messages that strengthen your customer relationships.
Once integrated, you can use WhatsApp as a powerful communication channel inside campaigns — keeping customers engaged and informed wherever they are.
How to Create an Automation in Loyally
Set up automations in Loyally to trigger personalized messages, rewards, and workflows based on customer behavior — keeping your loyalty program running smoothly and efficiently.
Creating an SMS campaign
How to create your SMS campaign
How does PUSH notifications work?
Learn more about how push-notifications work on devices