Automations in Loyally help you handle repetitive tasks automatically — from sending messages to rewarding customer milestones.
They keep your loyalty program consistent, responsive, and personalized while saving time for your staff.
Use automations to:
Send welcome messages when customers join your program
Reward members when they reach specific milestones
Re-engage inactive customers automatically
Deliver targeted offers or reminders based on customer behavior
Before setting up your first automation, make sure:
You’ve created at least one loyalty card or customer segment.
Your email/SMS providers (e.g., SendGrid, Twilio) are connected under Settings → Integrations.
You have the proper permissions to create or edit automations.

Follow these steps to create and activate an automation in Loyally:
Log in to your Loyally Dashboard.
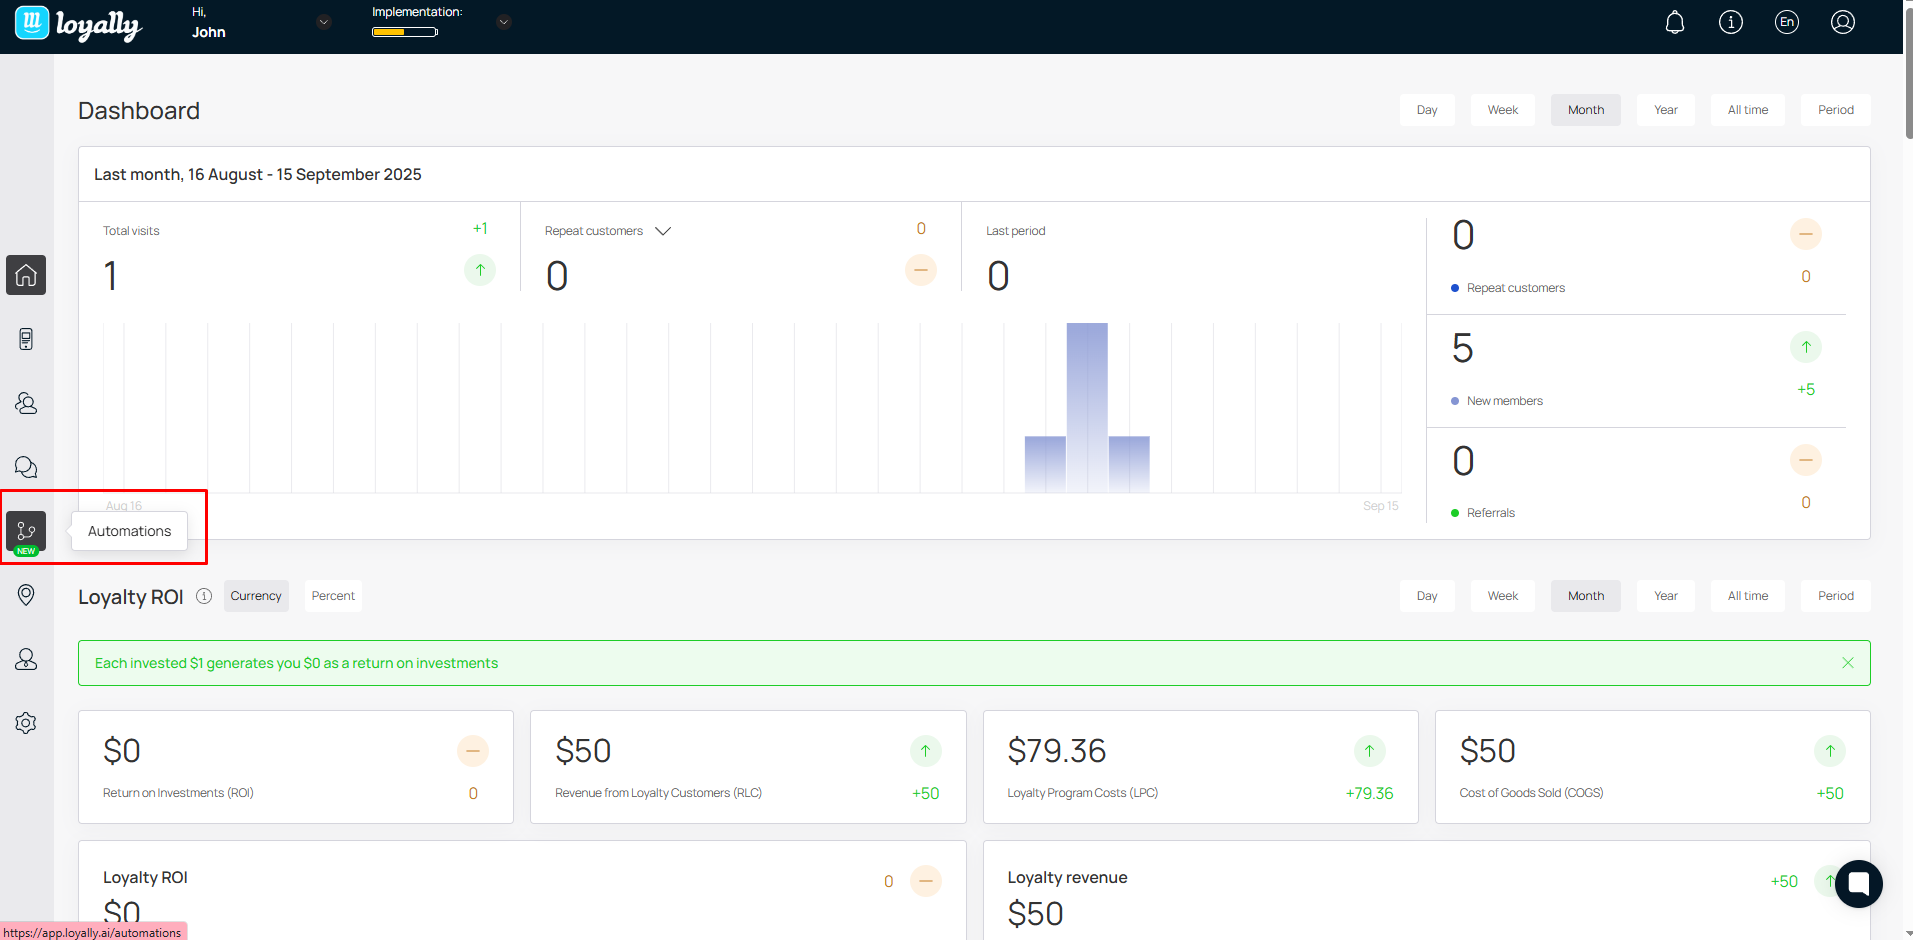
Click the Automations tab in the left-hand menu.
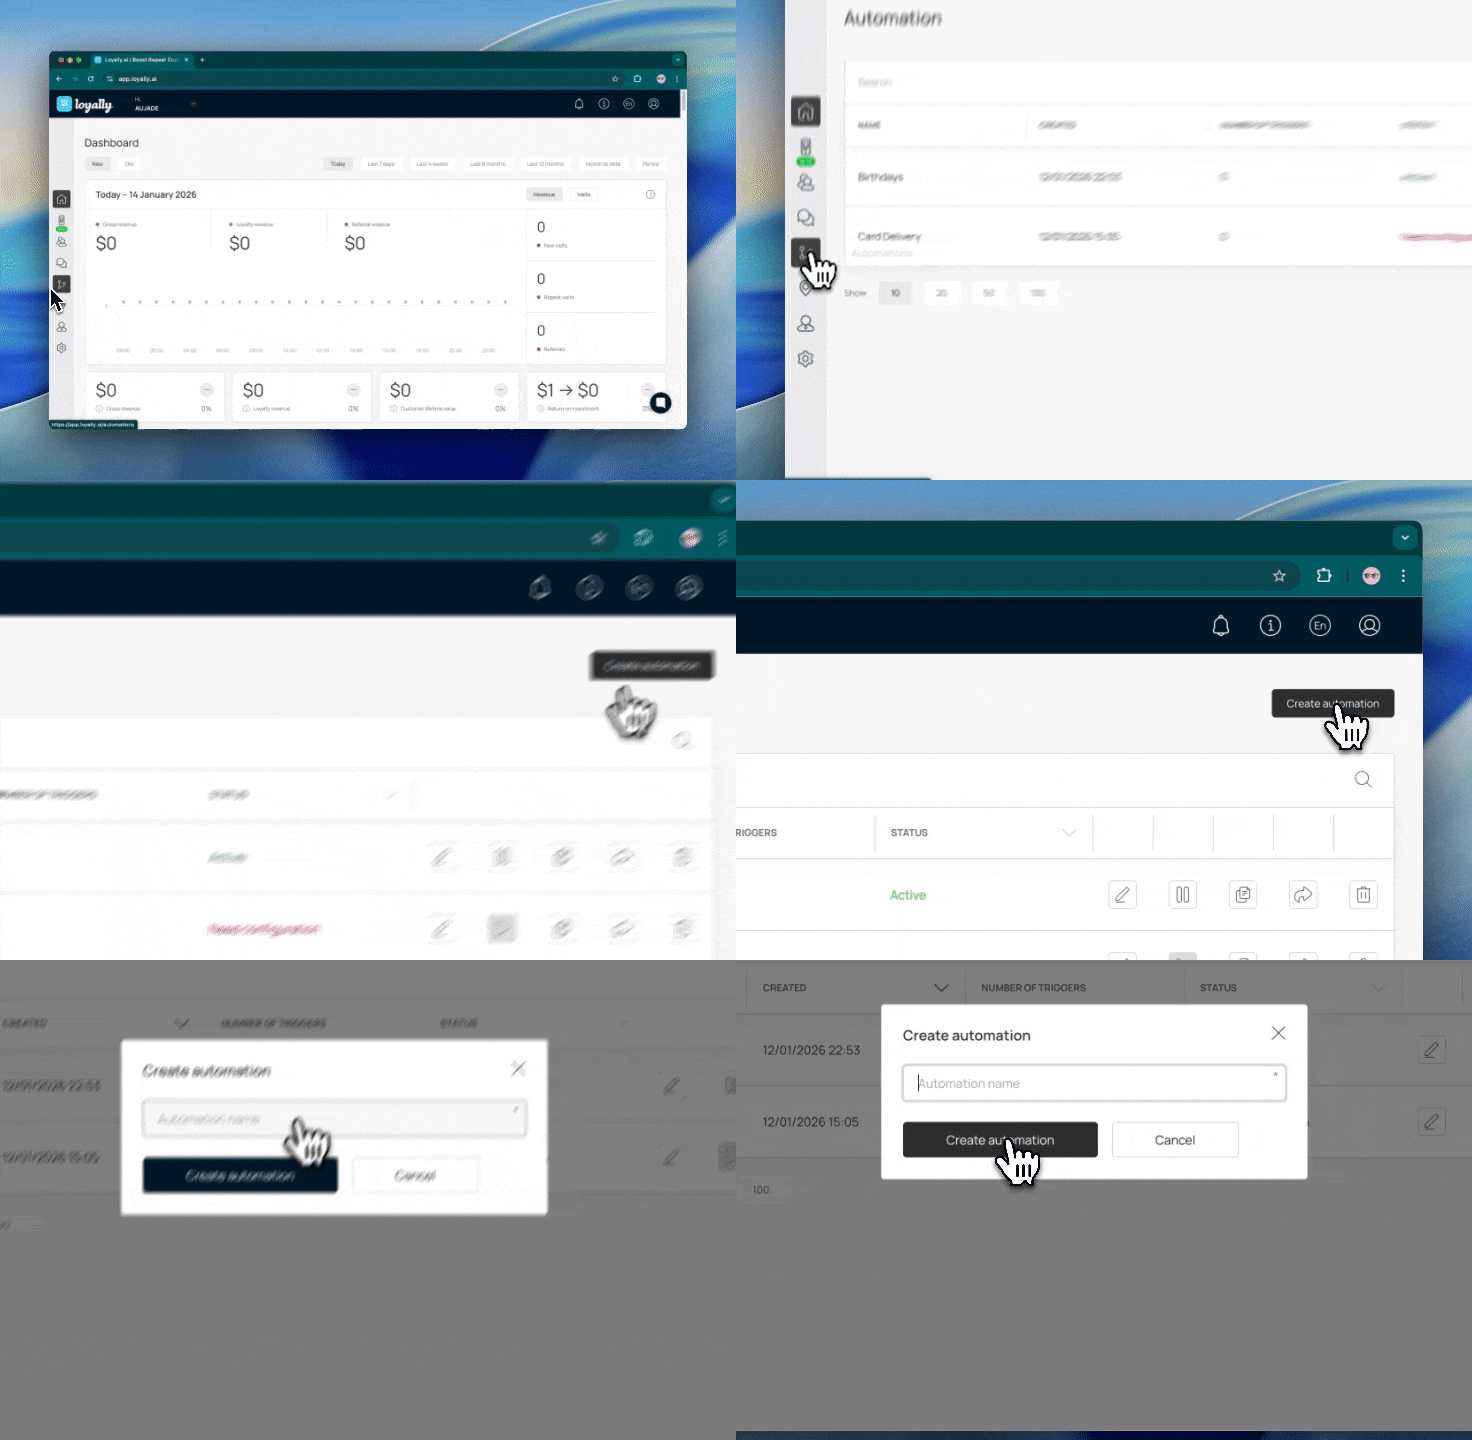
Select ‘Create Automation’.
Give your automation a clear, descriptive name, like “100 Points Reward Notification” or “Birthday Message Flow.”
A Trigger is the event that starts your automation.
Common triggers include:
🧾 Customer joins the program
🎂 Customer’s birthday
💰 Points count reached
💳 Card installed or activated
Example:
If you select Points Count Reached = 100, the automation will start automatically when a customer collects 100 points.
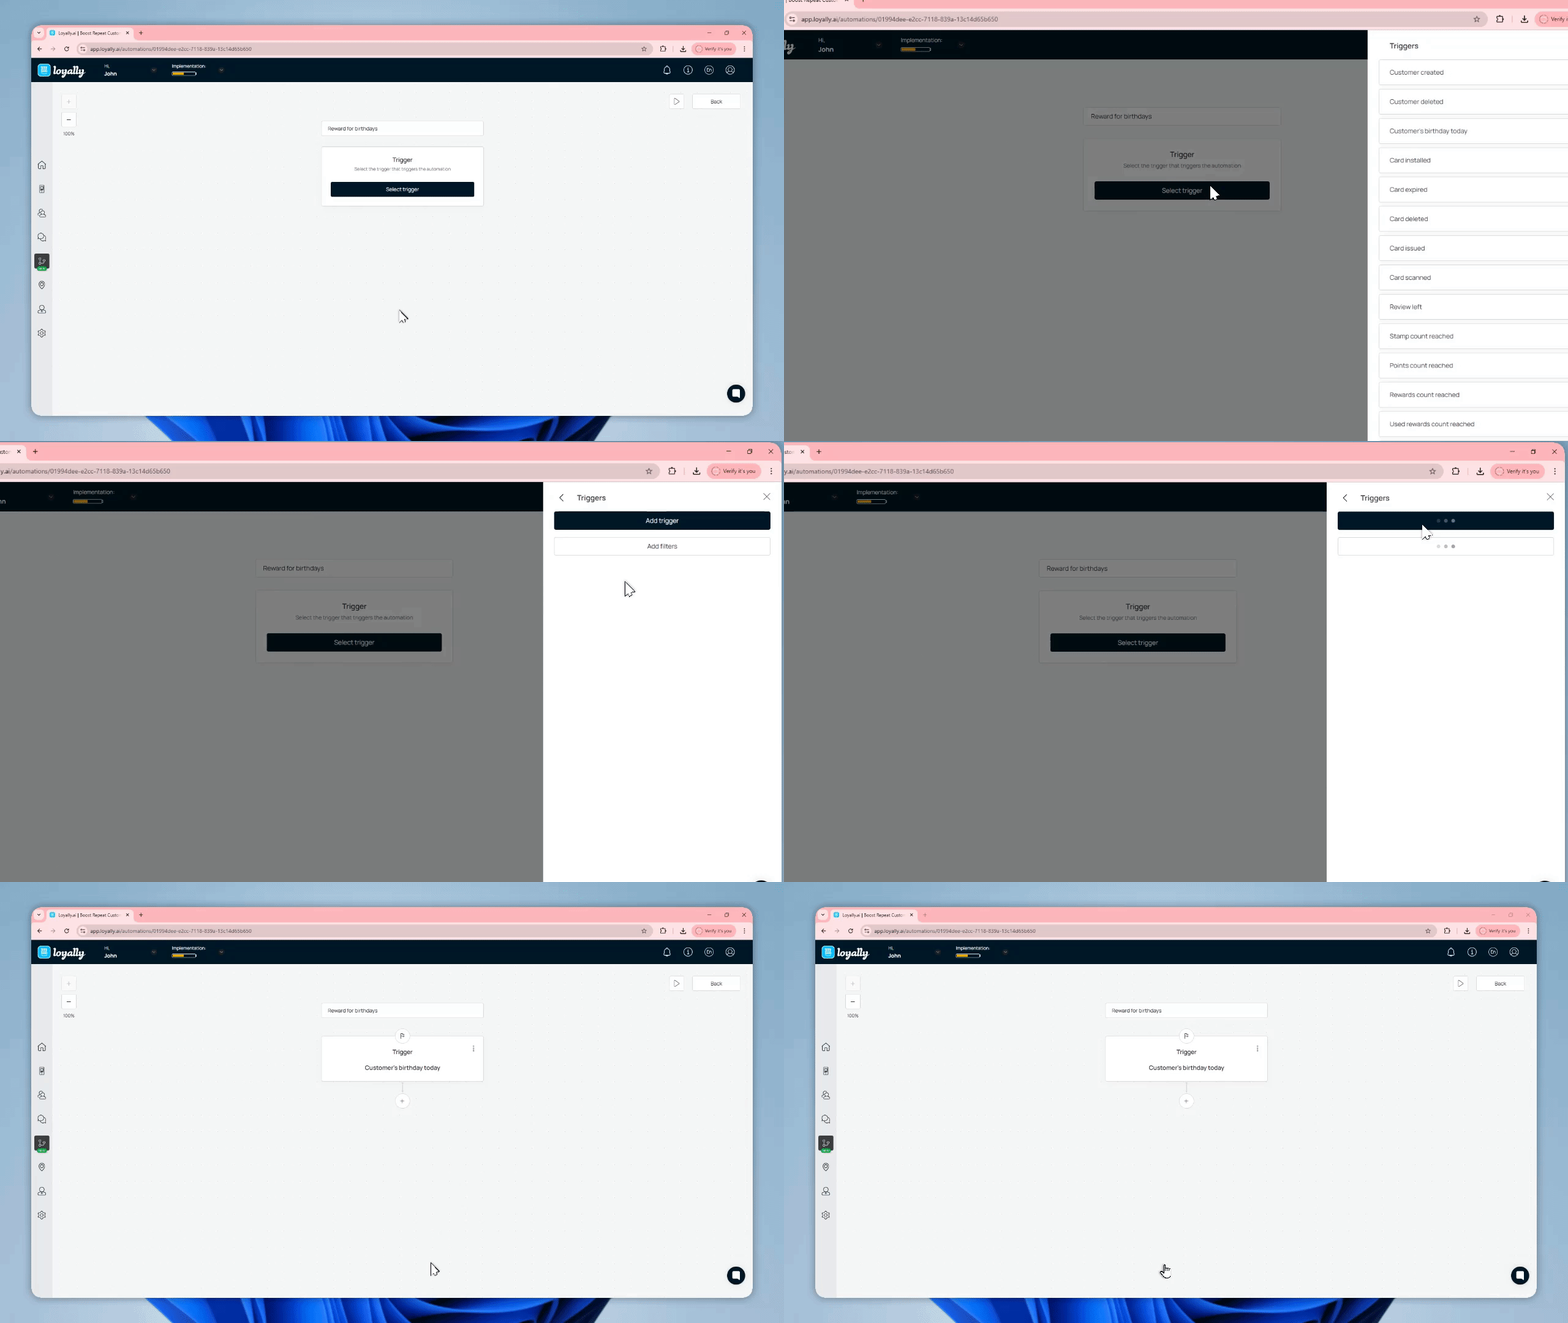
Filters help refine your trigger so the automation only runs under specific conditions.
Example:
Trigger only if order total > $50 or customer tag = VIP.
You can stack multiple filters to create precise targeting.
Conditions create branches within your workflow, allowing you to define different paths for different scenarios.
Example:
If the customer’s bonus balance > 99, send them an email encouraging redemption.
If bonus balance < 99, send a push notification reminder.
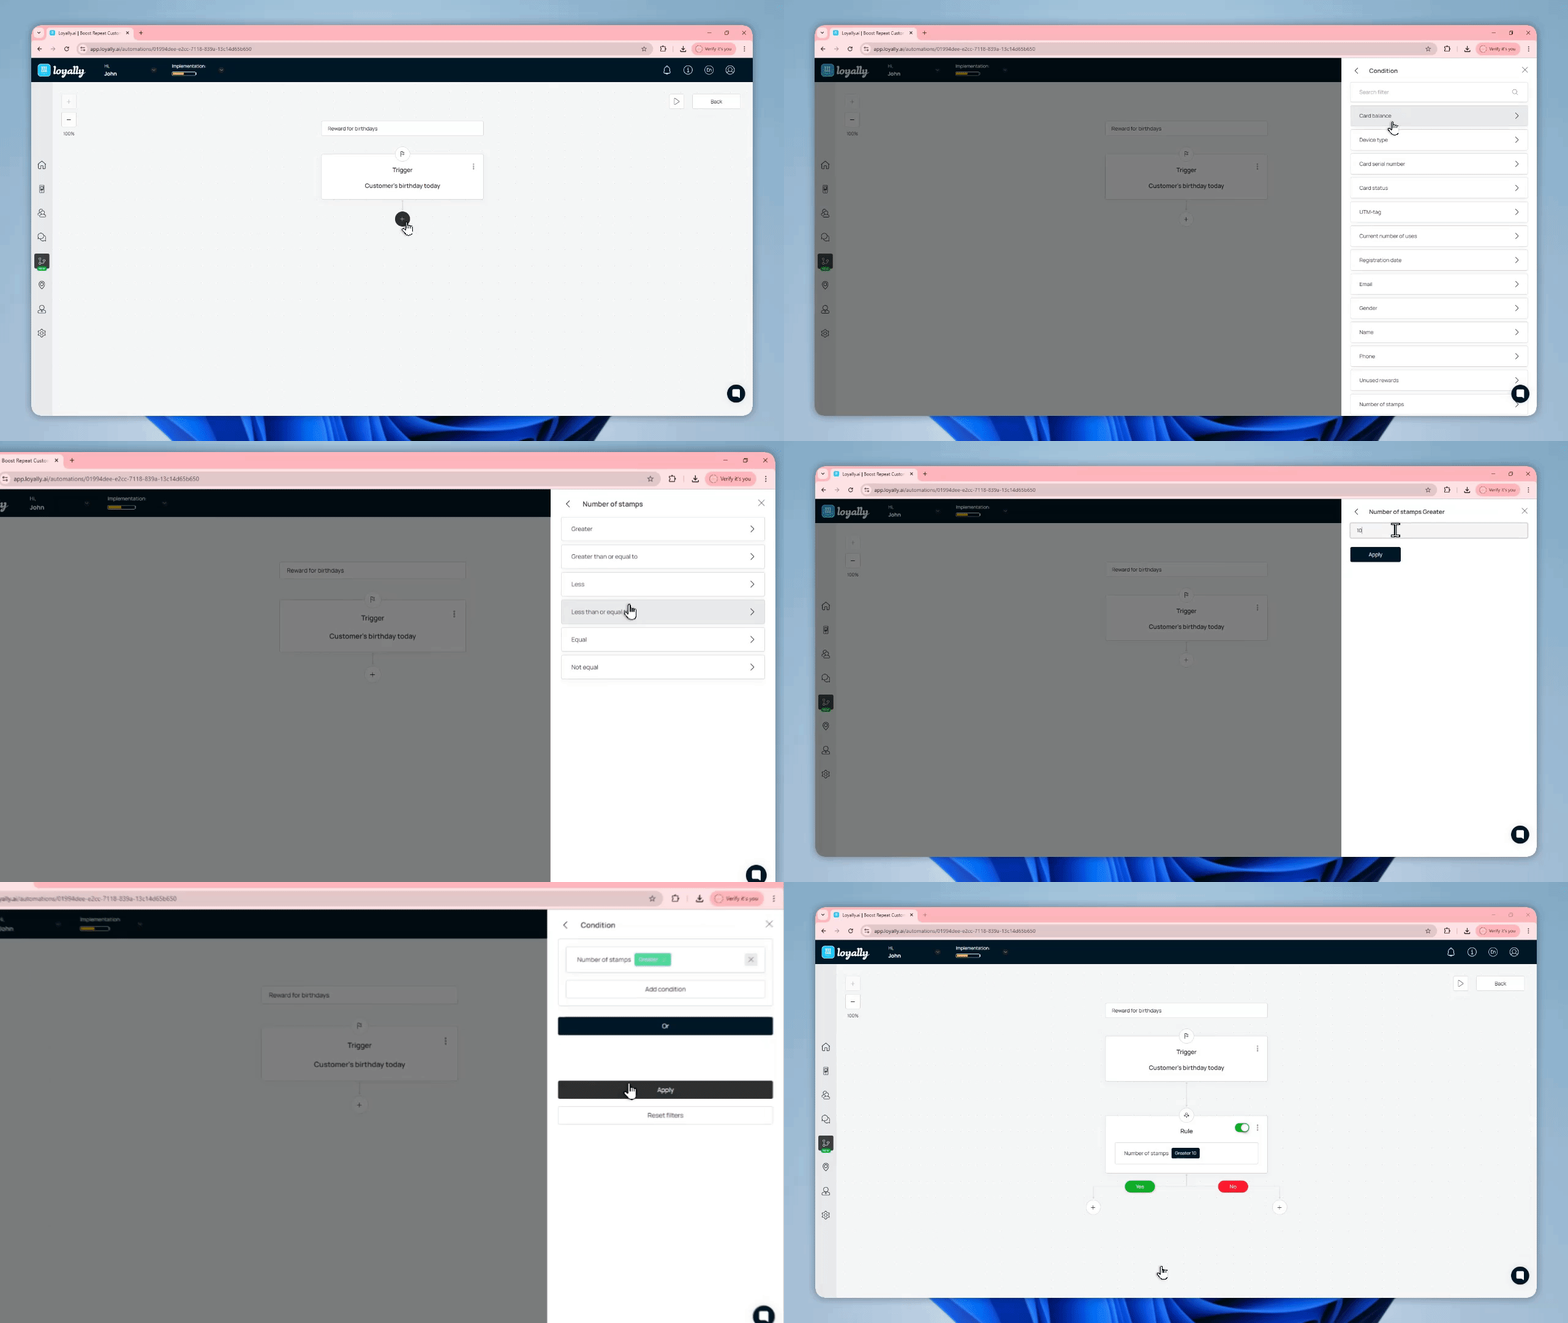
Each condition or branch defines what happens when the trigger occurs.
You can combine multiple actions in sequence to create complex, personalized workflows.
Action Type | Description | Example |
Send Email | Sends an email through your connected email provider. | “Congrats on reaching 100 points!” |
Send Push Notification | Sends a push message to the customer’s loyalty card. | “You’ve earned a reward — tap to view!” |
Add Tag / Update Record | Updates customer data automatically. | Tag customer as “VIP” when spending > $200. |
Issue Reward | Grants a bonus or coupon automatically. | Add 10% discount for loyal customers. |
Wait (Delay) | Adds a time delay before the next step. | Wait 7 days before sending follow-up. |
⚠ Important:
Approval (ACL) actions only work for unlimited cards.
Redemption actions only work for limited cards.
Always confirm that your selected action is supported by your card type.
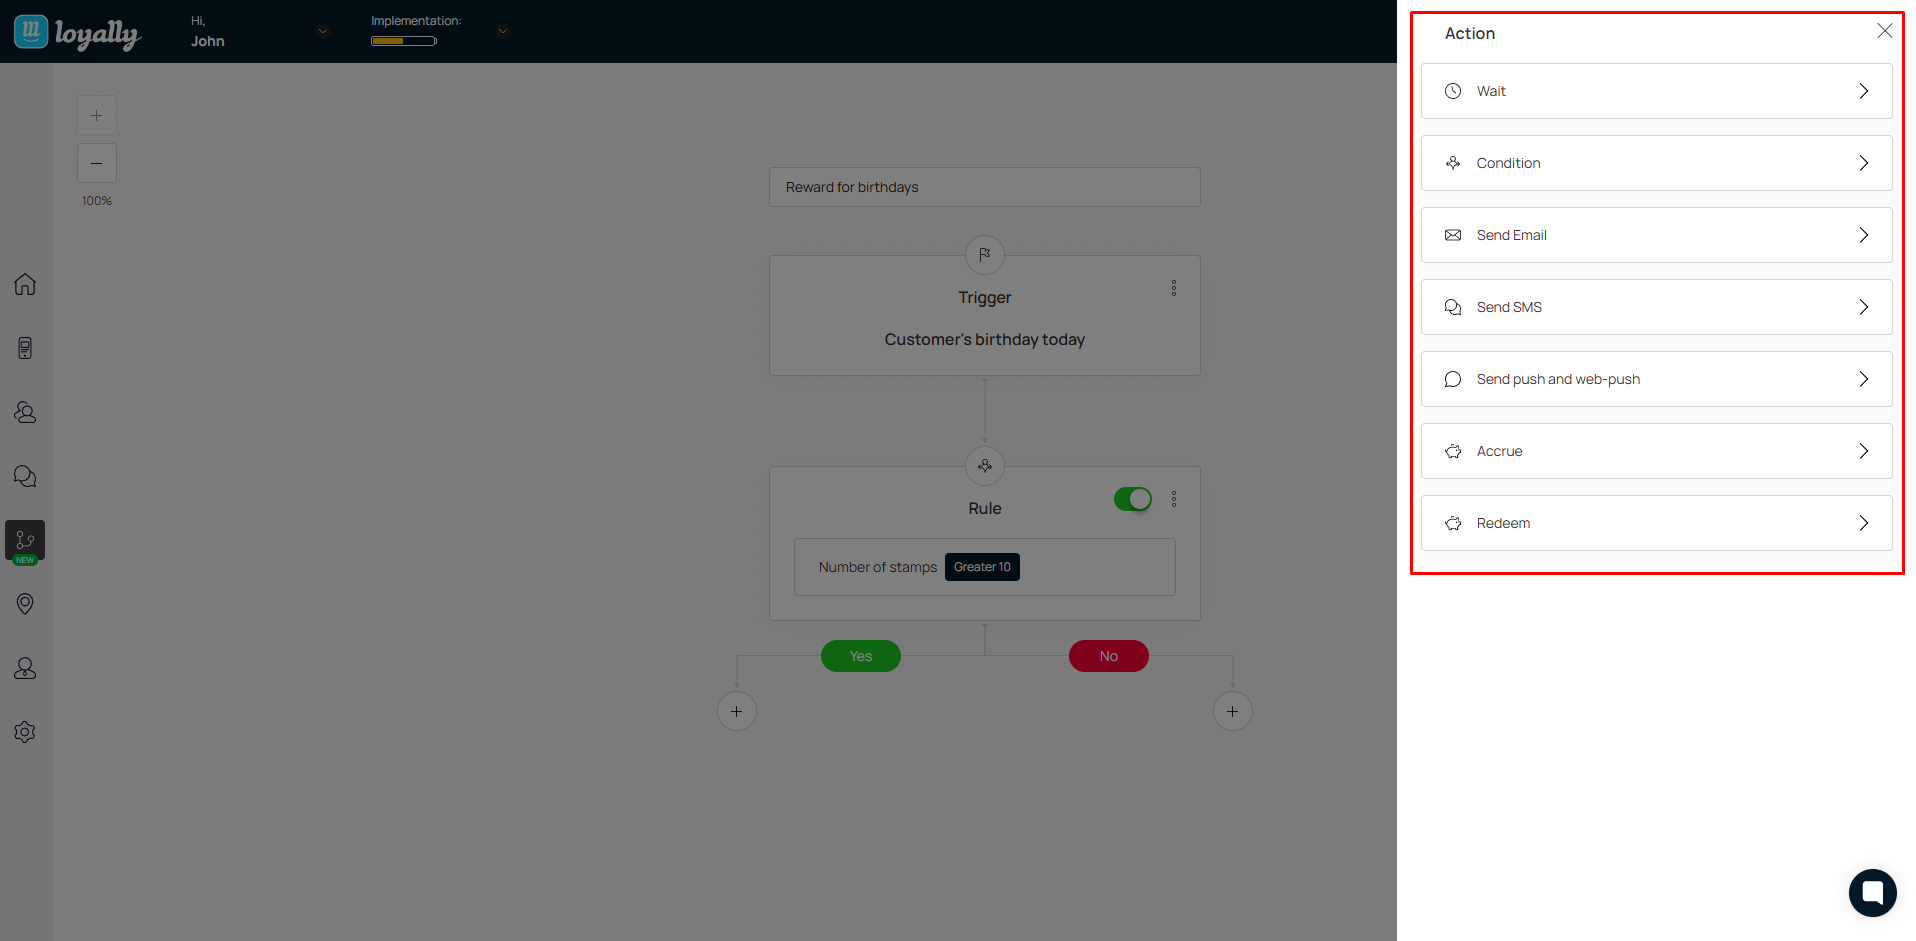

You can space out your actions using delays between steps.
Click the three dots (⋯) next to an action to edit timing.
Example:
Send a push notification → wait 7 days → send a follow-up email reminder.
Before going live, test your automation to ensure it behaves as expected:
Use a test customer account.
Manually trigger the event (e.g., add 100 points).
Check that each action runs correctly (email sent, push received).
Review the automation log for confirmation or errors.
Once your setup is complete:
Your changes are saved automatically (no Save button needed).
Click the ▶ Play icon to activate your automation.
Click ⏸ Pause anytime to temporarily stop it.
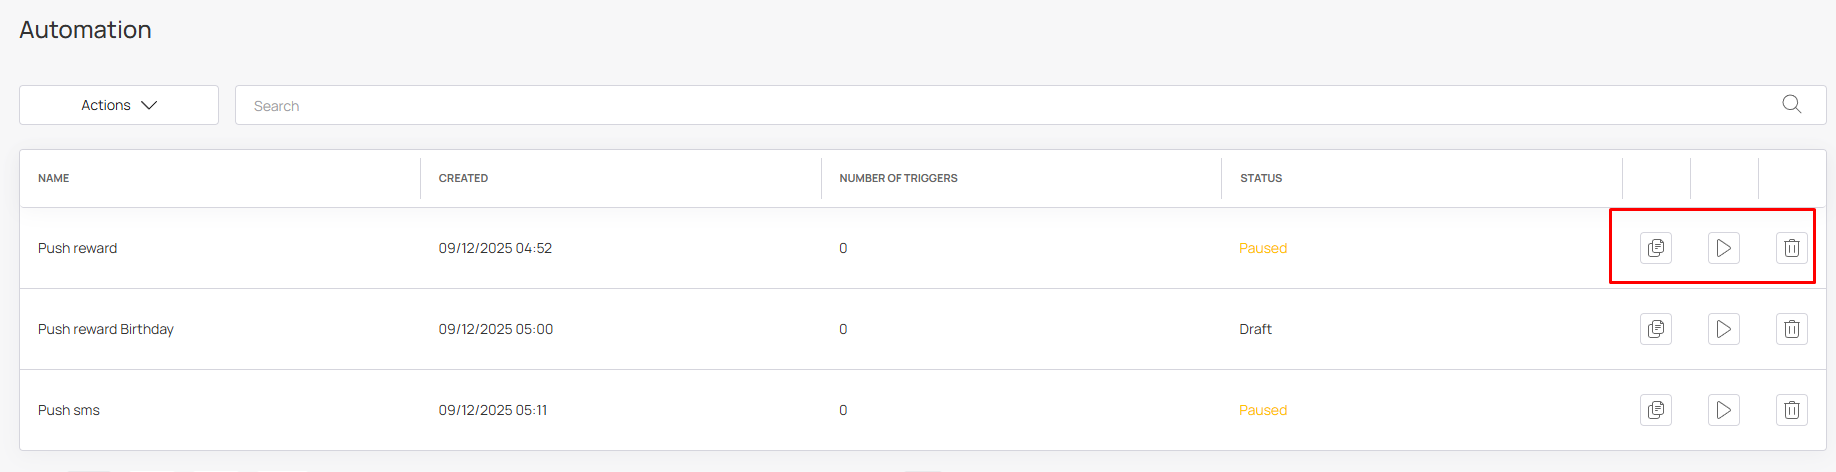
The Automations Page provides an overview of all active, paused, and draft automations.
Field | Description |
Name | The title of your automation for easy reference. |
Created | The date your automation was created. |
Number of Triggers | Shows how many times the automation has run. |
Status | Indicates whether it’s Active, Paused, or Draft. |
Quickly manage your automations with built-in shortcuts:
Button | Function |
📋 Copy | Duplicate any automation for faster setup of similar workflows. |
▶ Play / ⏸ Pause | Start or stop an automation instantly. |
🗑 Delete | Remove unused automations to keep your dashboard organized. |
Goal | Trigger | Action |
Welcome new members | Customer joins program | Send a welcome push + add 5 points |
Reward milestones | Points ≥ 100 | Send an email: “Congrats! Claim your reward.” |
Win back inactive customers | Last visit > 30 days | Send push: “We miss you! Here’s 10% off.” |
Birthday rewards | Customer birthday | Automatically send a birthday coupon |
Start simple — use one trigger and one action to begin.
Use customer milestones (birthdays, anniversaries, point goals) as triggers to boost engagement.
Combine automations with segments or tags for targeted messaging.
Regularly monitor your Number of Triggers metric to track performance.
Review automations monthly to optimize messaging and timing.
Automations in Loyally make your loyalty program smarter, faster, and more efficient.
By combining triggers, filters, and actions, you can create personalized workflows that engage customers automatically — driving higher retention and customer satisfaction.
SMS Setup with Twilio
Connect your Twilio account with Loyally.ai to send text messages (sms) to your customers.
Email Setup with Mailgun
Connect your Mailgun account with Loyally.ai to send email campaigns to your customers.
Webhooks
Learn how you can add Webhooks using Loyally.ai
Integrations
See how the integrations work