The Mailings Dashboard in Loyally.ai is your central hub for direct communication. Whether you are sending a quick update or setting up complex automated workflows, this tool ensures your brand stays top-of-mind by delivering messages directly to your customers' devices.
To access your communication tools, follow these simple steps:
Sign in to your official Loyally.ai account using your credentials.
From the main dashboard, locate and click on the Mailings tab in the primary navigation menu.
Once inside the Mailings section, you can switch between the Inbox, Mailings history, Send push, Push automation, and Custom auto-push using the top navigation buttons.
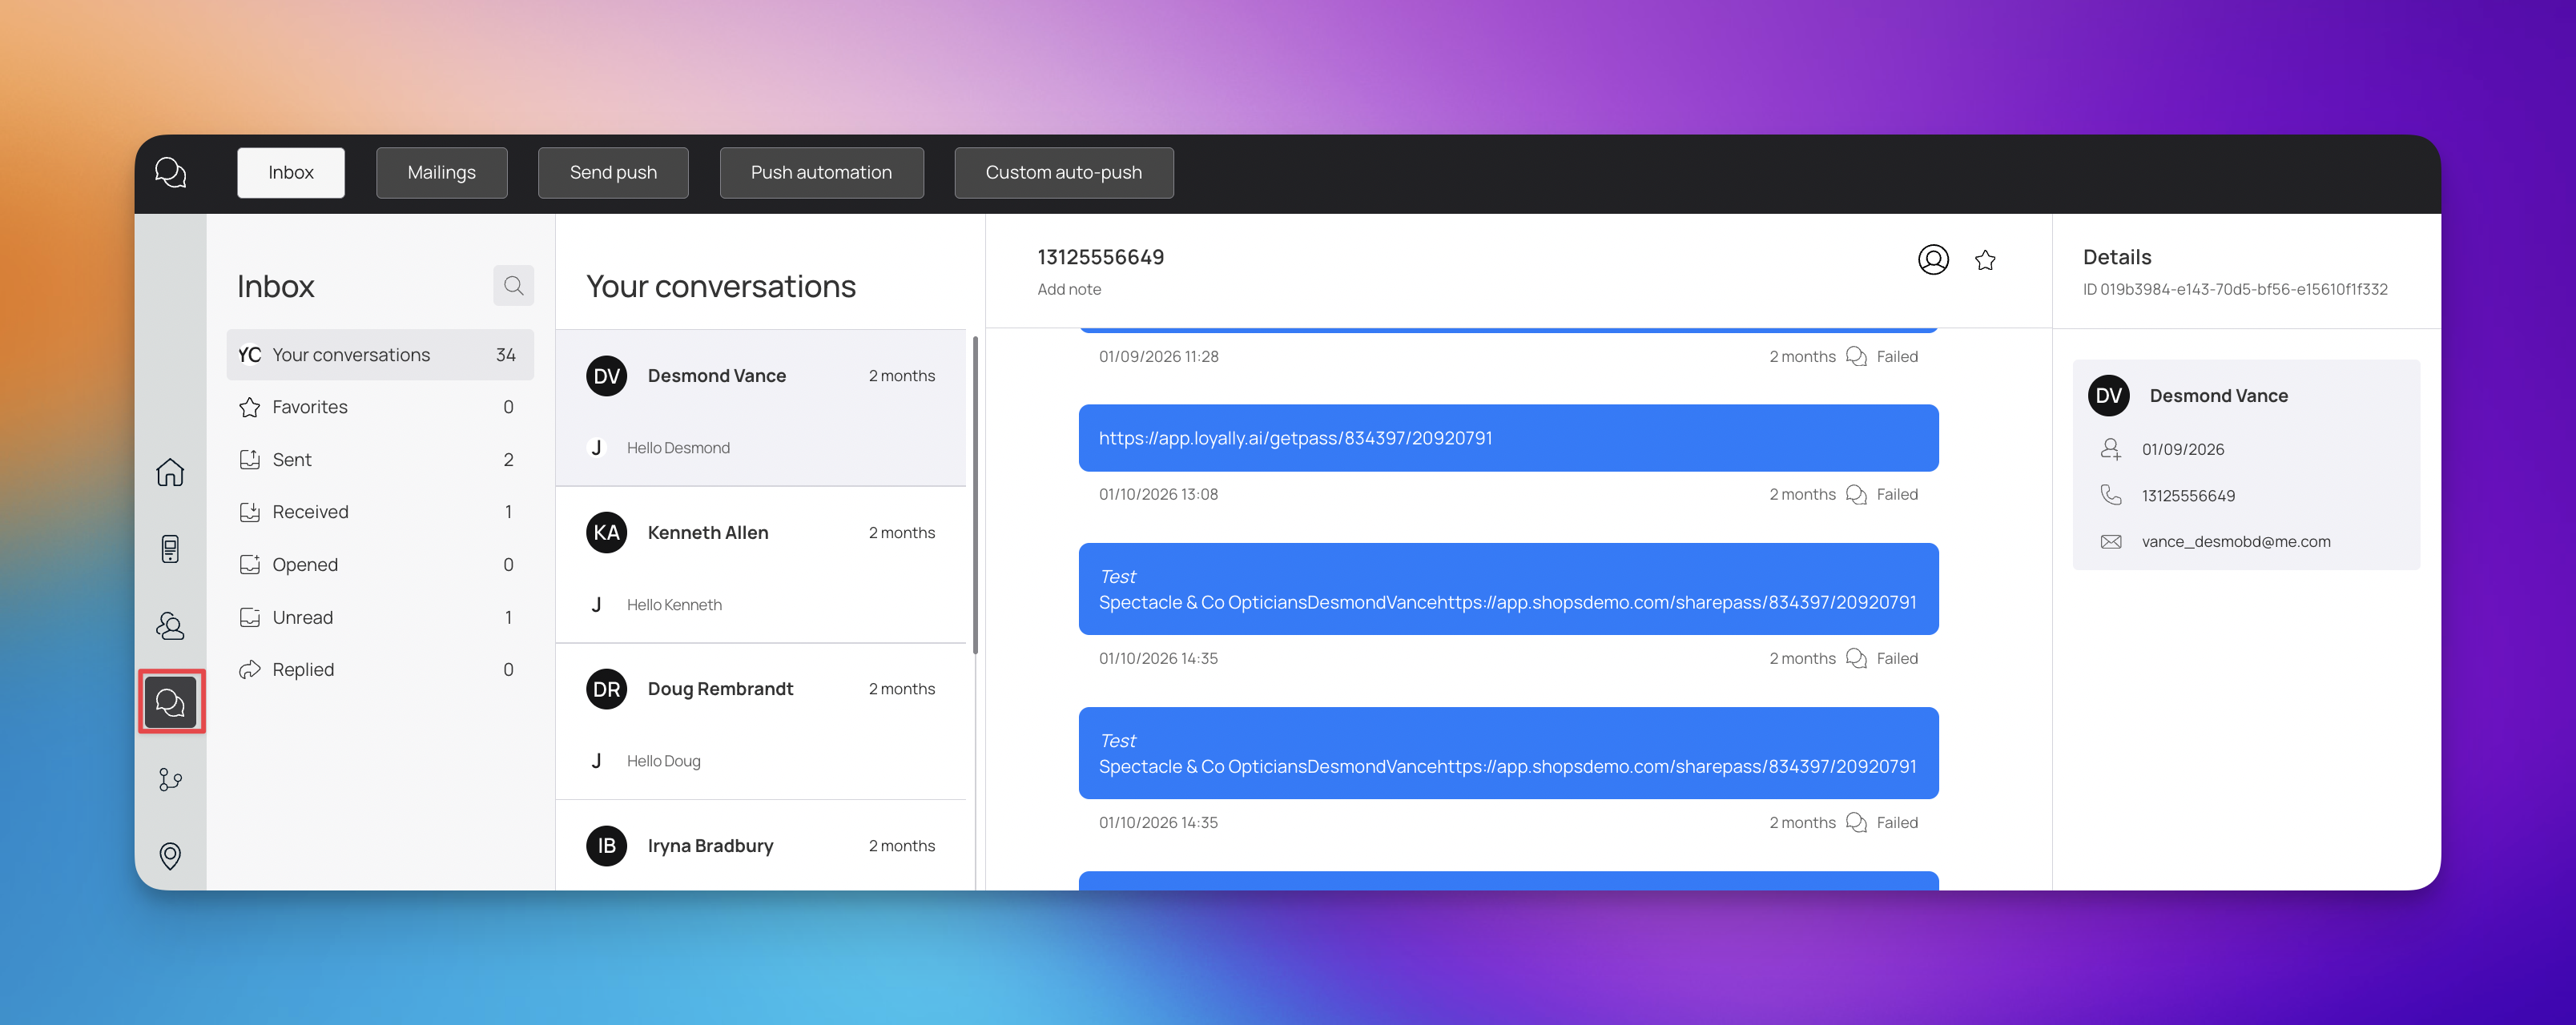
The Inbox serves as your primary tool for managing two-way communication with your customers, allowing you to provide personalized support and follow up on sent campaigns directly.
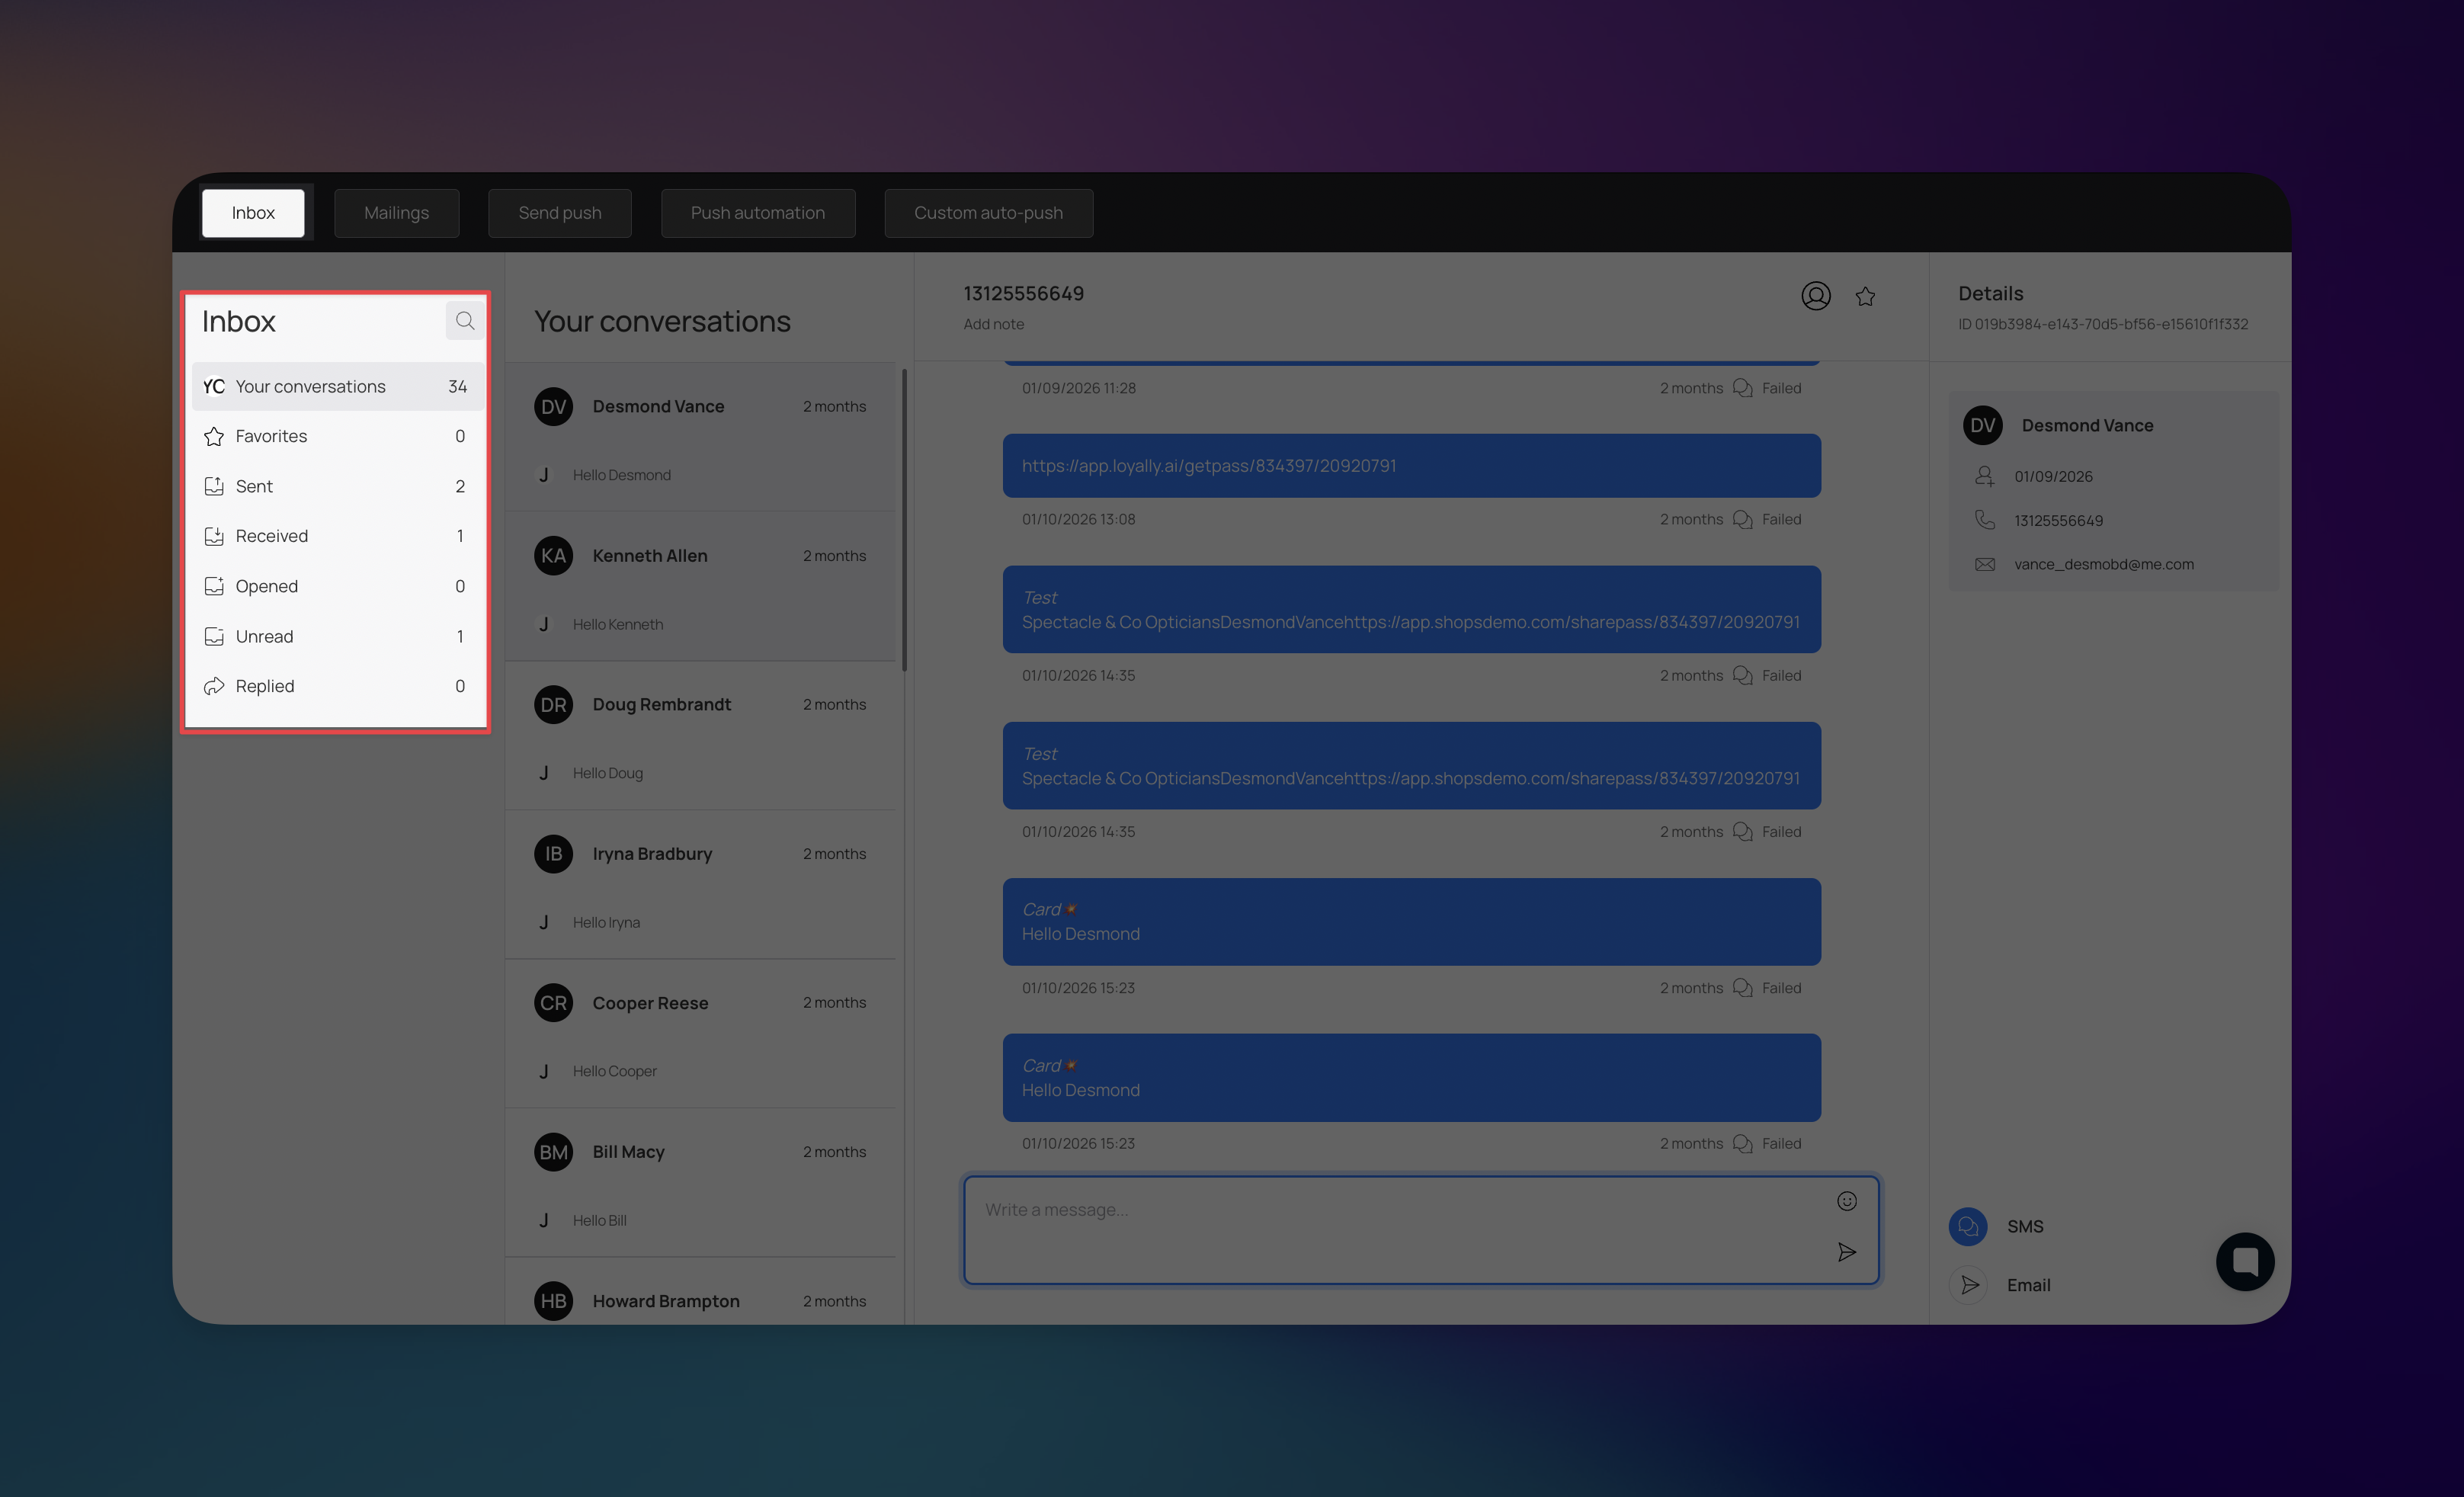
To help you stay organized, the Inbox categorizes your interactions based on their current status:
Your conversations: View all ongoing dialogue threads in one place.
Favorites: Mark specific high-priority conversations for quick access later.
Sent: Review all messages successfully dispatched from the platform.
Received: Monitor incoming messages and replies from your customers.
Opened: See which messages have been viewed by your recipients.
Unread: Identify new messages that still require your attention.
Replied: Track conversations where a response has already been provided.
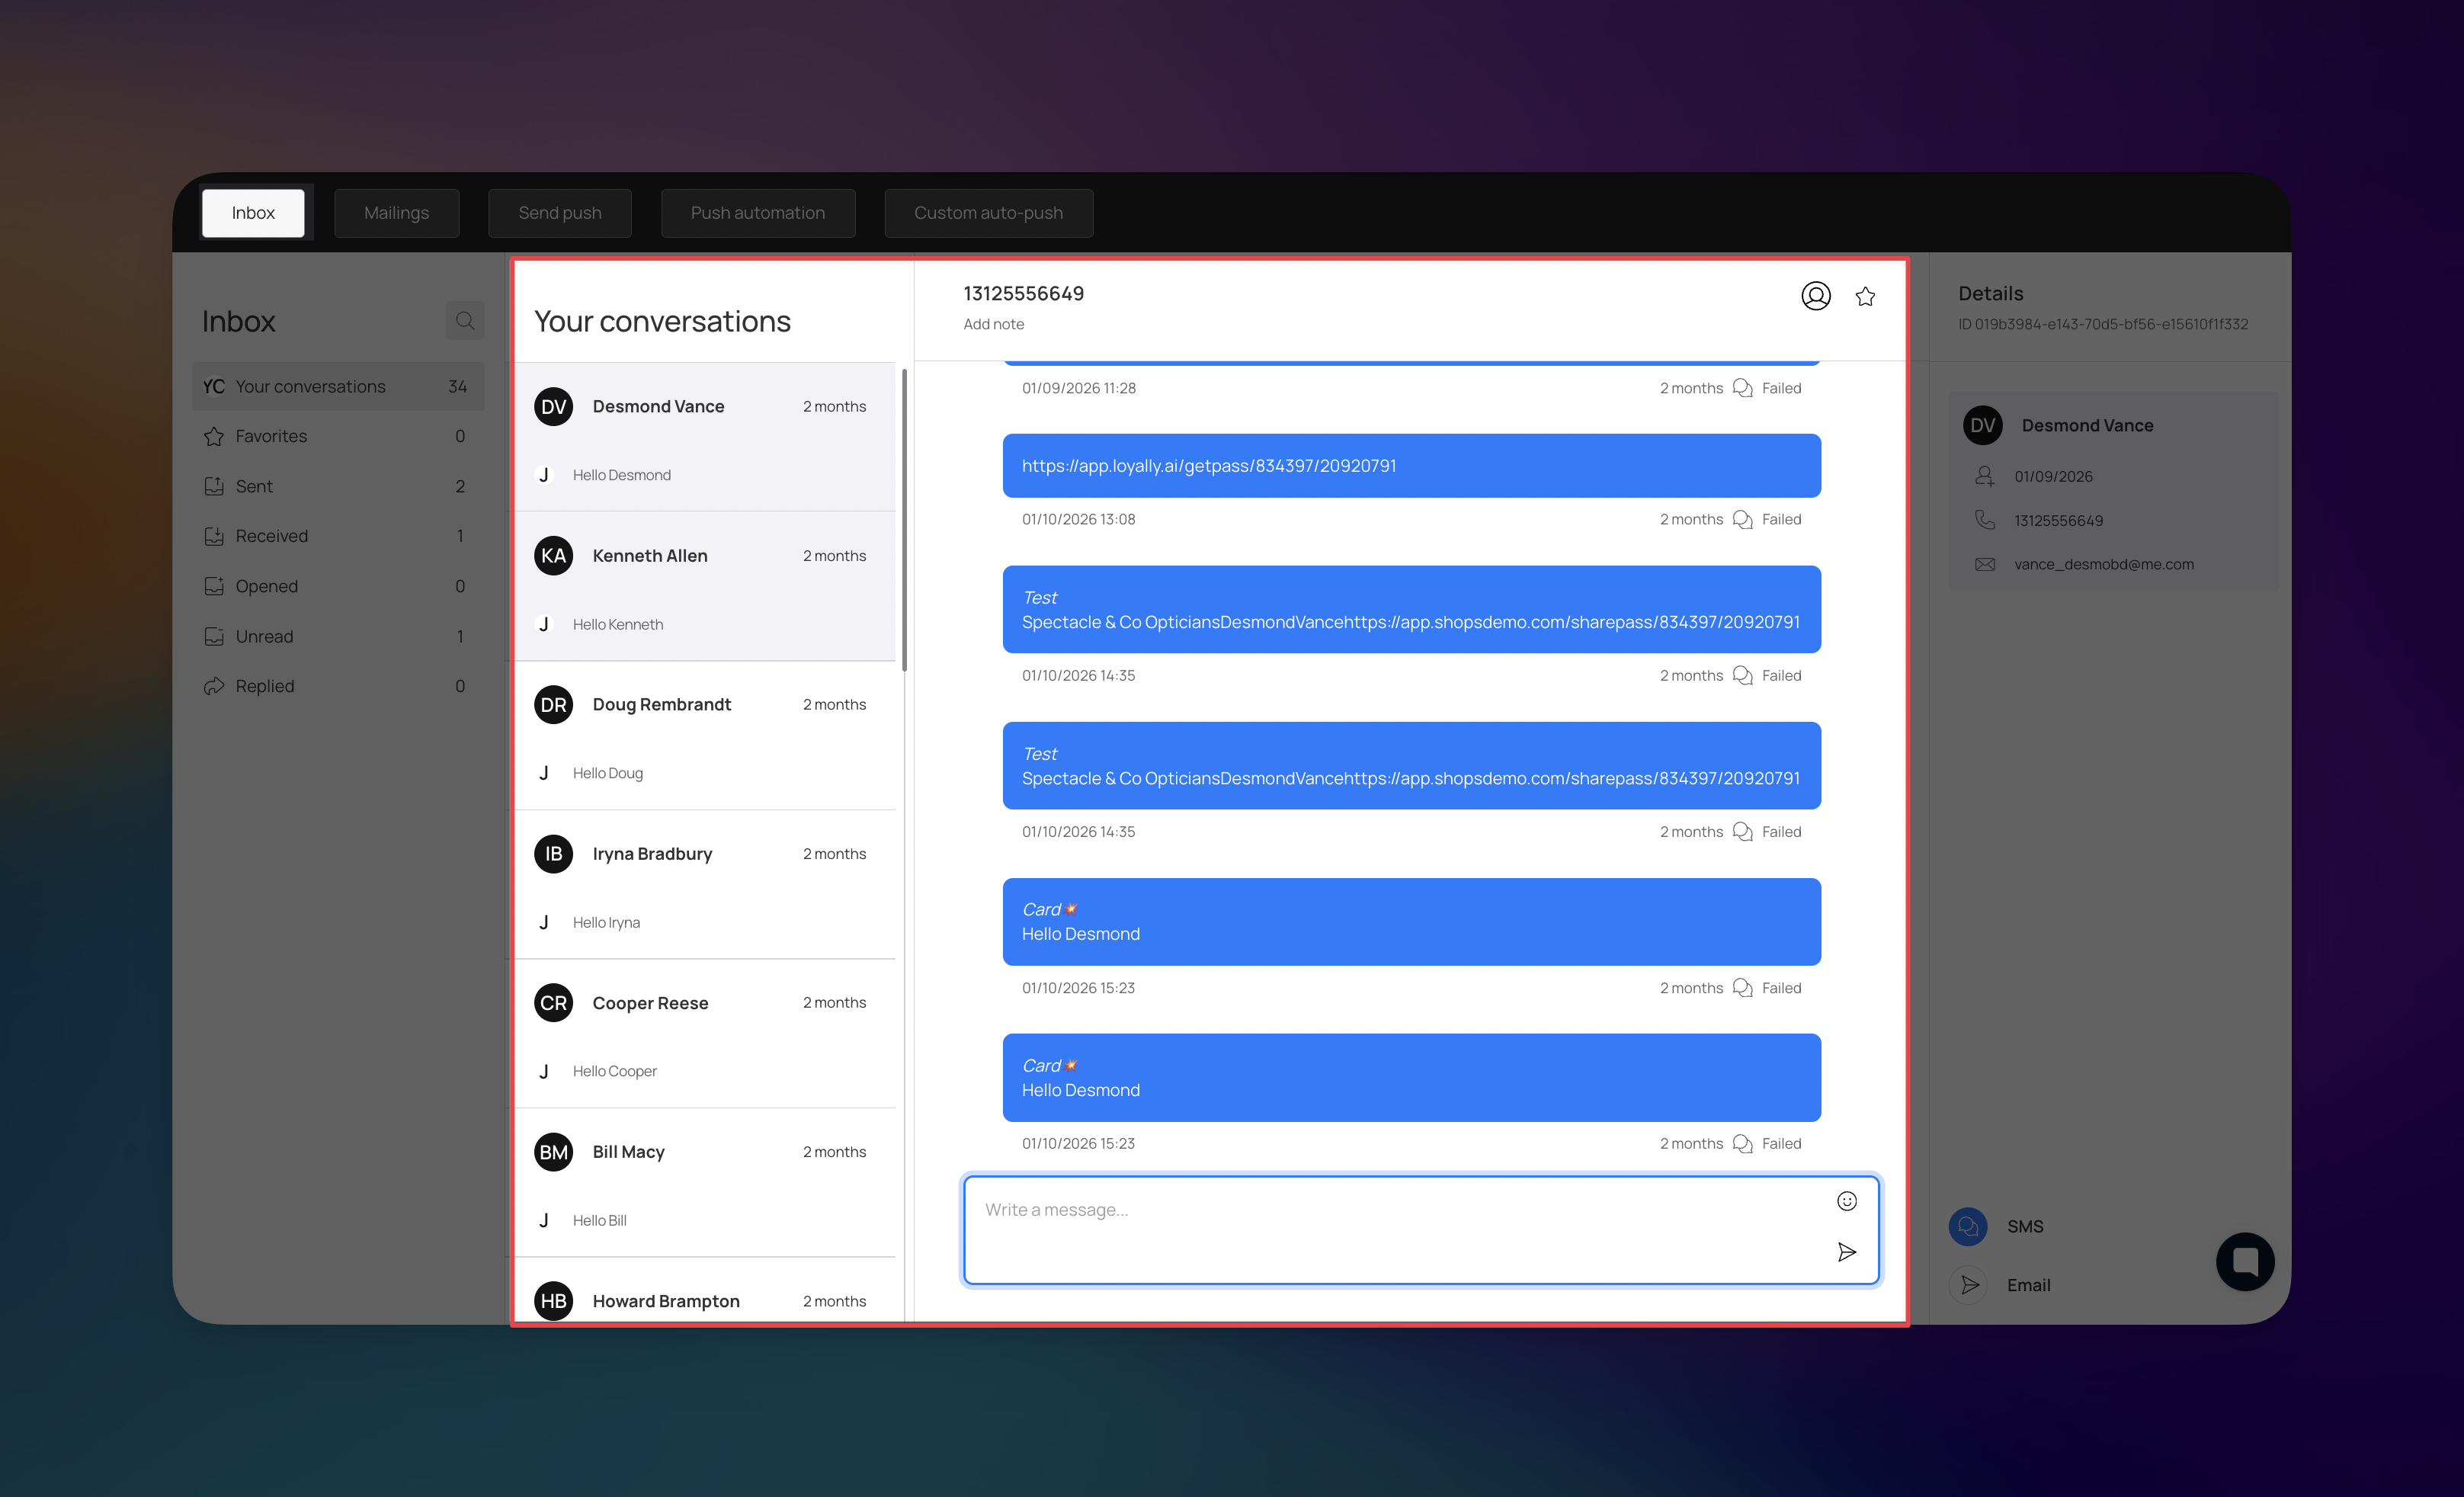
The central workspace displays the full history with a selected customer, providing the context needed for high-quality service:
Message History: Track the timeline of sent and received messages, including delivery status indicators (such as "Failed") and specific timestamps.
Direct Reply: Use the message box at the bottom of the thread to type and send a response immediately.
Multichannel Support: Depending on the customer's available contact information, you can choose to send your message via SMS or Email.

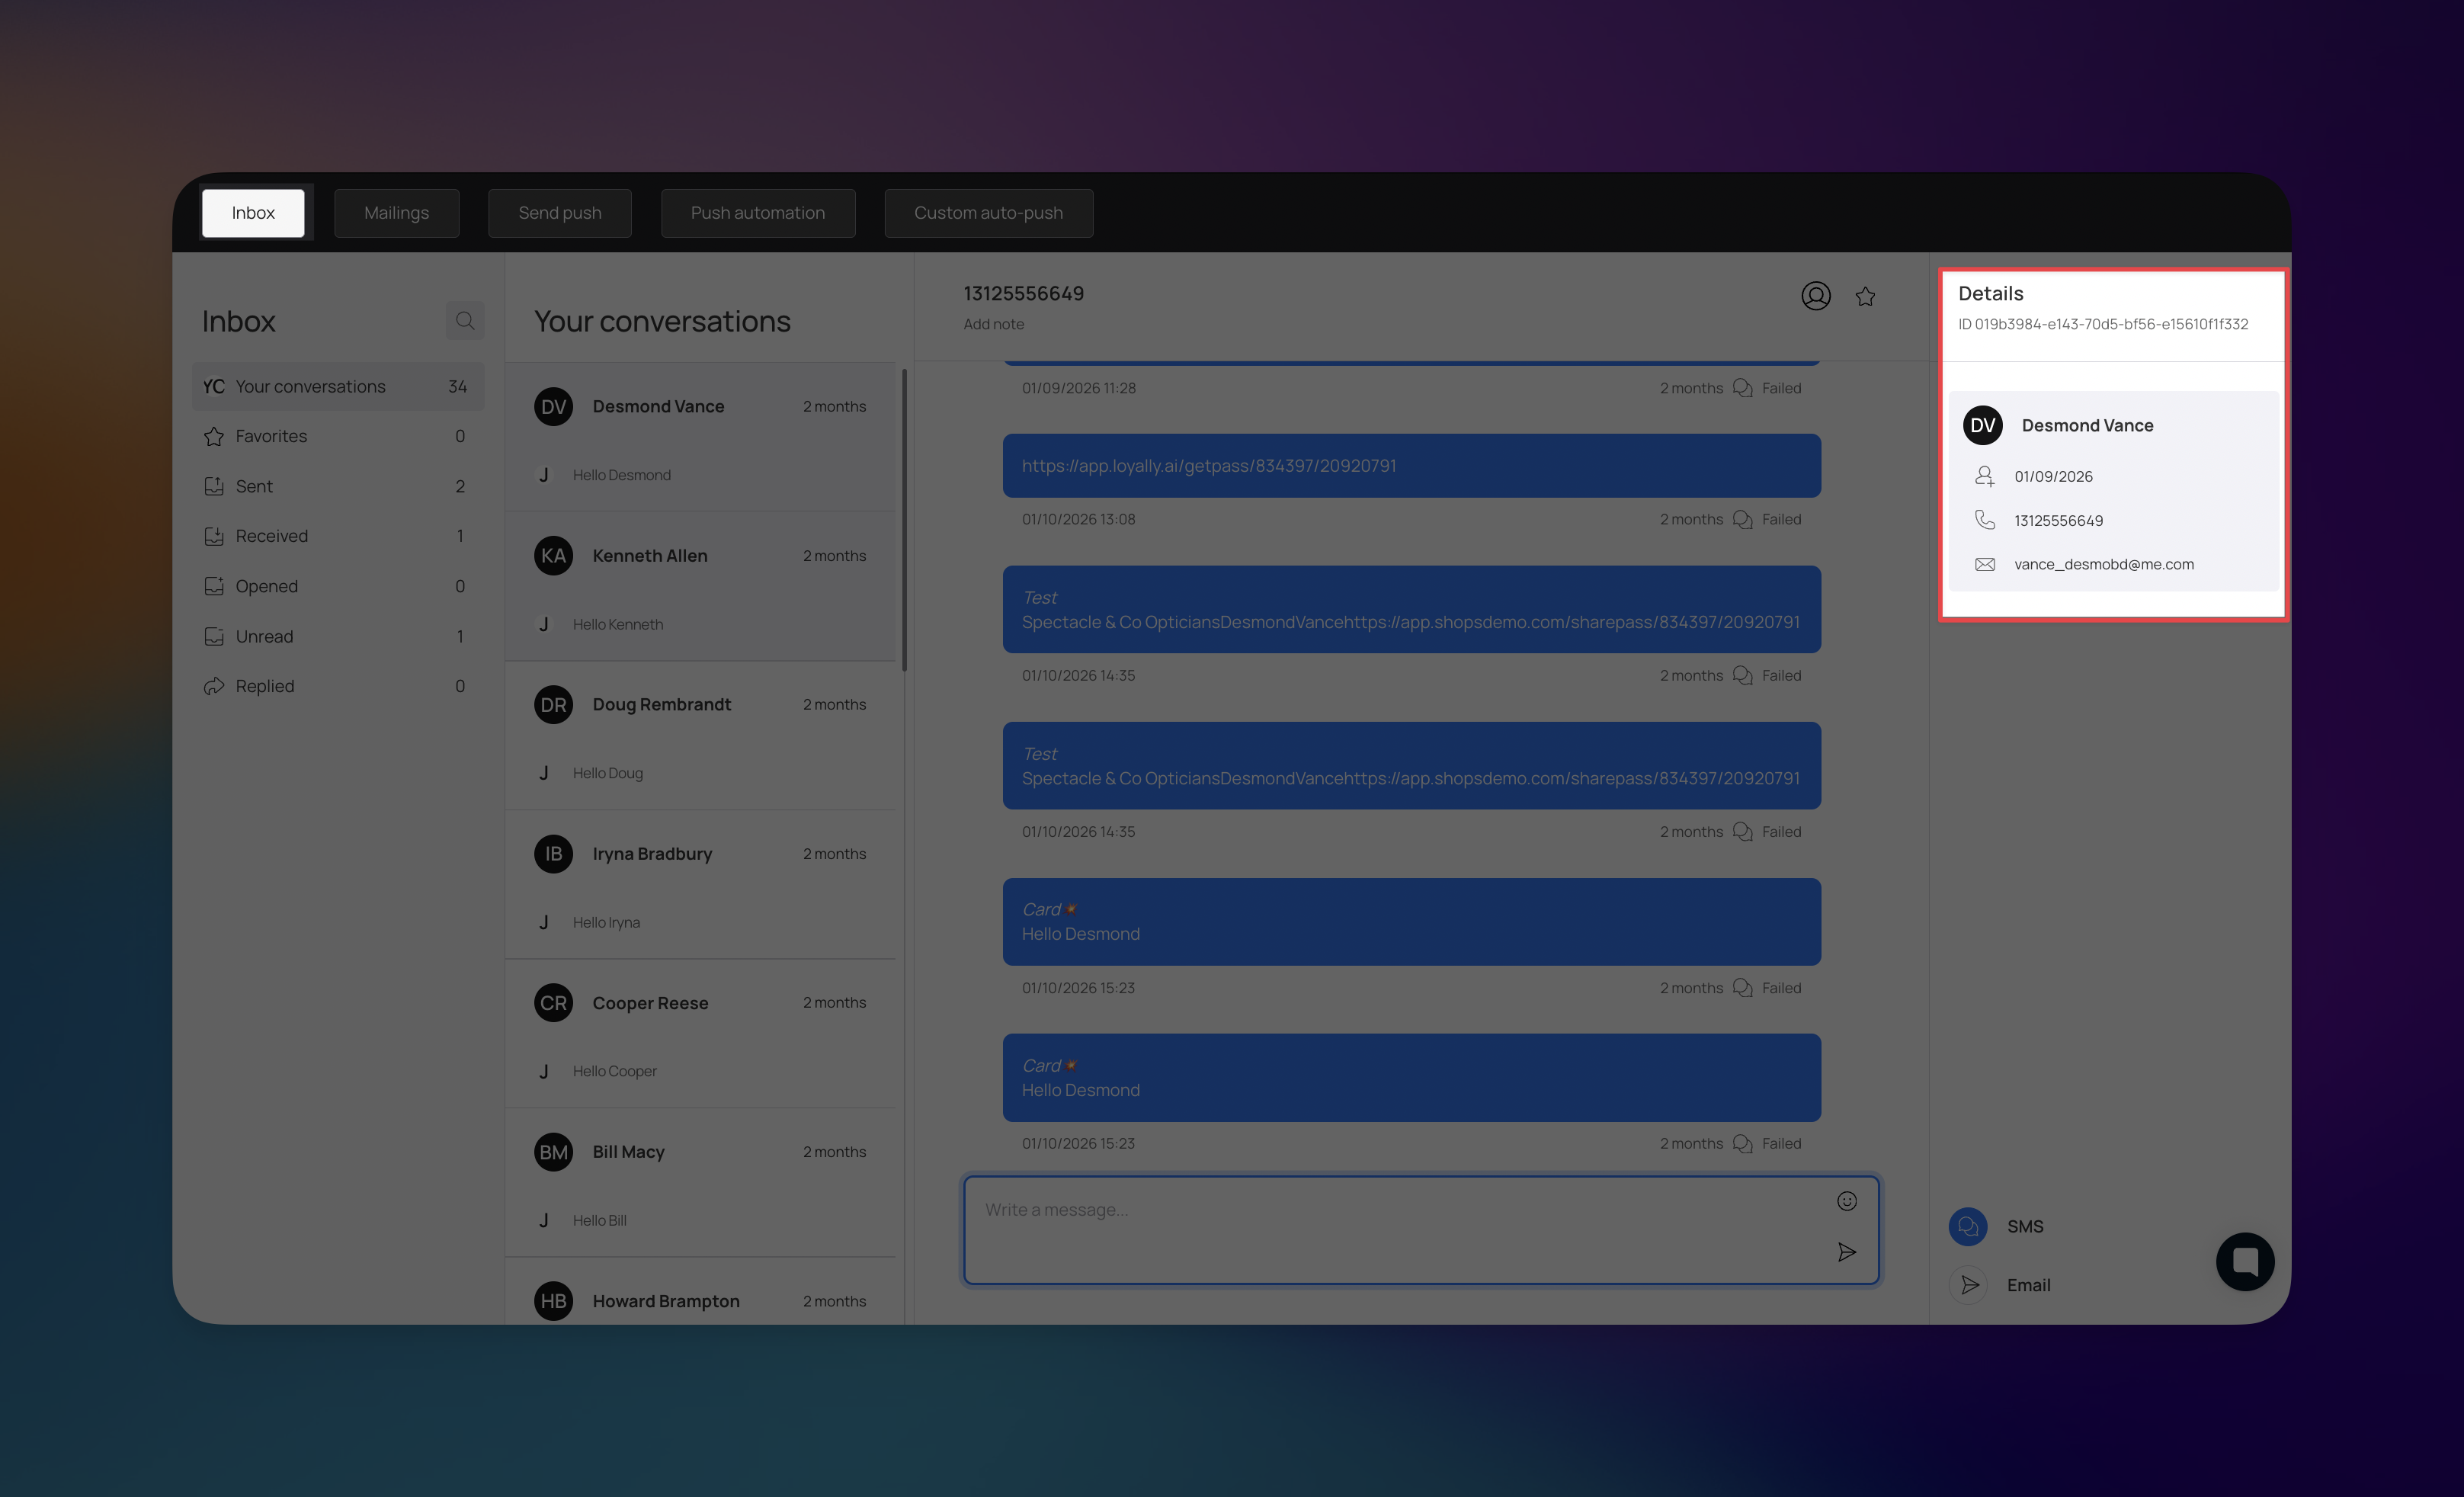
A dedicated Details pane for the selected contact provides essential information at a glance:
Contact Information: Quickly view the customer's name, phone number, and email address to verify who you are speaking with.
System IDs: Reference unique customer IDs for technical support or for cross-referencing with other features in the platform.
The Mailings section provides a high-level overview of your mass communication efforts and current messaging balances. This area allows you to monitor the reach and status of your sent campaigns across multiple channels.
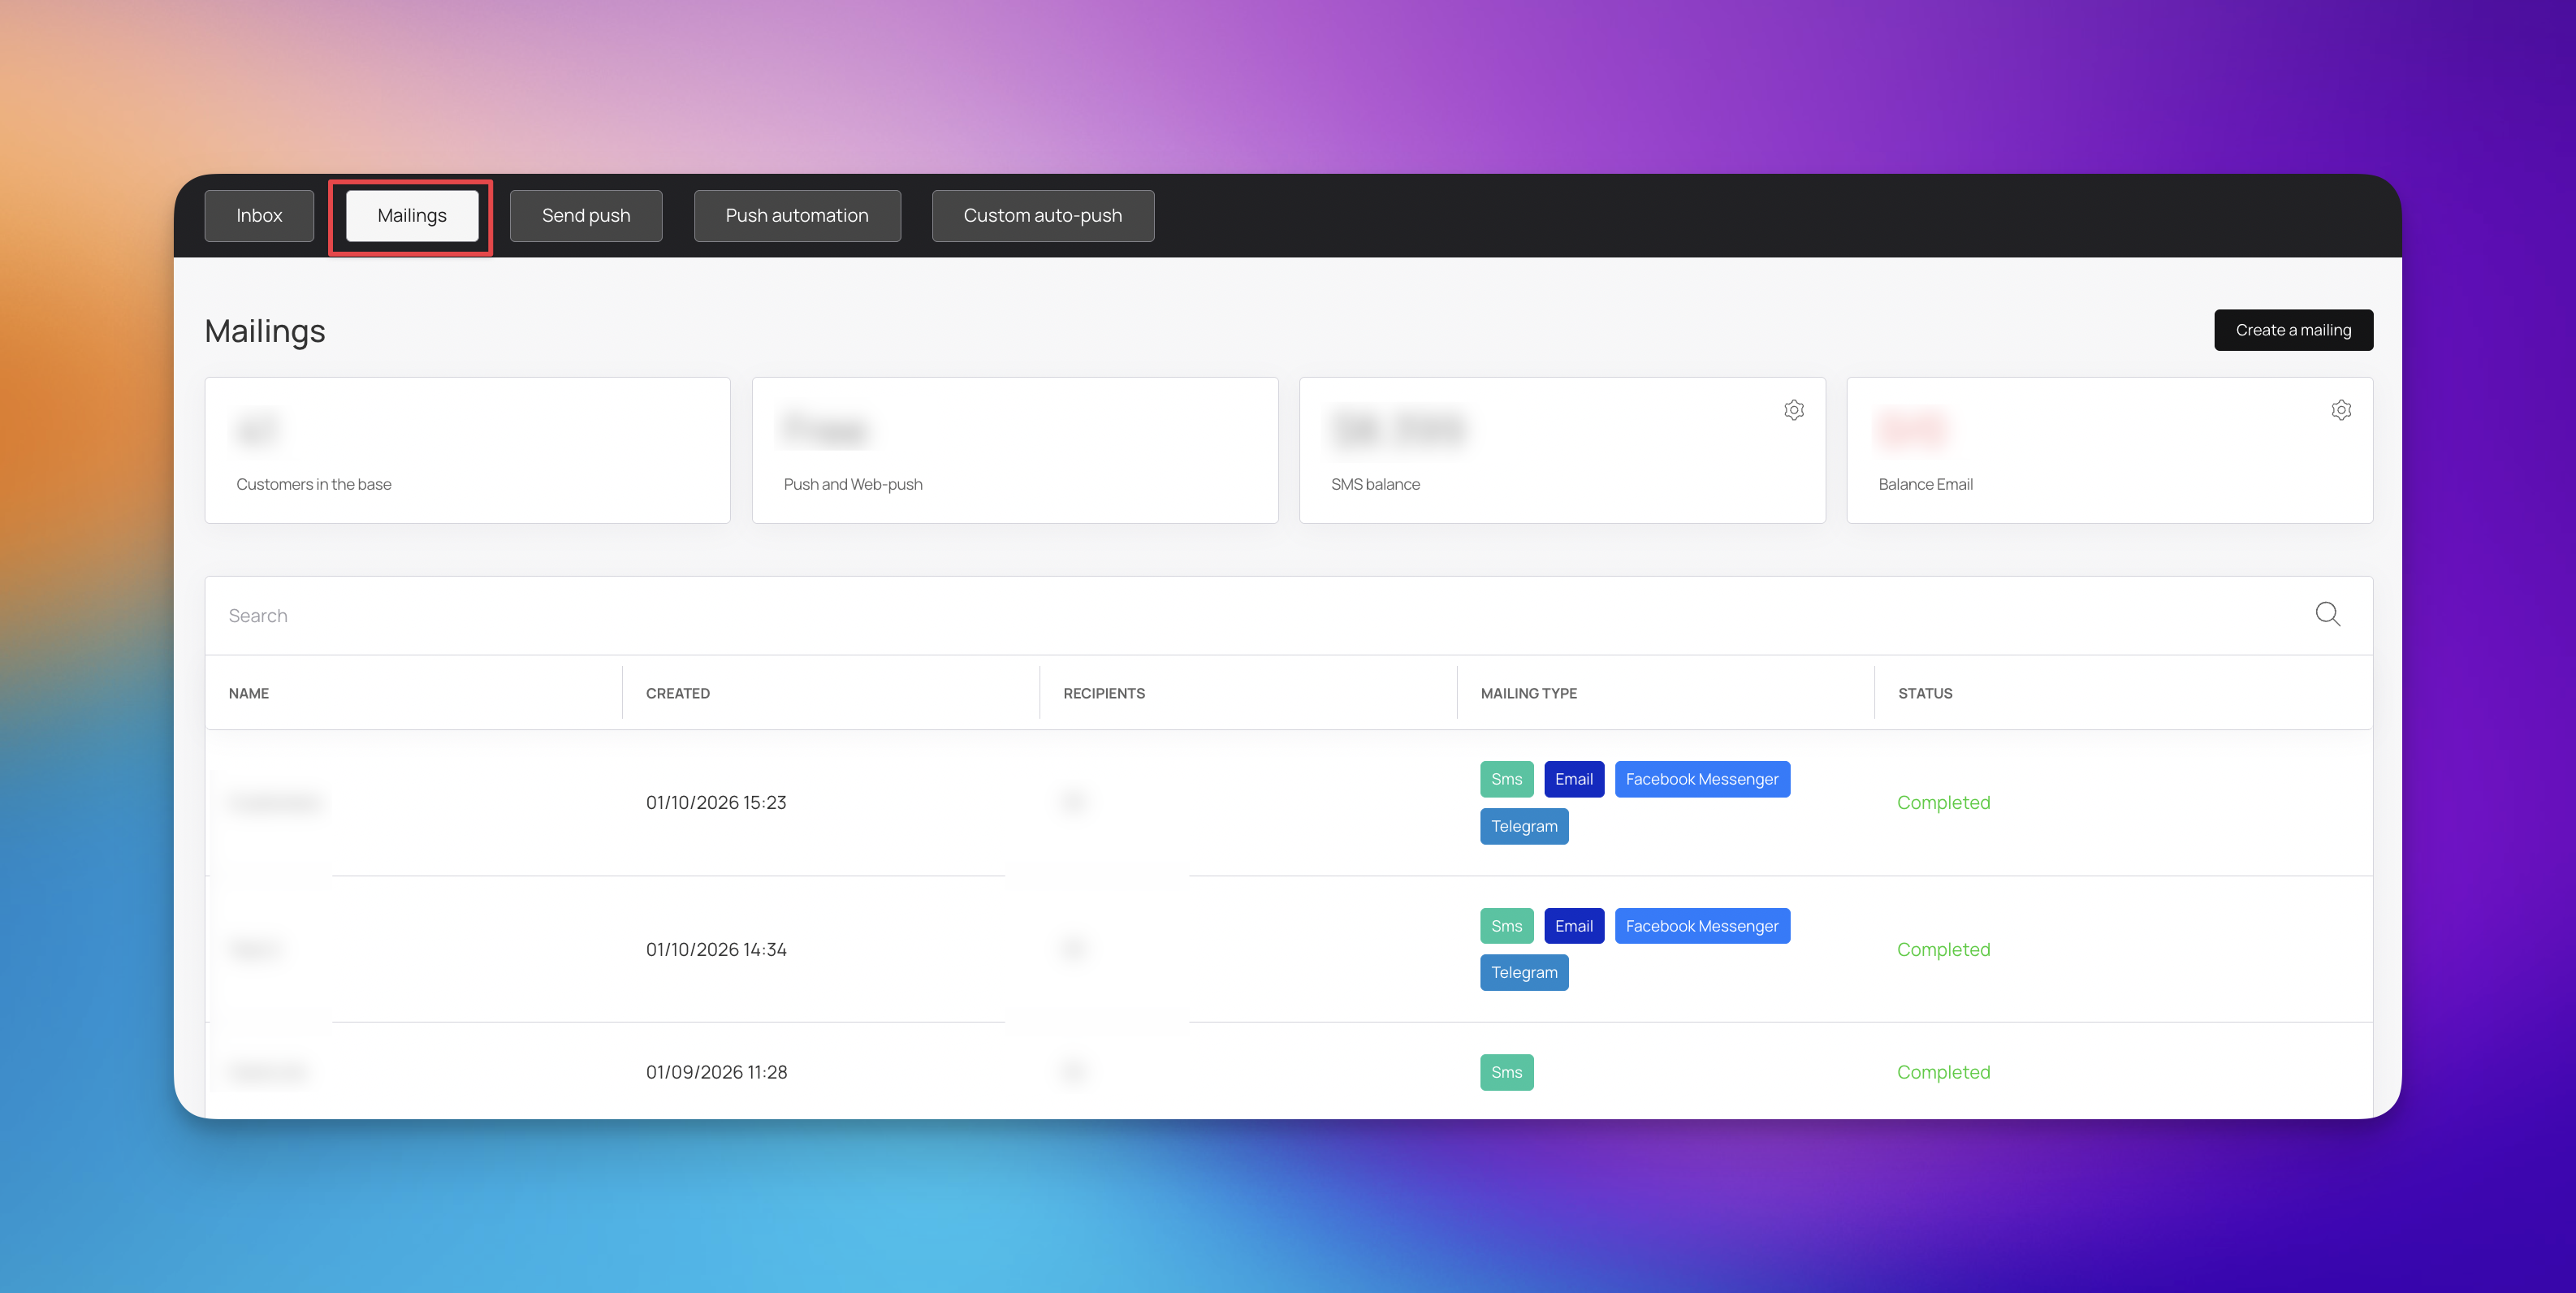
You can track your current capacity and available resources like:
Customers in the base: View the total number of customers currently in your database.
Push and Web-push: Confirm your access to free push notification services.
SMS Balance: Monitor your remaining credit for sending SMS messages.
Balance Email: Track your remaining email quota
The main table provides a detailed history of every mailing campaign you have initiated. You can use the search bar to quickly find specific campaigns by name.
For each entry, you can review:
Name: The specific title assigned to the mailing.
Created: The exact date and time the mailing was generated.
Recipients: The total number of customers included in the dispatch.
Mailing Type: Visual indicators showing which channels were utilized, such as Sms, Email, Facebook Messenger, or Telegram.
Status: The current state of the mailing, such as Completed.
When you are ready to reach out to your customer base, use the 'Create a mailing’ button to begin a new campaign. This workflow allows you to select your target audience and choose the delivery channels that best suit your message.
The Send Push section allows you to broadcast immediate or scheduled alerts directly to your customers' mobile devices. These notifications appear on the customer’s locked screen and are also saved under the (i) icon on the back of their digital loyalty card for future reference.
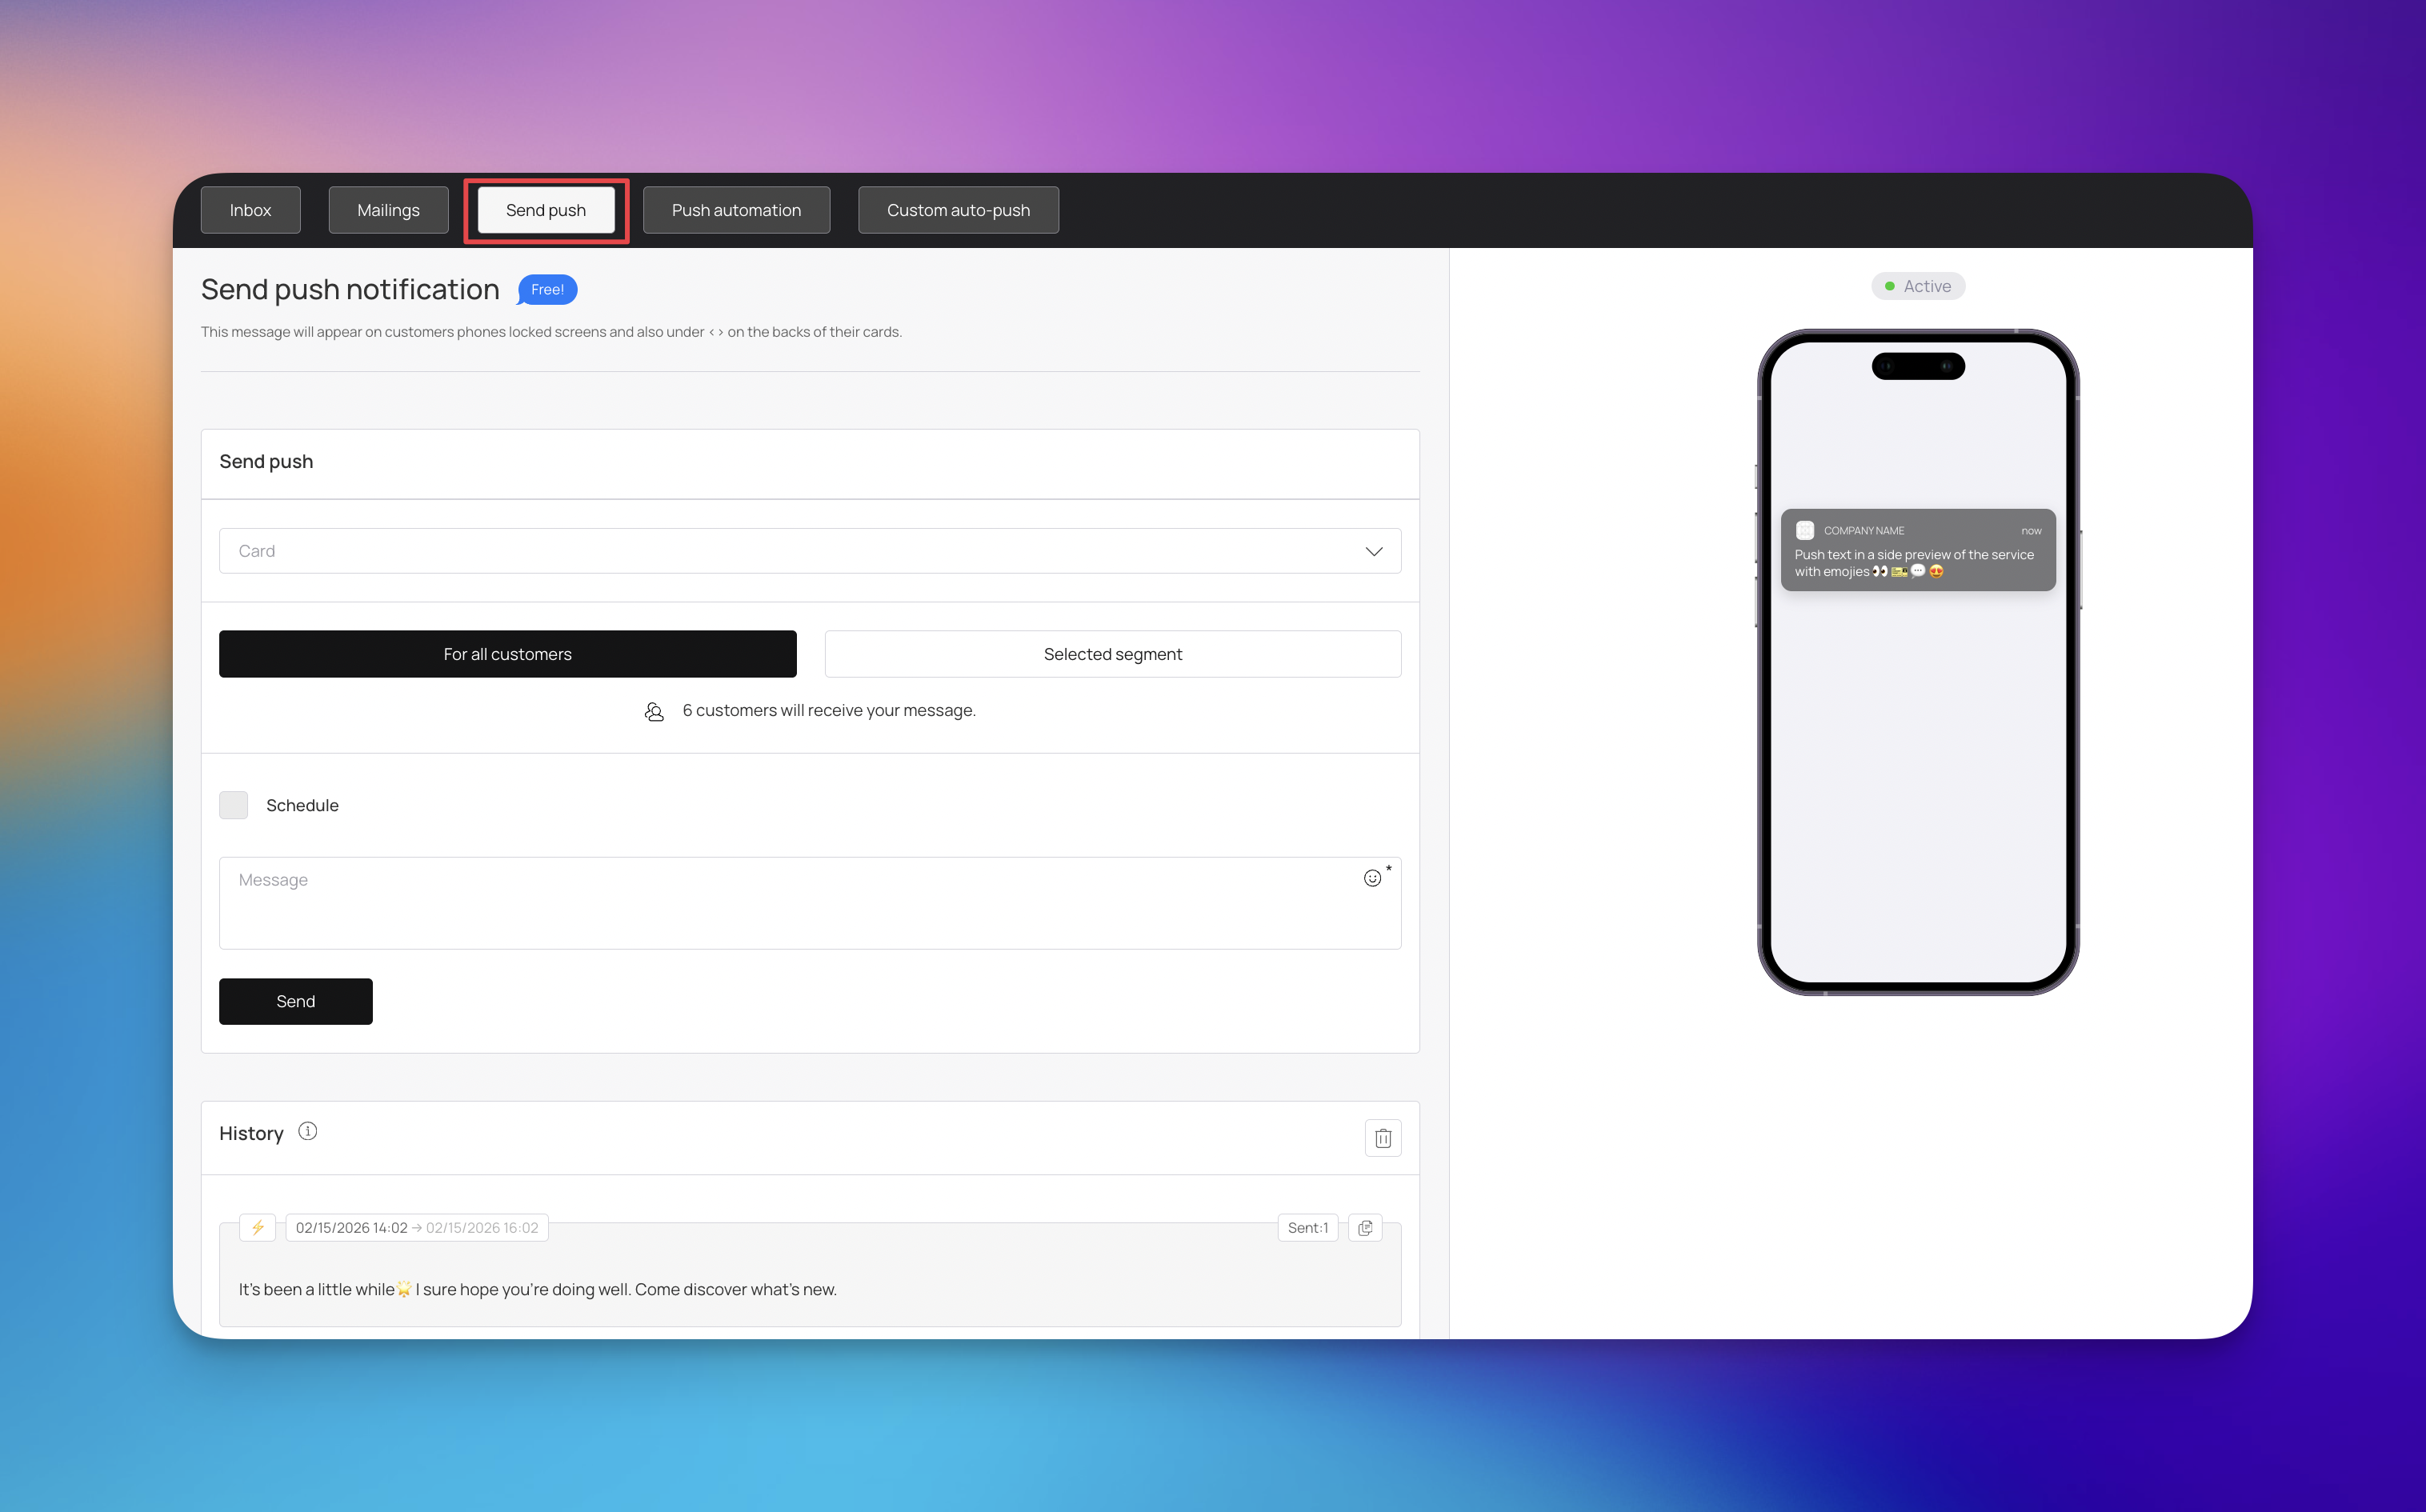
To send a new notification, follow these steps within the Send push interface:
Select Card: Choose the specific loyalty card associated with this message from the dropdown menu.
Define Audience: Select For all customers to reach your entire base, or choose a Selected segment to target a specific group. The system will display exactly how many customers are set to receive your message based on your selection.
Compose Message: Enter your text in the Message field. You can use the preview on the right side of the screen to see how your notification will appear on a smartphone.
You have flexibility in how and when your message is delivered:
Immediate Send: Simply click the Send button to dispatch your message instantly.
Scheduled Send: Use the Schedule checkbox to set a specific date and time for the notification to be sent automatically in the future.
You can access the History section to review previously sent push notifications. This log helps you track your communication frequency and refer back to past messaging content.
The Push automation section allows you to set up hands-free messaging that triggers based on specific customer milestones or behaviors. This feature is designed to help you reward customers on special occasions, collect valuable feedback, and invite them back to your business without manual effort.
Automated notifications are a powerful way to maintain a consistent connection with your audience:
Special Occasions: Automatically send rewards or greetings for birthdays and anniversaries.
Feedback Collection: Prompt customers for reviews or feedback following a visit or purchase.
Customer Retention: Automatically reach out to customers who haven't visited in a while to invite them back.
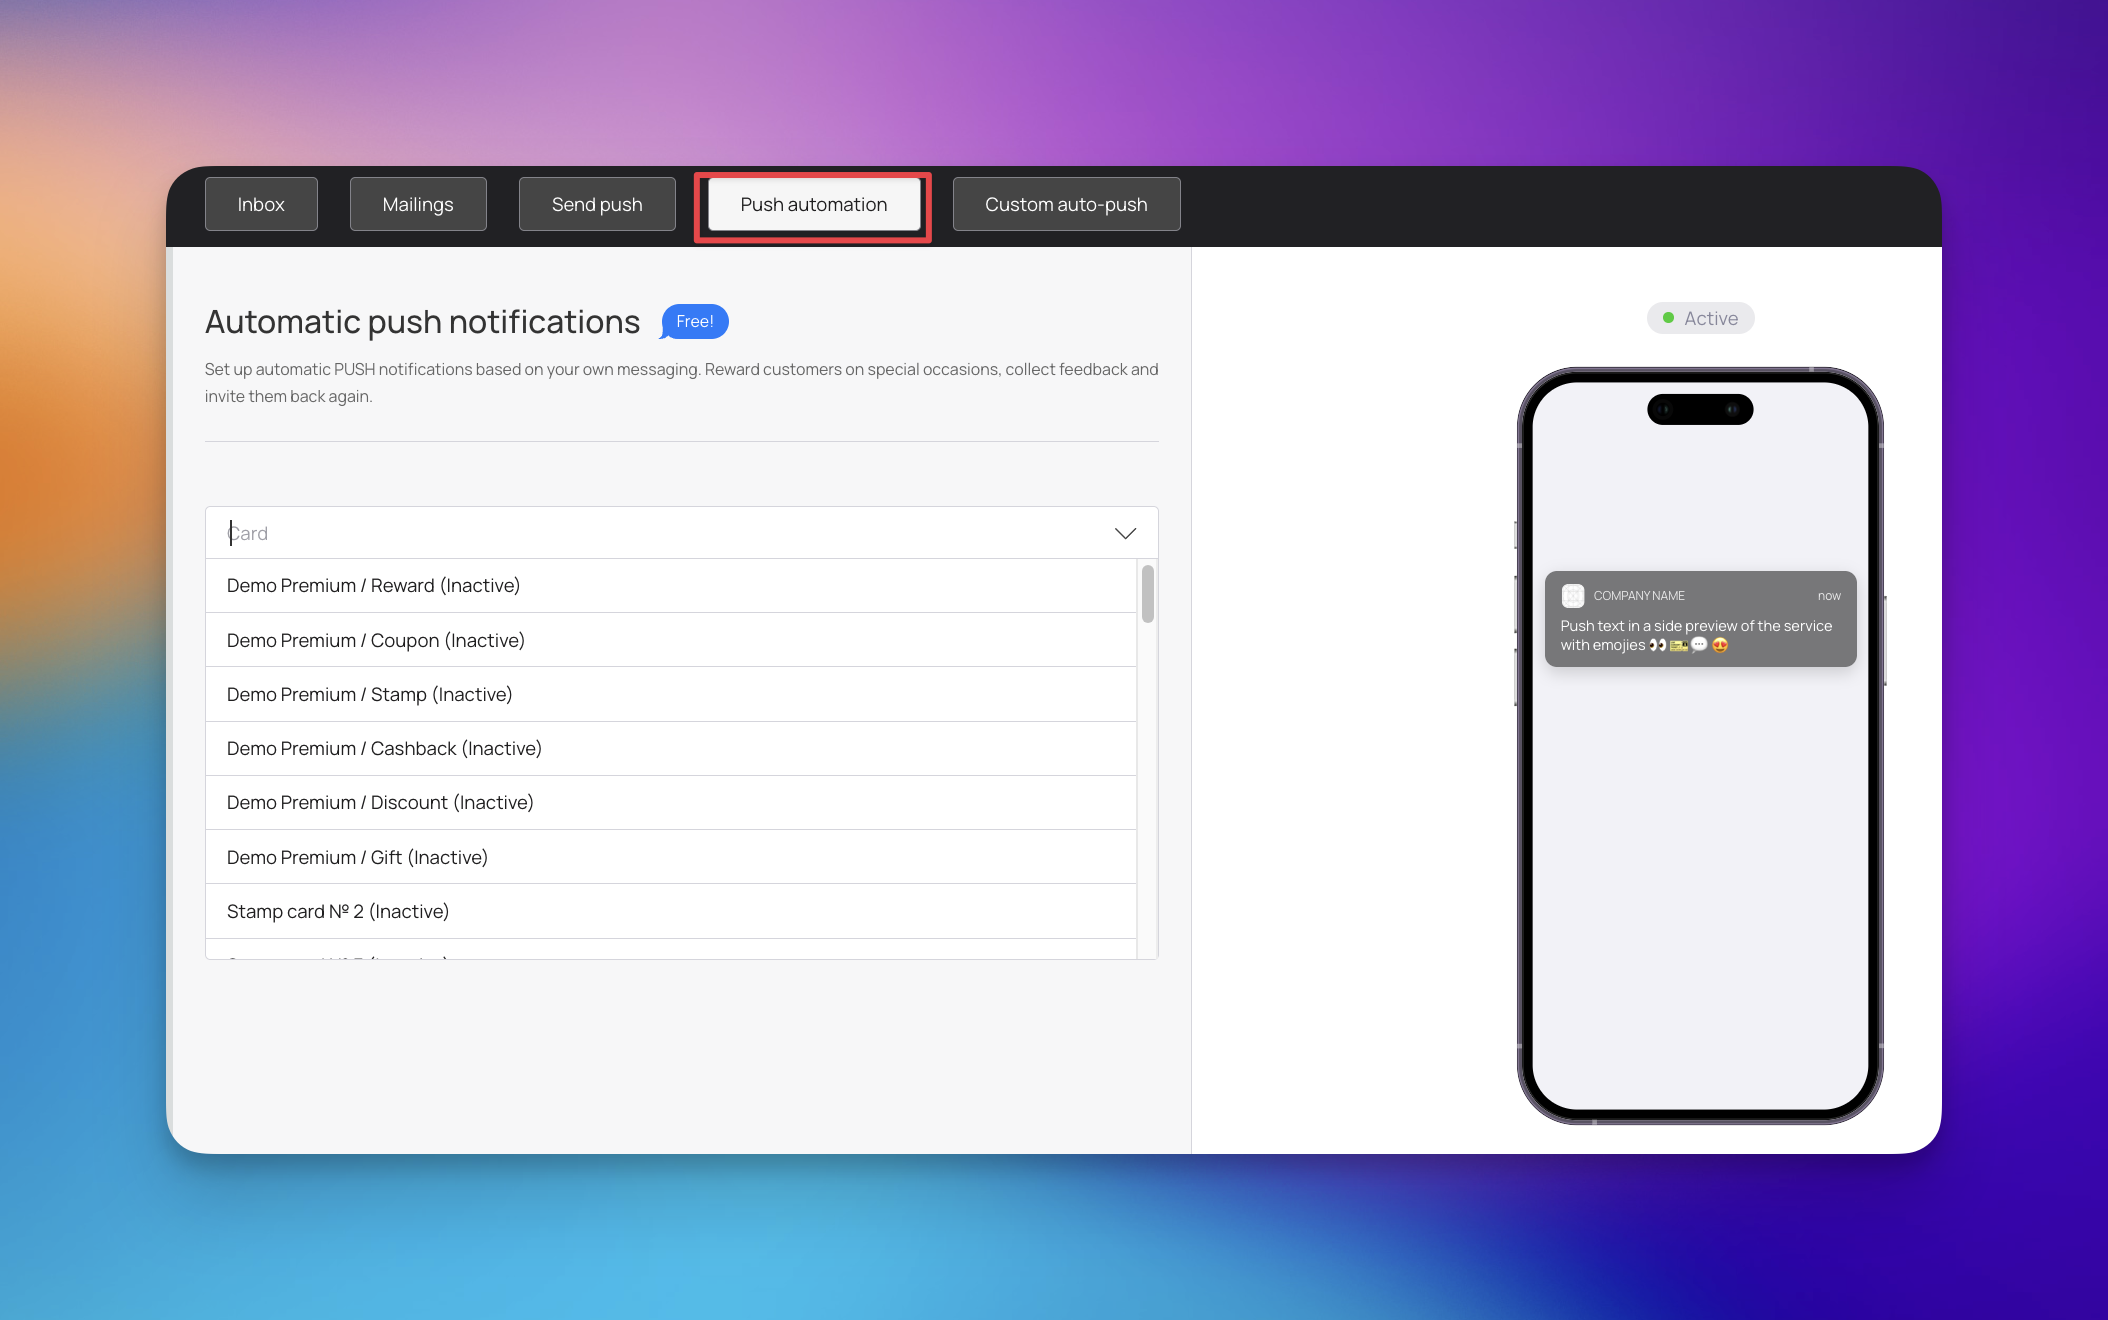
To get started with an automated workflow:
Select Card: Choose the specific loyalty card from the dropdown menu that this automation will apply to.
Draft Your Content: Compose the message that will be sent when the trigger conditions are met.
Visual Preview: Use the live smartphone preview on the right side of the screen to ensure your message looks perfect on a mobile lock screen.
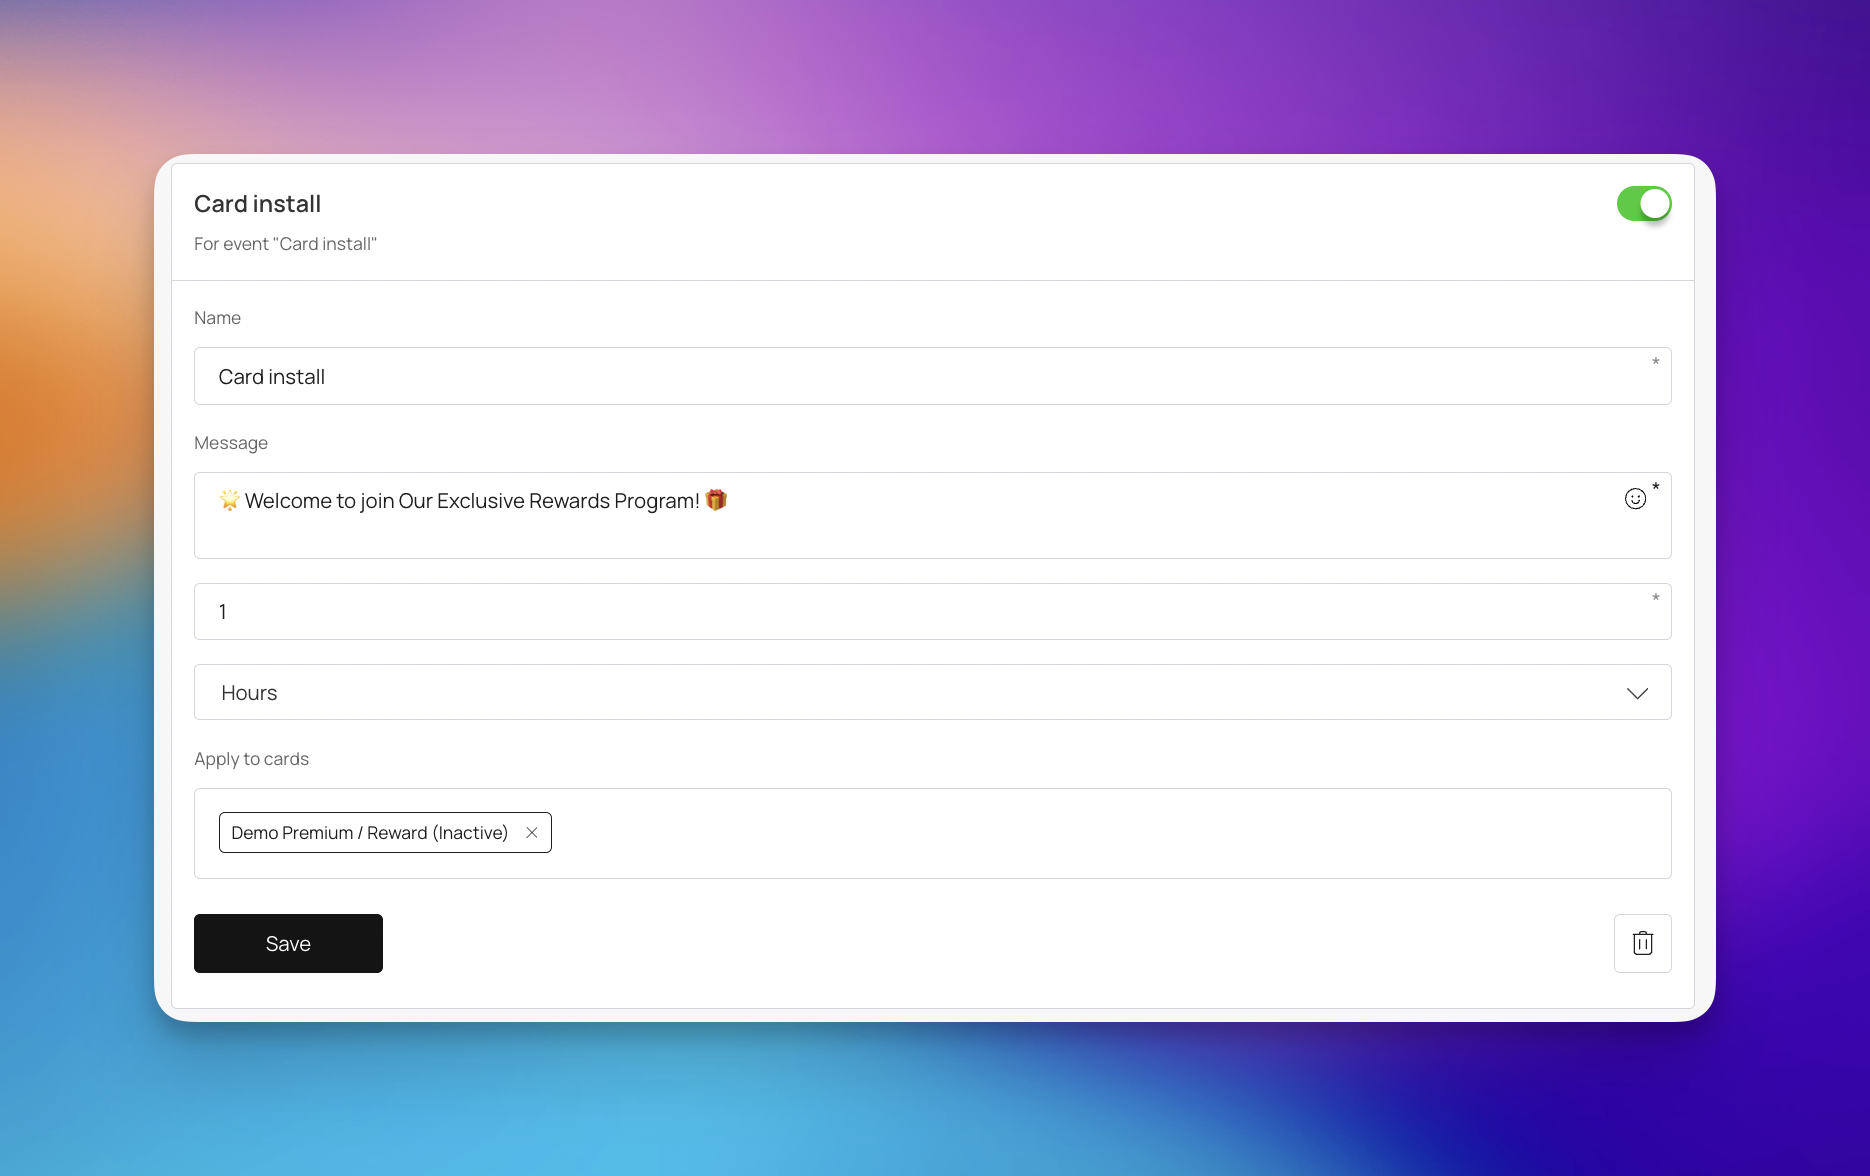
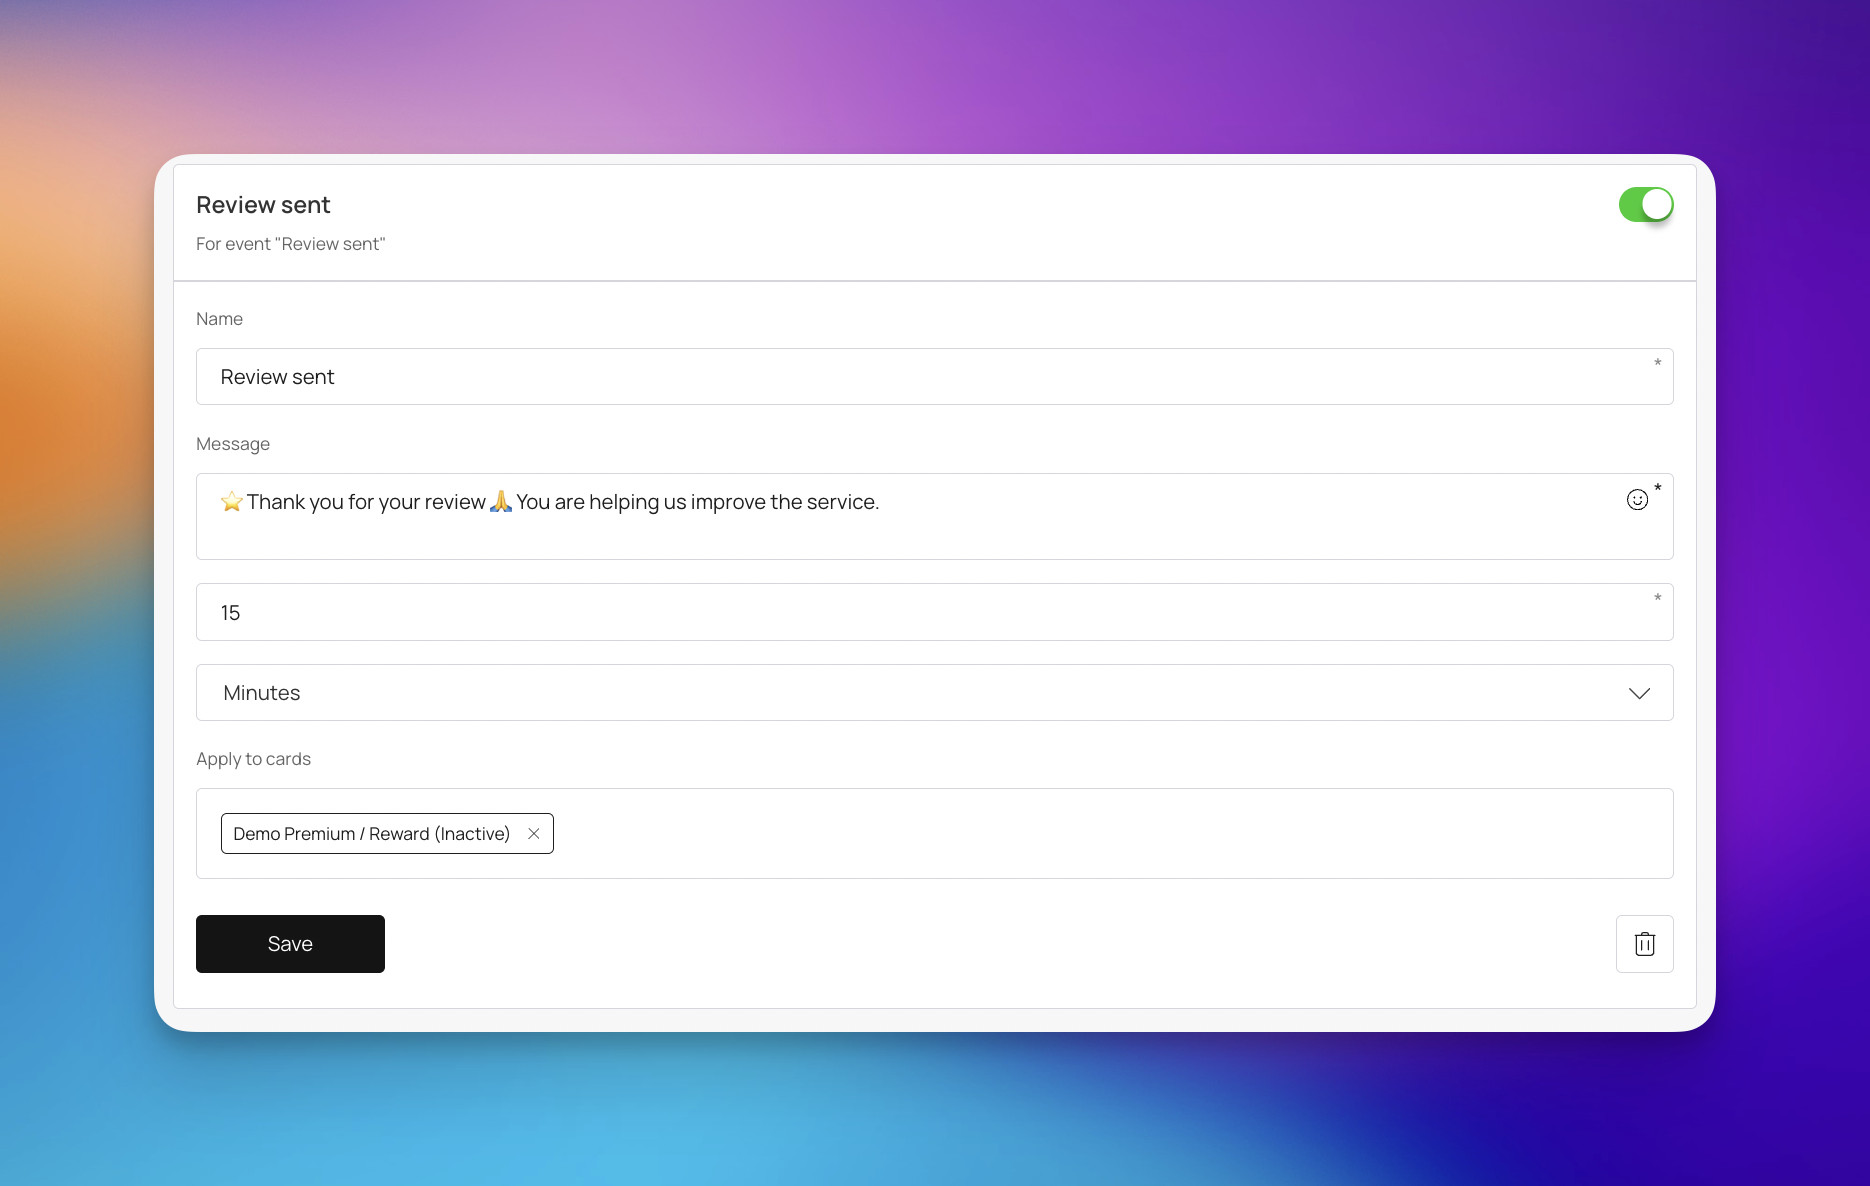
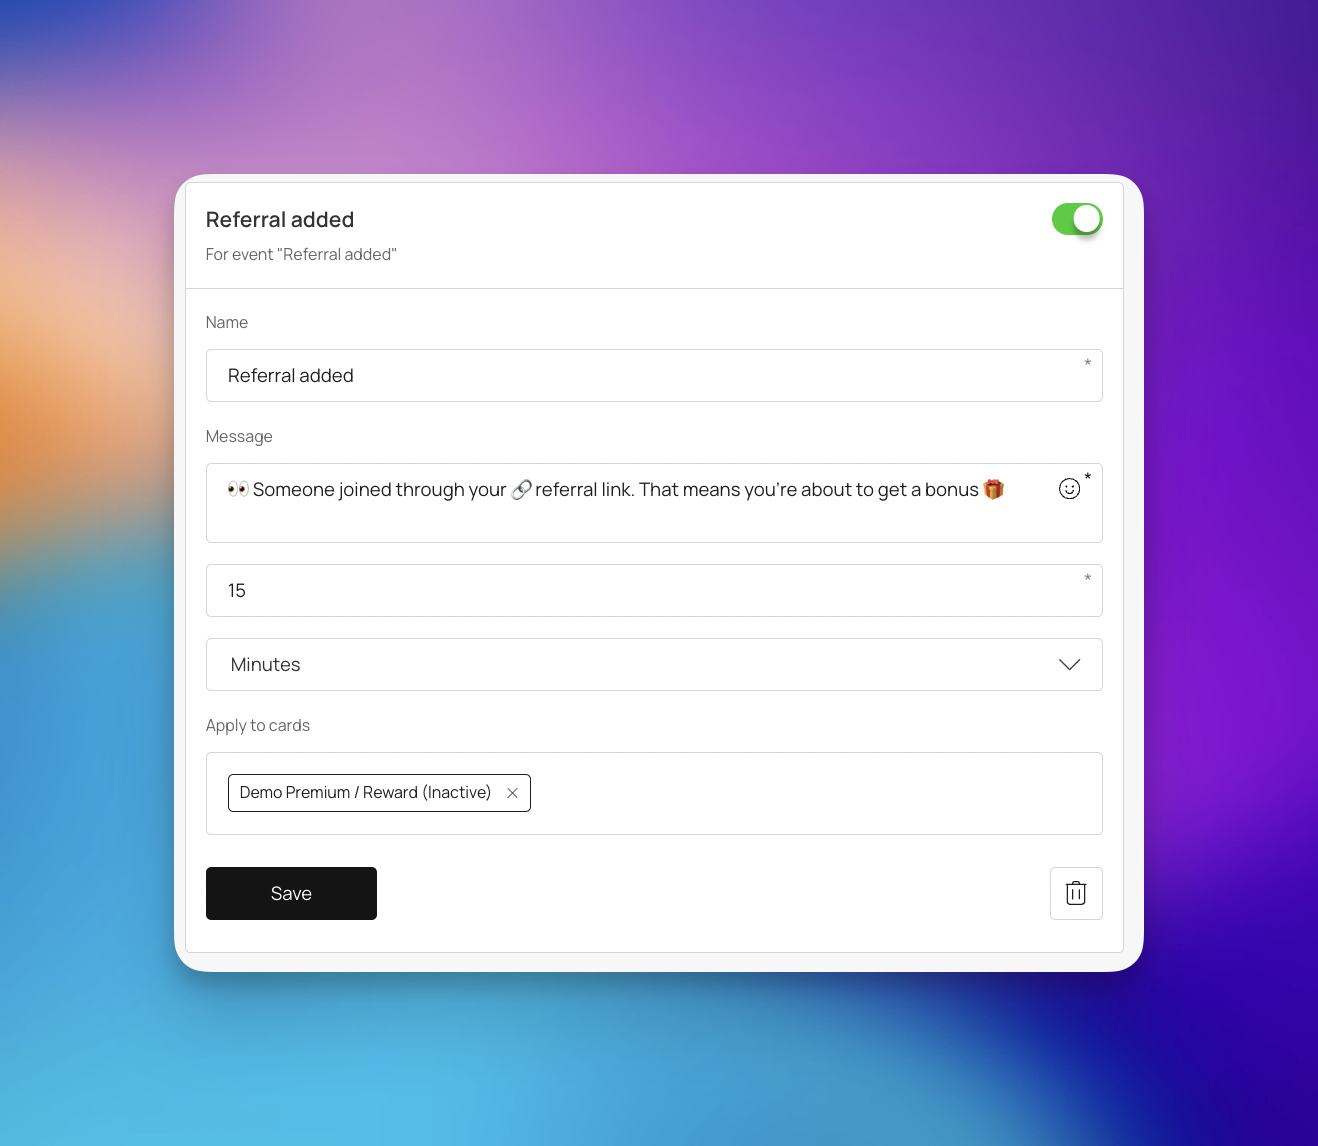
The Custom Auto-Push section provides granular control over your automated messaging. This feature allows you to create specific rules for push notifications by selecting a trigger event, defining a delivery delay, and writing a tailored message.
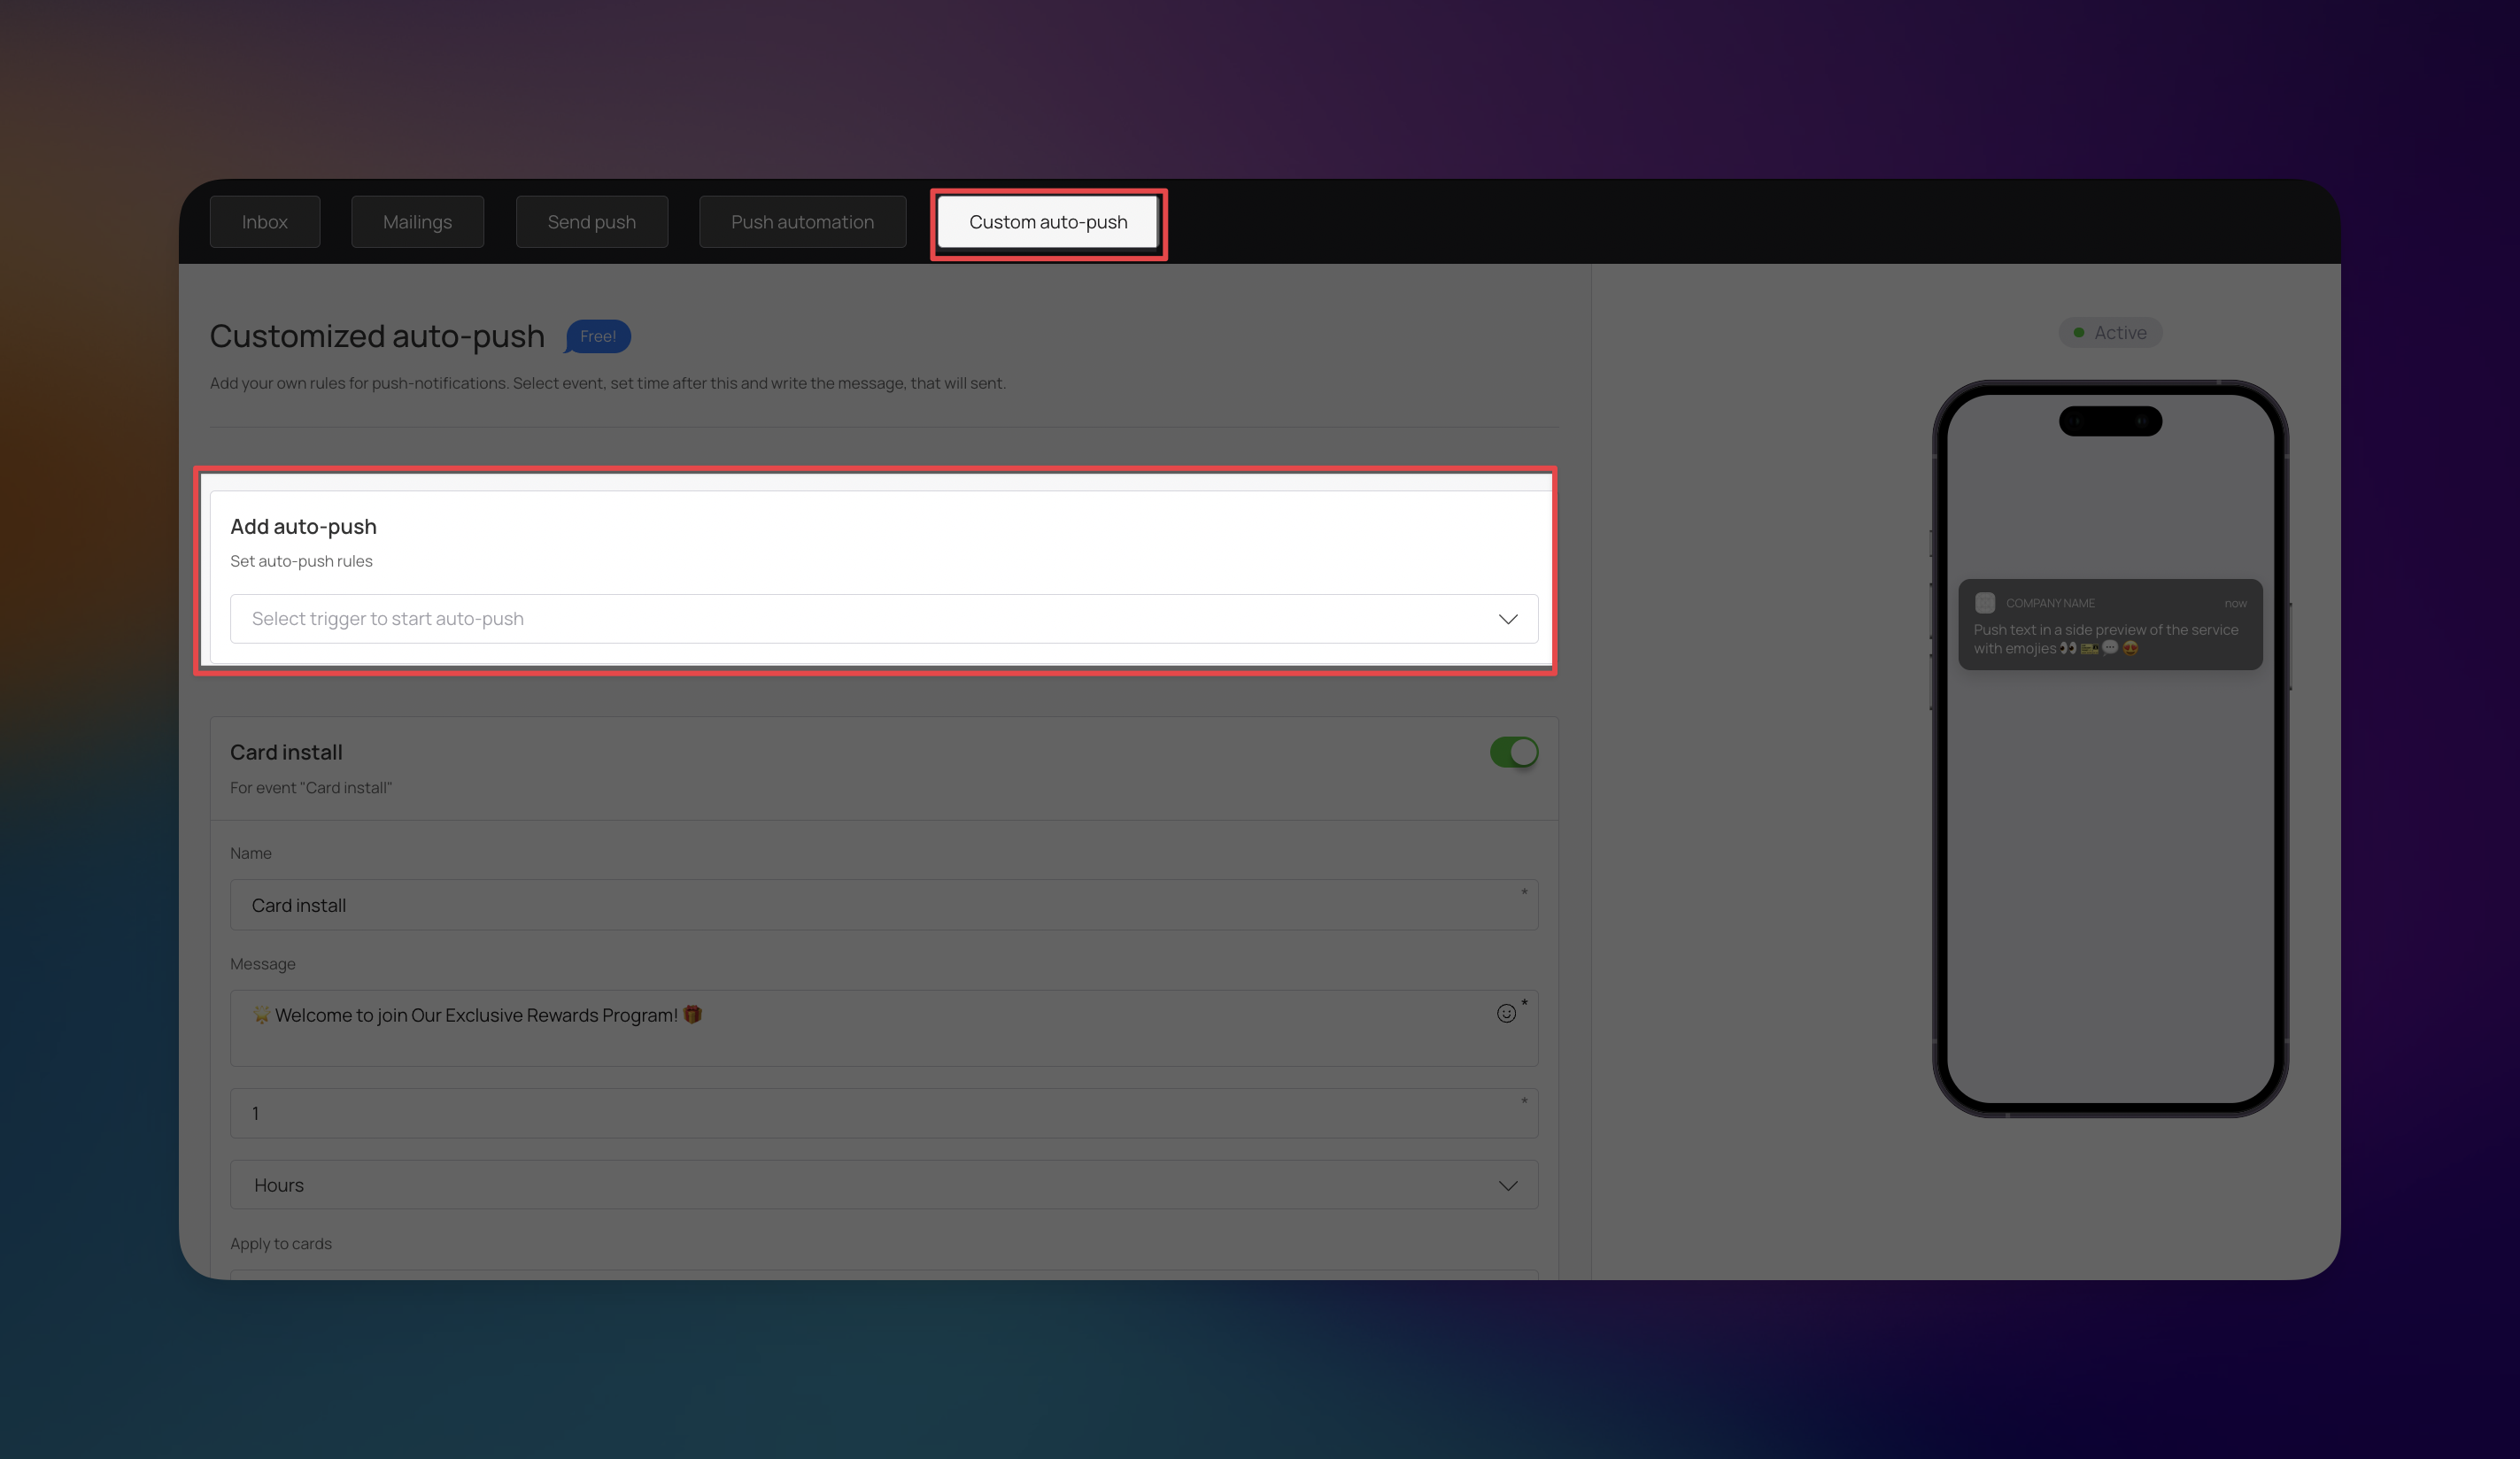
You can set up automated responses for a variety of customer actions to ensure timely engagement:
Card install: Send a welcoming message immediately or shortly after a customer adds their digital card to their phone.
Review Sent: Acknowledge and thank customers automatically after they submit feedback.
Referral added: Trigger a notification when a customer successfully refers a friend to your loyalty program.
Card period expired: Send a reminder or a "win-back" offer when a customer's specific card or membership period has ended.
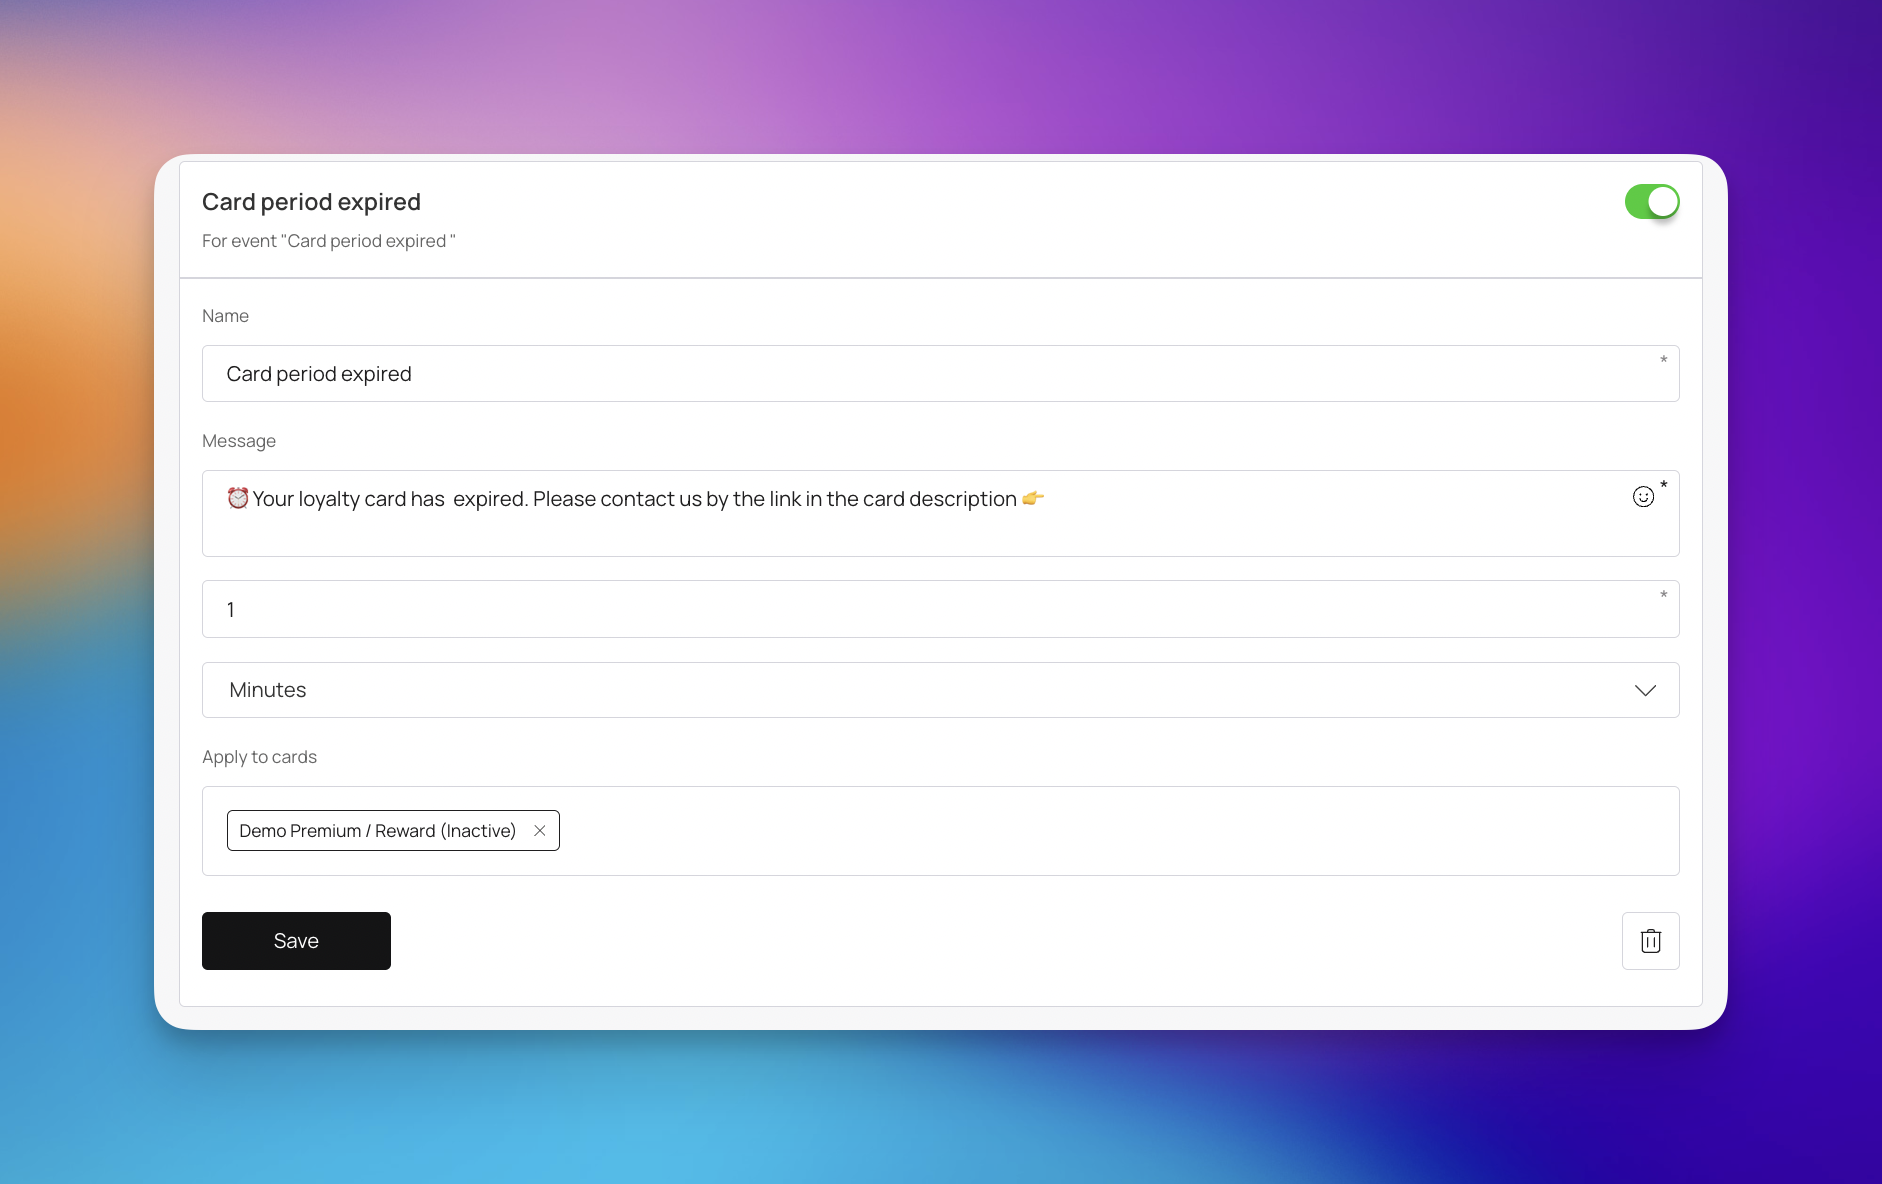

As with all push features in Loyally.ai, these messages are Free! and do not count against your SMS or email balances.
You can view a real-time preview of how your custom message will appear on a customer's mobile device using the smartphone graphic on the right.
Can I see if a message I sent from the Inbox failed?
Yes. In the conversation history of the Inbox, each message includes a status indicator. If a message was not delivered, it will be marked as "Failed" next to the timestamp.
What is the difference between "Push automation" and "Custom auto-push"?
Push automation is designed for high-level engagement like rewarding special occasions, collecting feedback, or inviting customers back.
Custom auto-push allows for more granular control, letting you set specific rules based on triggers like "Card install," "Review Sent," or "Referral added," with a custom delay time (e.g., a specific number of hours or days).
How do I track my remaining messaging credits?
You can view your current SMS balance and Balance Email at the top of the Mailings dashboard. This area also displays the total number of customers currently in your database.
Can I send messages to specific groups of people?
Yes. When using the Send push feature, you can choose to send a notification to "For all customers" or target a "Selected segment". The interface will show exactly how many customers will receive the message based on your selection.
How can I keep track of internal notes about a customer?
Within the Inbox, you can use the "Add note" feature at the top of a specific conversation thread to save internal context or reminders that are only visible to your team.
Optimize Customer Outreach with Targeted Mailings
Sending a Targeted Email to a Specific Segment
Marketing Push
Push Section
Custom auto-push
Learn how the triggered auto-push feature works
Push automation
Automate specific push notifications sent to customers